Ausmini
It is currently Mon Jun 23, 2025 9:00 am

All times are UTC + 10 hours


Post new topic Reply to topic  [ 154 posts ]  Go to page Previous  1 ... 4, 5, 6, 7, 8, 9, 10, 11  Next
Author Message
 Post subject:
PostPosted: Tue Dec 11, 2007 8:12 am 
Offline
1275cc
1275cc
User avatar

Joined: Thu Jun 03, 2004 2:56 pm
Posts: 3981
Location: Brisbane
AT,

Just noticed something when looking over the pics on page one. Why is the turbo positioned the wrong way around? Is the flange a mirror image and does the turbo sit in the right spot once fitted correctly?

JC

_________________
But he's thriving and striving and hugging the turns.


Top
 Profile  
 
 Post subject:
PostPosted: Tue Dec 11, 2007 11:27 am 
Offline
998cc
998cc
User avatar

Joined: Wed Jan 18, 2006 2:22 pm
Posts: 751
Location: Cootamundra, NSW
dang i love that manifold

_________________
Image
Mearcat wrote:
Sheesh! As entertaining as this may be to some, can one of the mods throw a big bucket of cold water on this and please shut this sh!t fight down


Top
 Profile  
 
 Post subject:
PostPosted: Sat Dec 15, 2007 7:00 pm 
Offline
1275cc
1275cc
User avatar

Joined: Fri Jun 17, 2005 10:31 am
Posts: 3183
Location: Burpengary, Queensland - Home of Tricky Performance Engineering
Hi JC,

Turbo basically had to sit that way for two reasons.

1. Tony didn't want to cut the front apron behind the grill to make access and installation of the turbo easier, so it had to be positioned this way to even fit

2. The actuator can would foul on the body work in the 'normal' postion, and Tony didnt want to go to the expense of an external wastegate.

Took a lot more work to do the dump pipe this way, and most likely the inlet and FMIC pipes as well.

Cheers,
Tricky

_________________
"Not Speeding Officer..........Qualifying"


Last edited by Archangel007 on Sun Dec 16, 2007 2:31 pm, edited 1 time in total.

Top
 Profile  
 
 Post subject:
PostPosted: Sat Dec 15, 2007 7:56 pm 
Offline
1275cc
1275cc
User avatar

Joined: Fri Jun 17, 2005 10:31 am
Posts: 3183
Location: Burpengary, Queensland - Home of Tricky Performance Engineering
Hi Guys (and Girls),

Time for a bit of an update. I have spent quite a few hours on Barbie this week, in an effort to have the car ready for rego just after Xmas. Things have progressed quite well, with only a few small hassles raising their ugly heads (like Tony has mislaid the other seat rail for the 2nd seat, so that cant go in till its found!). Anyway, talking about seats, the seats have been finished, albeit without bolting in the 2nd (drivers) seat. The following pics show the brackets and how they are mounted.

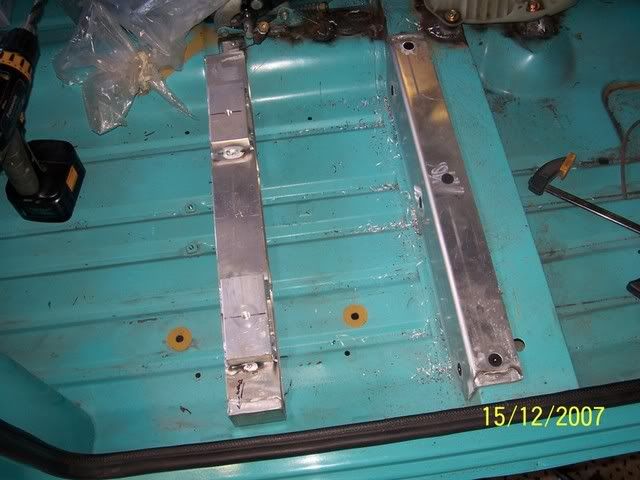
Tony's seats have a funny setup to slide. The bar sits underneath the seat, and you have tp push it down to unlock the slide. The means that the seat cannot sit flat on the floor, or in our case, flat on the cabin crossmember. So, a 10mm spacer sits at the front and a block of 25x50mm sold aluminium was welded to the original bracket at the back to make the seat sit up far enough so the slide would work. It also means simply tapping an M8 thread into the block for the seat rails to bolt to.

This is the front moutn, minus the bolts that bolt to the seat rail. Held down by 6 x M8 countersunk allen bolts into M8 nutserts:
Image

The rear mount with the levelling blocks - looks funny but at least it will be underneath the seat and out of site:
Image

And both mounts together. They really are very sturdy:
Image

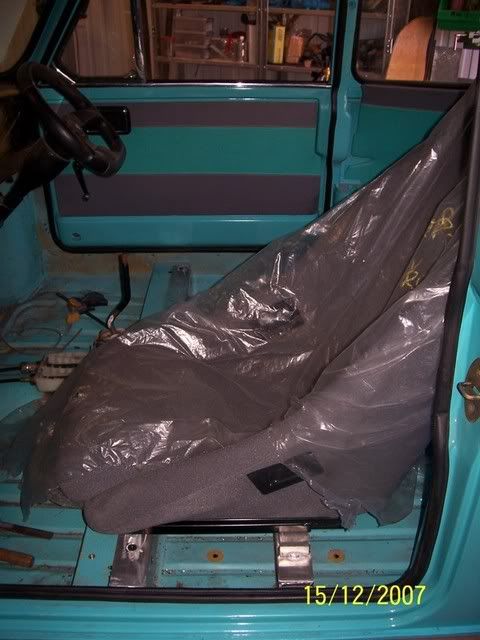
And a pic of the seat installed (and yes, that's seat, not seats!!)
Image

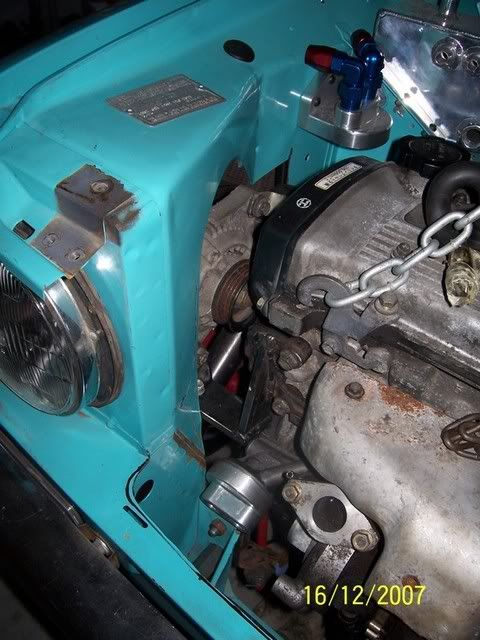
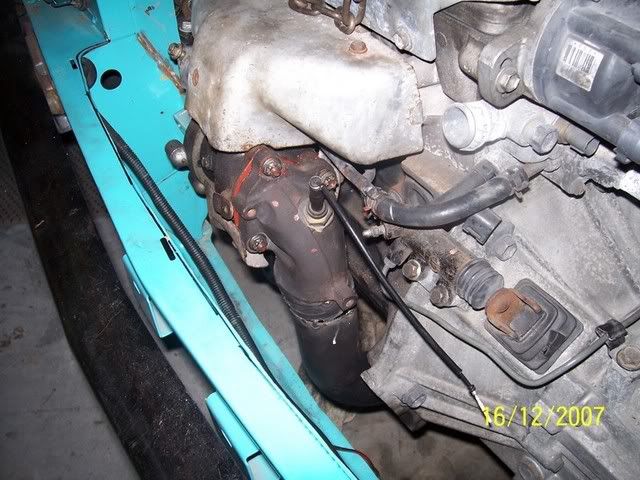
Next job on the agenda was to mount the brake booster. The brake line guy comes out next Saturday to do the brake lines. Tony has chosen the funky red braided stuff, which I must say looks the duckz nutz. I was not aware that this stuff was approved for use everywhere in the car, as I thought you had to use solid lines only unless movement and flexibility was needed. Seems I was wrong, its all ADR aprroved!

Anyway, back to the booster. Started by cutting out of 5mm steel flat bar the necessary components - there is only three. Then the bracket parts are all drilled, deburred and lightened prior to welding together. Not that you save much weight overall, but it does add a certain bit of bling. Here they are prior to welding together:
Image

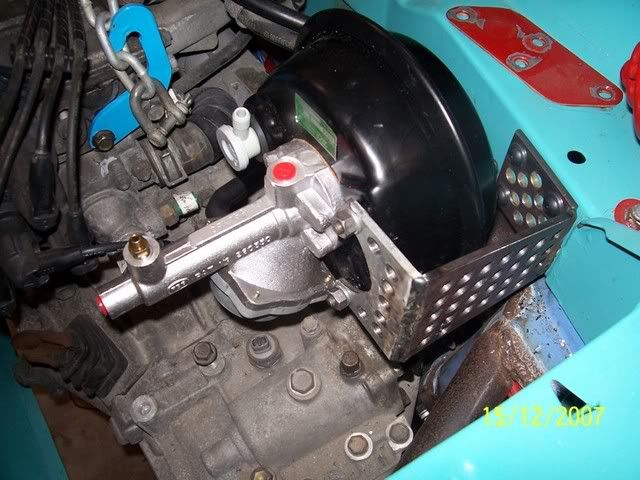
And once they were welded together, we had a little trial fit in situ. The fit was aye OK, so the attacment holes for the mounting bolts. 8mm nutserts were used, and the bracket was bolted to the firewall with M8 domed head allen bolts. And here it is, it will of course be painted or powdercoated in the future:
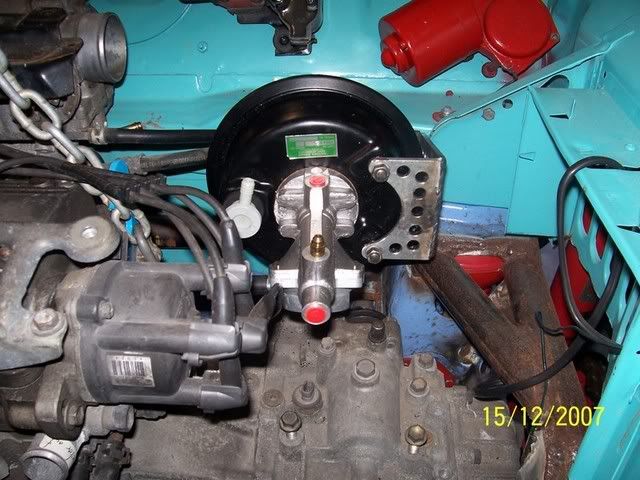
Image

Close up:
Image

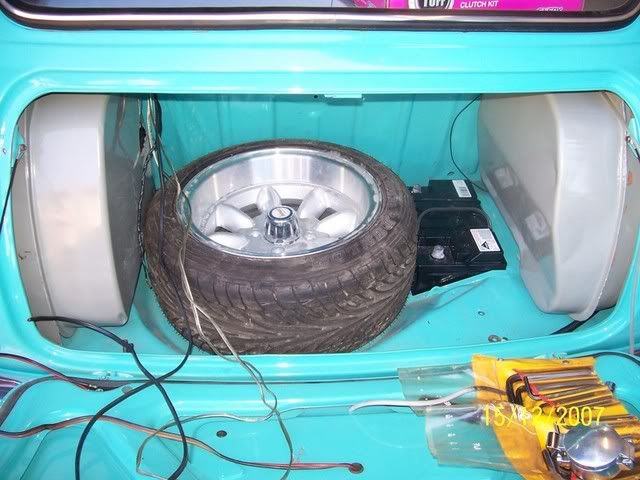
With that done, desided to move onto doing the fueling for the car. Tony and I decided that the fuel pump, filter balance pipe etc will be mounted on a piece of 2.3m aluminium chequer plate, bent up to conform to the shape of the rear firewall. Before we could take dimensions of the size of the plate, we test fit all the big ticket stuff that has to go in the boot, like the spare 13x7 Superheavy (courtesy of El Gato):
Image

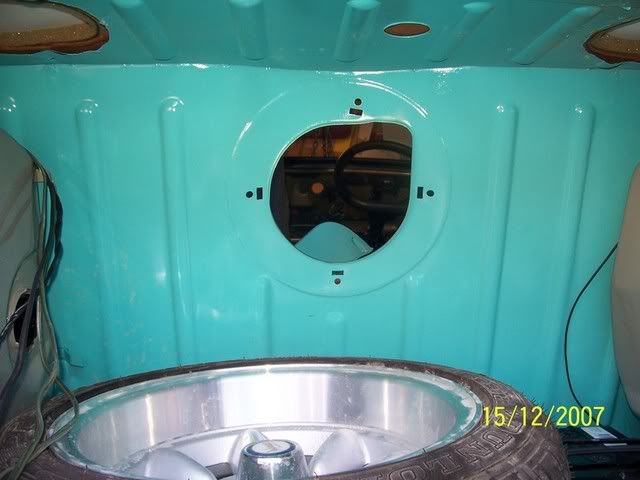
So, the space where the plate could go, was above the spare, over the rotisserie hole (whick I will blank off with another piece of 2.3mm aluminium chequer plate:
Image

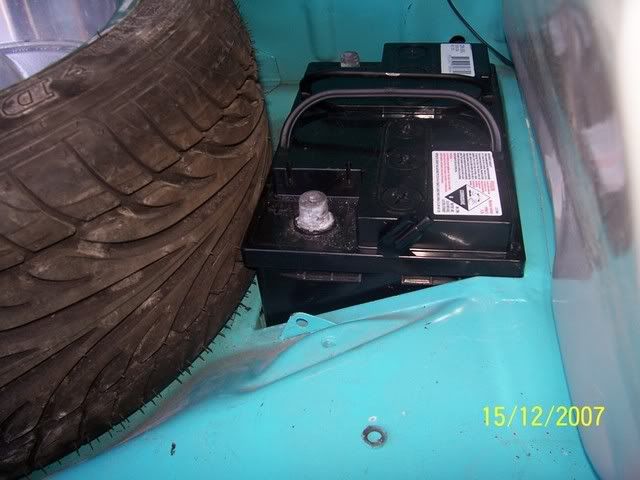
Tight fit with the big battery and even bigger tyre:
Image

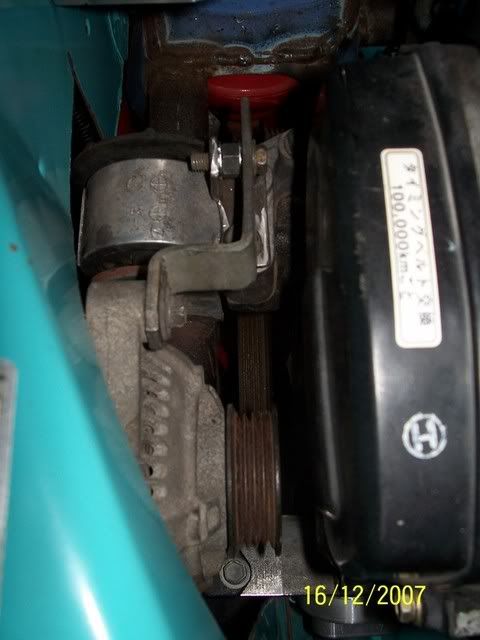
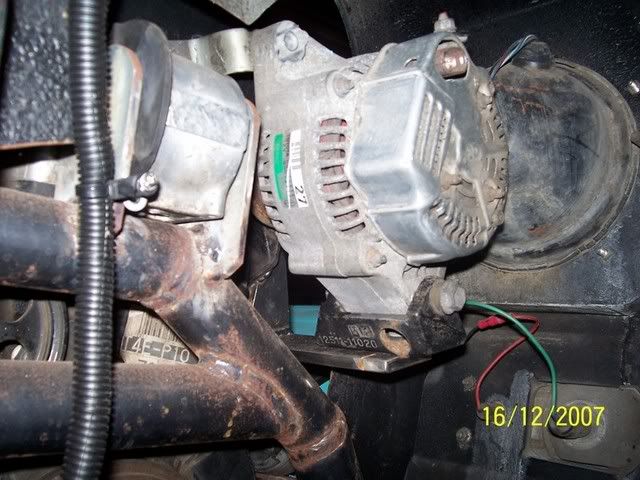
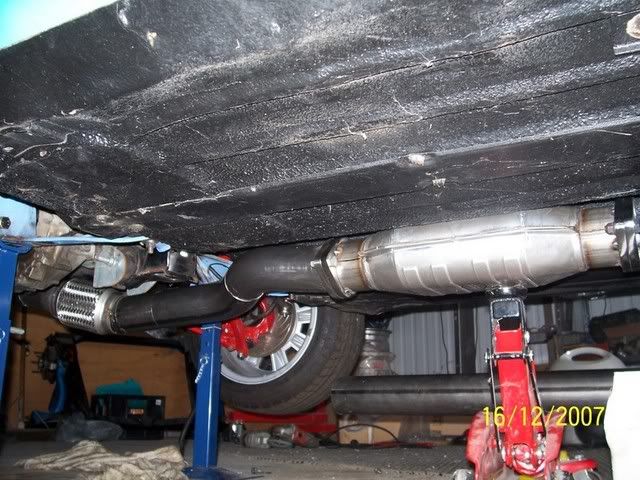
Tomorrow will be doing the exhaust, the alternator bracket, blanking off the rear firewall hole, return line to the RHS tank and a few other bits and pieces.

Regards,
Ticky

_________________
"Not Speeding Officer..........Qualifying"


Top
 Profile  
 
 Post subject:
PostPosted: Sun Dec 16, 2007 10:59 am 
Offline
1098cc
1098cc
User avatar

Joined: Tue Mar 16, 2004 7:23 pm
Posts: 1821
Location: TAS
Looks fantastic bud - keep up the good work :)

_________________
Image


Top
 Profile  
 
 Post subject:
PostPosted: Sun Dec 16, 2007 5:43 pm 
Offline
1275cc
1275cc
User avatar

Joined: Fri Jun 17, 2005 10:31 am
Posts: 3183
Location: Burpengary, Queensland - Home of Tricky Performance Engineering
Thanks MiniMafia, will do!

Quick Update,

With the close of todays play, one task has been completed, and one task half completed. The alternator mounting has been fabricated, and the alternator mounted. The job was made easier in that its the fourth one I have done, so it only took me about 3 hours to get done. Even had time to come inside and watch the Aussies bat against NZ in the 20/20 match - and of course it took a Queenslander to rescue the innings!

Here are some shots of the finished alternator mount with the alternator installed:
Image

Image

Shot from inside the wheel arch looking forward:
Image

And the half finished job, the exhaust system. The twin outlet back box (muffler) didnt show up from the suppliers on Friday. I expect it will be here Monday. The exhaust will need a bit of finesssing anyway, to get it spot on.

Anyway some pics of the progress. The standard cast iron flange was cuttoff and used, welded to a 2 1/2 inch dump pipe, connected to a 3 inch flex, and 3 inch exhaust. The dump and and everything from the flex forward will be given the flick anyway, once the TD04L is fitted permanently.
Image

Image

Well thats about it. Time to spend some time with the family!

Cheers,
Tricky

_________________
"Not Speeding Officer..........Qualifying"


Last edited by Archangel007 on Mon Dec 17, 2007 7:49 am, edited 1 time in total.

Top
 Profile  
 
 Post subject:
PostPosted: Sun Dec 16, 2007 6:19 pm 
Offline
Forum Graffiti
User avatar

Joined: Sat Jun 16, 2007 10:31 pm
Posts: 1640
Archangel007 wrote:

Image


:o So you convinced him to chop it away then? :)


Top
 Profile  
 
 Post subject:
PostPosted: Sun Dec 16, 2007 7:01 pm 
Offline
1275cc
1275cc
User avatar

Joined: Thu Jun 03, 2004 2:56 pm
Posts: 3981
Location: Brisbane
Archangel007 wrote:
.....The dump and and everything from the flex forward will be given the flick anyway, once the TD04L is fitted permanently.


'ahem, returned to its rightful owner.

Nearly there. Can't wait to see this thing run.

_________________
But he's thriving and striving and hugging the turns.


Top
 Profile  
 
 Post subject:
PostPosted: Sun Dec 16, 2007 8:03 pm 
Offline
1275cc
1275cc
User avatar

Joined: Fri Jun 17, 2005 10:31 am
Posts: 3183
Location: Burpengary, Queensland - Home of Tricky Performance Engineering
Quote:
'ahem, returned to its rightful owner'.


Correct - a big thanks to JC for loaning the dump pipe to Tony so the RWC will be easier. As a bonus the dump will now fit better!

Hi Sam,

Yes, told him it was a must, and Tony begrudginly agreed.

Cheers,
Tricky

_________________
"Not Speeding Officer..........Qualifying"


Top
 Profile  
 
 Post subject:
PostPosted: Sun Dec 16, 2007 8:29 pm 
Offline
1275cc
1275cc
User avatar

Joined: Thu Jun 03, 2004 2:56 pm
Posts: 3981
Location: Brisbane
Whats the deal with the placement of the flexi joint? Looks like you've had to place it under the engine mount. Is that the case or is it just an optical illusion?

_________________
But he's thriving and striving and hugging the turns.


Top
 Profile  
 
 Post subject:
PostPosted: Sun Dec 16, 2007 9:18 pm 
Offline
848cc
848cc

Joined: Wed Aug 30, 2006 5:59 pm
Posts: 69
Location: kallangur qld--- boot_it mechanical
JC wrote:
Whats the deal with the placement of the flexi joint? Looks like you've had to place it under the engine mount. Is that the case or is it just an optical illusion?


na its placed half way under the sump and ends just under the driveshaft it will all be fixed up soon as everything is just tacked up at the moment

as tricky and i were in discusions about they way it sat (as i madea bit too much clearance between the exhaust and driveshaft) which made it sit like that


Top
 Profile  
 
 Post subject:
PostPosted: Sun Dec 16, 2007 9:39 pm 
Offline
998cc
998cc
User avatar

Joined: Mon Jan 16, 2006 1:15 pm
Posts: 685
Location: Melbourne
Awesome work there guys.

I'm taking notes. Love the alternator bracket, will have to do something similar myself very soon. I found that a charade alternator that is about 20mm smaller in diameter and length but otherwise looks the same. Looks like it will even plug into the toyota loom so I;m gonna use it. It's probably rated less but I wont have much to run.

Also what are you mounting that front seat mount too? Is it those nutserts you've talked about? Have you got a pic? And I assume the rear seat mounts will just bolt through with a spreader plate below?

Sorry for all the questions, but this is all stuff I'm playing with at the moment as time allows. I hope to get a lot done over the xmas break so have to try and post more as well.

Cheers and keep up the good work.

Madmorrie


Top
 Profile  
 
 Post subject:
PostPosted: Sun Dec 16, 2007 9:43 pm 
Offline
1275cc
1275cc
User avatar

Joined: Thu Jun 03, 2004 2:56 pm
Posts: 3981
Location: Brisbane
booy_it wrote:
.......i made a ....


Does that mean we have an exhaust specialist in the QBR workshop now too? Fantastic!

_________________
But he's thriving and striving and hugging the turns.


Top
 Profile  
 
 Post subject:
PostPosted: Sun Dec 16, 2007 9:46 pm 
Offline
848cc
848cc

Joined: Wed Aug 30, 2006 5:59 pm
Posts: 69
Location: kallangur qld--- boot_it mechanical
JC wrote:
booy_it wrote:
.......i made a ....


Does that mean we have an exhaust specialist in the QBR workshop now too? Fantastic!


ill leave that comment to tricky as its up to him


Top
 Profile  
 
 Post subject:
PostPosted: Mon Dec 17, 2007 7:47 am 
Offline
1275cc
1275cc
User avatar

Joined: Fri Jun 17, 2005 10:31 am
Posts: 3183
Location: Burpengary, Queensland - Home of Tricky Performance Engineering
MM,

Yes nutserts - I use 8mm ones for the seats, booster bracket and 'heavy' items like that. I use the 6mm ones for the likes of the oil catch can etc.

If you have a look at the picture of the passenger seat installed on this page, on the square section crossmember, just forward of the aluminium bracket, you will see one inserted in the cross member (it was trial and error for the placement of Tony's seat). They sit flush with the floor, so it wont be seen once the carpet goes in.

Let me know if you want a close-up, supplier contact etc. Engineers love them - no self-tappers in this car!!!

Cheers,
Tricky

_________________
"Not Speeding Officer..........Qualifying"


Top
 Profile  
 
Display posts from previous:  Sort by  
Post new topic Reply to topic  [ 154 posts ]  Go to page Previous  1 ... 4, 5, 6, 7, 8, 9, 10, 11  Next

All times are UTC + 10 hours


Who is online

Users browsing this forum: No registered users and 23 guests


You cannot post new topics in this forum
You cannot reply to topics in this forum
You cannot edit your posts in this forum
You cannot delete your posts in this forum
You cannot post attachments in this forum

Jump to:  

cron

© 2016 Ausmini. All garage work involves equal measures of enthusiasm, ingenuity and a fair degree of irresponsibility.