Ausmini
It is currently Tue Jul 08, 2025 9:39 pm

All times are UTC + 10 hours


Post new topic Reply to topic  [ 13 posts ] 
Author Message
PostPosted: Tue Nov 20, 2007 12:19 am 
Offline
848cc
848cc

Joined: Mon Feb 19, 2007 3:13 am
Posts: 51
Location: france
hi,

I bought an used revs counter smiths but their no connect and I don't know how to connect it.I haven't the connector

could you help me?

Image


Image

_________________
www.moroccominiraid.blogspot.com


Top
 Profile  
 
 Post subject:
PostPosted: Tue Nov 20, 2007 8:54 am 
Offline
SooperDooperMiniCooper ExpertEngineering
User avatar

Joined: Fri Apr 29, 2005 9:46 am
Posts: 18887
Location: Under the bonnet son!
For the pulg, you will need to contact these guys:
General : [email protected]
Technical : [email protected]
Sales : [email protected]
Spares : [email protected]


Quote:
INSTALLATION INSTRUCTIONS
Gauge to be fitted to NEGATIVE EARTH VEHICLES only

Application Notes
OPERATING VOLTAGE 11-17VDC
NOTE: instrument is equipped with a 12v lamp
INPUT SIGNAL:-
Contact breaker ignition (coil)
ECU tachometer output

COMPILES WITH 95/54/EC, ISO7637 & ISOTR 10605

Installation

When mounting the gauge in an instrumental panel, cut a hole in the instrument panel suitable to fit the diameter of the gauge and clearance for the depth and wires.
Mount the tachometer in the instrument panel and connect he wires as below.

GREEN - Connect to switched ignition power source.
(+ve) via 3A fuse
BLACK - Connect to ground (-ve)
RED/WHITE - Connect to dash lamp power
BROWN/SLATE - Not used (Hour meter only)

SIGNAL INPUT ALTERNATIVES:-
The circuit diagram shows all alternatives, only one is needed.
WHITE/BLACK - Connect to Tacho output of electronic ignition
RED/BLUE - Connect to negative side of ignition coil (distributor side)


Calibration

The electronic tachometer is calibrated (programmed) by setting a combination of four switches found on the rear of the instrument. To gain access to these switches, remove the hole plug.
Set the switches prior to installing the instrument.
NOTE: The switch setting must be done with the power "off"

Calibration Procedure:
Set the switches to the correct values for the number of cylinders.
(Refer to the table below)
Locate the setting, then set the switches marked "O" to "OFF" (down)

Calibration Switch Settings (petrol engines)
No of cylinders Pulses/Rev Sw1 Sw2
8 cylinders 4 ON OFF
6 cylinders 3 OFF ON
4 cylinders 2 OFF OFF
2 cylinders 1 ON ON

Switch3:- OFF, unless
Tacho outputs on some ECU'S and some sensors require resistive load to 12 volts to operate (open-collector output)
Turning Switch 3 ON will provide this.

Switch '4' is NOT used for calibration and should be switched 'OFF'

_________________
SooperDooperMiniCooperExpertEngineering

All garage work involves equal measures of enthusiasm, ingenuity and a fair degree of irresponsibility.


Top
 Profile  
 
 Post subject:
PostPosted: Tue Nov 20, 2007 5:14 pm 
Offline
848cc
848cc

Joined: Mon Feb 19, 2007 3:13 am
Posts: 51
Location: france
hi mick,

ok I translate all your information and I tell you if I succeed in.

I ask the same questionin france but nobody can help me and also on the minifinity in uk and also nobody help me....

you have the save revs counter?

_________________
www.moroccominiraid.blogspot.com


Top
 Profile  
 
 Post subject:
PostPosted: Tue Nov 20, 2007 5:22 pm 
Offline
SooperDooperMiniCooper ExpertEngineering
User avatar

Joined: Fri Apr 29, 2005 9:46 am
Posts: 18887
Location: Under the bonnet son!
I did, and they are worth it. The instructions they provide are a little vague but is there all the same on the caerbont website.
http://www.caigauge.com/Caerbont_Automo ... uments.htm

.

_________________
SooperDooperMiniCooperExpertEngineering

All garage work involves equal measures of enthusiasm, ingenuity and a fair degree of irresponsibility.


Top
 Profile  
 
 Post subject:
PostPosted: Tue Nov 20, 2007 5:58 pm 
Offline
848cc
848cc

Joined: Mon Feb 19, 2007 3:13 am
Posts: 51
Location: france
ok I have a look to the web site ou give me

for the switch it's ok but for the connector....I dont' know if the positive is on the right or on the left

I send an email to this factory. I hope it will be good

thanks a lot for your help


best regards

_________________
www.moroccominiraid.blogspot.com


Last edited by titi de lille on Tue Nov 20, 2007 6:21 pm, edited 1 time in total.

Top
 Profile  
 
 Post subject:
PostPosted: Tue Nov 20, 2007 6:08 pm 
Offline
SooperDooperMiniCooper ExpertEngineering
User avatar

Joined: Fri Apr 29, 2005 9:46 am
Posts: 18887
Location: Under the bonnet son!
Actually, looking at your dip switch, you may have the older design. This means you have a few more switches to play with:

Quote:
No of Cylinders............Switch1.....Switch 2......Switch 3
4...................................Off................Off................On
6...................................Off................On................On
8...................................On................Off................On

Quote:
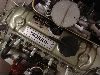
CAI Electronic Programmable Tachometer (EPT)


Introduction

The EPT can be programmed to accommodate 4, 6 or 8 cylinder engines and to accept inputs from Contact Breaker Ignition Systems and Electronic Ignition Systems.

IMPORTANT INFORMATION

* Only to be fitted to negative earth vehicles
* Disconnect your vehicle’s battery prior to installation
* Operating voltage is nominally 12V (11volts min 17volts max)
* The Tachometer complies with CE regulations regarding electromagnetic compatibility


Input Signals

The EPT can accept input signals from: -

1. The low tension side of the coil. On contact breaker or electronic ignition systems (except multispark and CDI systems)
2. Electronic Ignition Systems Dedicated tacho outputs. (Normally provided when the electronic system is multispark or CDI)


Programming Your EPT

1. Make sure that the battery is disconnected.
2. Make sure that your vehicle is negative earth.
3. Determine number of cylinders.
4. Determine input source, i.e. either contact breaker or electronic ignition.
5. Remove the black hole plug on the rear of the tachometer, by pressing it inwards, just above it’s centre, and then inserting a small coin or screwdriver into the edge of the plug.
6. Removing the plug will reveal 6 switches.
7. To programme the number of cylinders the switches should be set as follows:-

No of Cylinders Switch1 Switch 2 Switch 3
4 Off Off On
6 Off On On
8 On Off On

This is correct for vehicles with a single distributor. (The same number of spark lead outputs from the distributor as the number of cylinders in the engine) See note (A)
If your ignition system is multicoil and / or has no distributor
8.

For petrol engine applications switch 5 is always ON and switch 6 is always OFF
9. Please note, switch 4 adjusts for two types of electronic ignition, one of which generates it’s own voltage output for the tachometer (type b) and the other which requires the tachometer supply voltage (type a). If you do not know the type of ignition you have, set switch 4 experimentally to OFF. If this fails and the tacho does not work, switch to ON and try again.
10. To programme the input signal the switches should be set as follows:-

Input Signal Switch 4 Switch 5 Switch 6
Contact Breaker Off On Off
Electronic Ignition (type a) On On Off
Electronic Ignition (type b) Off On Off


Installation Of Your EPT

1. A hole is needed in the fascia panel, the diameter of which will depend upon the tachometer purchased, with sufficient clearance behind to accept the body of the tachometer.
2. Check that the battery is disconnected.
3. Wire the tachometer as follows:-
* Green Wire– Connect to power source via a 3 amp fuse
* Black Wire– connect to earth/ground
* Brown/Slate Wire– Not used in this application
* Red/White Wire–Power for the tachometer lamp, connect to a dash lighting power feed.
* White/Black Wire– For use with Electronic Ignitions which have a dedicated tacho output connection, otherwise not needed. Do not connect to the coil or distributor.
* Red/Blue Wire– For use when you have a contact breaker or electronic ignition without a dedicated tacho output. Connect to the low tension side of the coil. Otherwise not needed.
4. The tachometer can now be installed in the fascia panel hole, and clamped against the back of the panel using the fixing clamp, spring washers and knurled nuts supplied.
5. N.B. if the tachometer is totally inoperative at this point, when tested, and you have an electronic ignition system, it is well worth checking the settings of switches 4 and 5, and determining whether your system is type a or b. A simple way to check is to meter the voltage output from the electronic ignition, tachometer connection, if voltage is zero, then you have type a, any kind of voltage detected would indicate type b. Make sure that switches 4 and 5 are set according to the table in item 8 of the programming instructions.

_________________
SooperDooperMiniCooperExpertEngineering

All garage work involves equal measures of enthusiasm, ingenuity and a fair degree of irresponsibility.


Top
 Profile  
 
 Post subject:
PostPosted: Tue Nov 20, 2007 6:37 pm 
Offline
848cc
848cc

Joined: Mon Feb 19, 2007 3:13 am
Posts: 51
Location: france
I think I find the answer for the cable. I try the lamp with the specific positive in the fourth position. and it's ok, the light is on.
I try it this afternoon and I will tell you if it's ok

best regards

_________________
www.moroccominiraid.blogspot.com


Top
 Profile  
 
 Post subject:
PostPosted: Thu Nov 22, 2007 1:17 am 
Offline
848cc
848cc

Joined: Mon Feb 19, 2007 3:13 am
Posts: 51
Location: france
hi,*

I connect the tachometer as said on the web site you give me.

when I connect the revs counter to the engine, the engine do not start and when I disconnect, the engine start.

the problem is when I connect it to the coil, the engine stop

could you tell me if the revs counter is ok or failed?

have you got an idea?

best regards

_________________
www.moroccominiraid.blogspot.com


Top
 Profile  
 
 Post subject:
PostPosted: Thu Nov 22, 2007 7:26 am 
Offline
SooperDooperMiniCooper ExpertEngineering
User avatar

Joined: Fri Apr 29, 2005 9:46 am
Posts: 18887
Location: Under the bonnet son!
It's probably dangerous to try and guess your way through the contacts. You are best getting onto the technical people in the emails for a list of the pinouts. My guess is that you have found the negative instead of the trigger wire, but it would still be better to get the diagram from the sources above. Not much can be done via the forum unless someone has a plug they would like to detail for you??

_________________
SooperDooperMiniCooperExpertEngineering

All garage work involves equal measures of enthusiasm, ingenuity and a fair degree of irresponsibility.


Top
 Profile  
 
 Post subject:
PostPosted: Thu Nov 22, 2007 5:50 pm 
Offline
848cc
848cc

Joined: Mon Feb 19, 2007 3:13 am
Posts: 51
Location: france
I sent a mail yesterday with the email you give me, but no answer for the moment.

I found the lamp wire so from this connector I found the other as said on the technical web site.

something is strange is the needle don't unless the rev counter is not connected. when you move the revs counter with your hand the needle don't move

_________________
www.moroccominiraid.blogspot.com


Top
 Profile  
 
 Post subject:
PostPosted: Thu Nov 22, 2007 5:56 pm 
Offline
SooperDooperMiniCooper ExpertEngineering
User avatar

Joined: Fri Apr 29, 2005 9:46 am
Posts: 18887
Location: Under the bonnet son!
It's not a meter like you usually expect. It has a stepper motor inside instead of a magnetic movement. That's why it doesn't move very much.

When you power it up correctly, you will hear it try and go backwards for a 1/4 second or so. This is the meter checking itself.

_________________
SooperDooperMiniCooperExpertEngineering

All garage work involves equal measures of enthusiasm, ingenuity and a fair degree of irresponsibility.


Top
 Profile  
 
 Post subject:
PostPosted: Thu Nov 22, 2007 10:06 pm 
Offline
848cc
848cc

Joined: Mon Feb 19, 2007 3:13 am
Posts: 51
Location: france
ok, so that a good thing for the moment.

I wait having more information to connect it.

best regards

_________________
www.moroccominiraid.blogspot.com


Top
 Profile  
 
 Post subject:
PostPosted: Sun Nov 25, 2007 10:23 pm 
Offline
848cc
848cc

Joined: Mon Feb 19, 2007 3:13 am
Posts: 51
Location: france
yesssss, it works.

thanks mick for your informations, I have found the cable color and how to connect them...

regards

_________________
www.moroccominiraid.blogspot.com


Top
 Profile  
 
Display posts from previous:  Sort by  
Post new topic Reply to topic  [ 13 posts ] 

All times are UTC + 10 hours


Who is online

Users browsing this forum: No registered users and 15 guests


You cannot post new topics in this forum
You cannot reply to topics in this forum
You cannot edit your posts in this forum
You cannot delete your posts in this forum
You cannot post attachments in this forum

Jump to:  

© 2016 Ausmini. All garage work involves equal measures of enthusiasm, ingenuity and a fair degree of irresponsibility.