Ausmini
It is currently Sun Jun 22, 2025 7:12 am

All times are UTC + 10 hours


Post new topic Reply to topic  [ 219 posts ]  Go to page Previous  1 ... 6, 7, 8, 9, 10, 11, 12 ... 15  Next
Author Message
 Post subject:
PostPosted: Thu Feb 04, 2010 11:44 am 
Offline
Yay For Hay!
User avatar

Joined: Wed Sep 08, 2004 9:27 pm
Posts: 15912
Location: Wodonga - Vic/NSW border
lovely.... now where and how are you going to mount your AC compressor?


Top
 Profile  
 
 Post subject:
PostPosted: Thu Feb 04, 2010 12:09 pm 
Offline
The TIG
User avatar

Joined: Thu Oct 27, 2005 4:28 pm
Posts: 860
Location: Victoria, BC, Canada
No A/C for me. Just robs power and adds weight to the car. If I need A/C I'll take my Supra, that's my gran touring car.

_________________
email - [email protected]
http://s28.photobucket.com/albums/c207/TurboOrangie/
Image
67 Traveller - Needs restoration
www.victoria-chiropractors.ca


Top
 Profile  
 
 Post subject:
PostPosted: Sat Feb 13, 2010 8:10 am 
Offline
The TIG
User avatar

Joined: Thu Oct 27, 2005 4:28 pm
Posts: 860
Location: Victoria, BC, Canada
Not finished the tank yet, but here is a little update on the progress. The little Honda tub that the fuel pump sits in has been welded into the Travelle"R" tank to help prevent surging problems common with fuel injection swaps into cars with tanks not originally designed for FI. I've been busy shortening up the Honda fuel pump bracket that bolts will bolt into the tank. The Traveller tank is not deep enough to fit the bracket in it's original configuration. So I've modified it to work in the Mini tank but also so it will still fit through the Honda flange I will be welding into the Traveller tank. I've also have to recess the flange so that the fuel lines will be protected and not hit the bottom of the Mini floor when the tank is in place. I've fabricated most of the bits I need now it's mostly just putting everything together. I should have the tank finished up this weekend and hopefully even have it modified to bolt into the car.

Image
Image
Image

_________________
email - [email protected]
http://s28.photobucket.com/albums/c207/TurboOrangie/
Image
67 Traveller - Needs restoration
www.victoria-chiropractors.ca


Top
 Profile  
 
 Post subject:
PostPosted: Sat Feb 13, 2010 2:07 pm 
Offline
Yay For Hay!
User avatar

Joined: Wed Sep 08, 2004 9:27 pm
Posts: 15912
Location: Wodonga - Vic/NSW border
right-click, save...

pity about no A/C - I was keen to copy your solution to that one - if I ever get back into my car :(


Top
 Profile  
 
 Post subject:
PostPosted: Sat Feb 13, 2010 4:39 pm 
Offline
The TIG
User avatar

Joined: Thu Oct 27, 2005 4:28 pm
Posts: 860
Location: Victoria, BC, Canada
simon - Maybe you could mount the compressor where I put my alternator and then mount the alternator over the motor mount with the pulley facing toward the the engine.

Otherwise you are probably going to have to lengthen the front of the Mini, because you are still going to have the problem of where to mount the condenser for the A/C. I'm just not a fan of A/C, it steals power, adds complexity, and adds weight (and all in front of the wheels). My version of A/C is more natural, sweating, rolling (or sliding) a window open and drinking a slurpee!

_________________
email - [email protected]
http://s28.photobucket.com/albums/c207/TurboOrangie/
Image
67 Traveller - Needs restoration
www.victoria-chiropractors.ca


Top
 Profile  
 
 Post subject:
PostPosted: Sat Feb 13, 2010 5:07 pm 
Offline
1275cc
1275cc
User avatar

Joined: Fri Apr 25, 2008 2:34 pm
Posts: 2002
Location: Brisbane
What if the alternator and air con compressor was powered off the same pulley, so air con one end, alternator the other?

_________________
Simplify and add lightness


Top
 Profile  
 
 Post subject:
PostPosted: Sat Feb 13, 2010 7:28 pm 
Offline
religious status
religious status
User avatar

Joined: Fri Mar 19, 2004 6:19 pm
Posts: 39750
Location: near Baulkham Hills, NSW
A few guys on MM forum mounted the condenser under the car, inside the rear subframe. With a fan to blow air down.
One way to make room... :P

_________________
DrMini- 1970 wasaMatic 1360, Mk1S crank, 86.6HP (ATW) =~125 @ crank, 45 Dellorto (38 chokes), RE282 sprint cam, 1.5 rockers, 11.0:1 C/R. :mrgreen:


Top
 Profile  
 
 Post subject:
PostPosted: Sat Feb 13, 2010 8:36 pm 
Offline
1098cc
1098cc
User avatar

Joined: Thu Aug 03, 2006 11:47 am
Posts: 1212
Location: In Transit, Sydney
Top work as usual Nige! You are the Master!

_________________
Your silliness has been noted.


Top
 Profile  
 
 Post subject:
PostPosted: Sun Feb 14, 2010 5:43 am 
Offline
1275cc
1275cc
User avatar

Joined: Fri Jun 17, 2005 10:31 am
Posts: 3183
Location: Burpengary, Queensland - Home of Tricky Performance Engineering
drmini in aust wrote:
A few guys on MM forum mounted the condenser under the car, inside the rear subframe. With a fan to blow air down.
One way to make room... :P


^^And as Nigel said, adds complexity............................................ :shock:

_________________
"Not Speeding Officer..........Qualifying"


Top
 Profile  
 
 Post subject:
PostPosted: Mon Feb 15, 2010 3:10 am 
Offline
The TIG
User avatar

Joined: Thu Oct 27, 2005 4:28 pm
Posts: 860
Location: Victoria, BC, Canada
Here is a little update on the petrol tank. I decided to recess the Honda anti-surge tank through the bottom of the Traveller petrol tank to make sure it was the lowest point of the tank and that I could access more of the petrol in the tank and be able to travel further on a fill of fuel. It would be frustrating when the pick up ran dry but there was still a few bucks of fuel in the tank. This also involved relocating the factory drain. Now I have to readjust the height of the fuel pump, no big deal. I'll have another update soon.

Image

_________________
email - [email protected]
http://s28.photobucket.com/albums/c207/TurboOrangie/
Image
67 Traveller - Needs restoration
www.victoria-chiropractors.ca


Top
 Profile  
 
 Post subject:
PostPosted: Tue Feb 16, 2010 6:26 pm 
Offline
The TIG
User avatar

Joined: Thu Oct 27, 2005 4:28 pm
Posts: 860
Location: Victoria, BC, Canada
Another tank update. Didn't get as much done as planned, but still happy with how things went. I worked on the tank today but I also welded up an exhaust system for a kid who lives on my street. I feel sorry for car dudes who don't have welders. I lost track of time while working on the tank that I missed my Mini club meeting tonight.
I have just a little more welding to do to seal up the tank and I have to mount it still, but it is pretty much all built in my head. I also started planning out my exhaust so I will leave enough room for it when I mount the tank.
Image
Image
Image
Image

_________________
email - [email protected]
http://s28.photobucket.com/albums/c207/TurboOrangie/
Image
67 Traveller - Needs restoration
www.victoria-chiropractors.ca


Top
 Profile  
 
 Post subject:
PostPosted: Wed Feb 17, 2010 7:23 am 
Offline
Give Ash some flowers Nick .
User avatar

Joined: Wed Aug 09, 2006 1:22 pm
Posts: 10149
Location: Toowoomba Region, QLD
That's turning out beautifully.

_________________
"In two years time your car will be like a lady's clothes, out of date, my car will still be in fashion when I am dead" - Sir Alec speaking to Pininfarina


Top
 Profile  
 
 Post subject:
PostPosted: Tue Feb 23, 2010 7:04 pm 
Offline
The TIG
User avatar

Joined: Thu Oct 27, 2005 4:28 pm
Posts: 860
Location: Victoria, BC, Canada
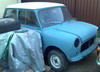
Here's what I've been up to the last few days, or at least the things worth taking pics of.

I need to clean up under the car a bit before I paint it. I got some surface rust from the couple months the car was under a tarp while it was raining.

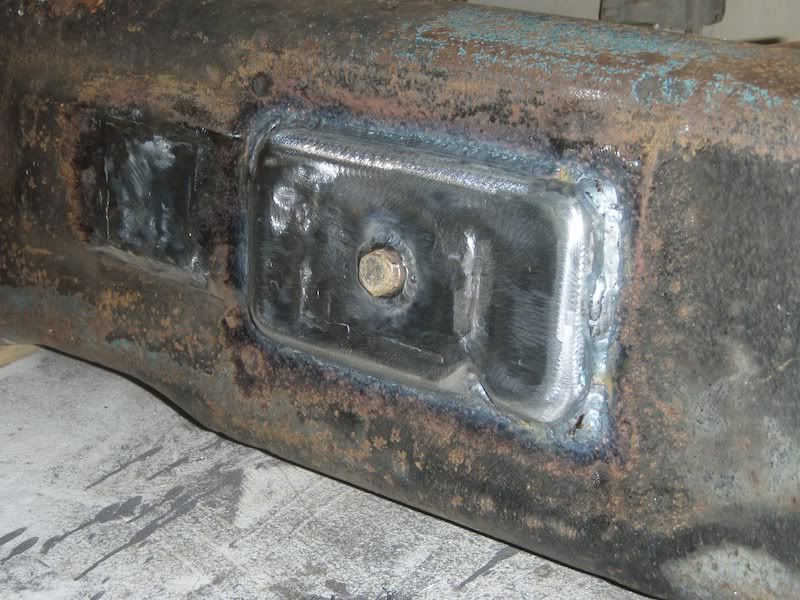
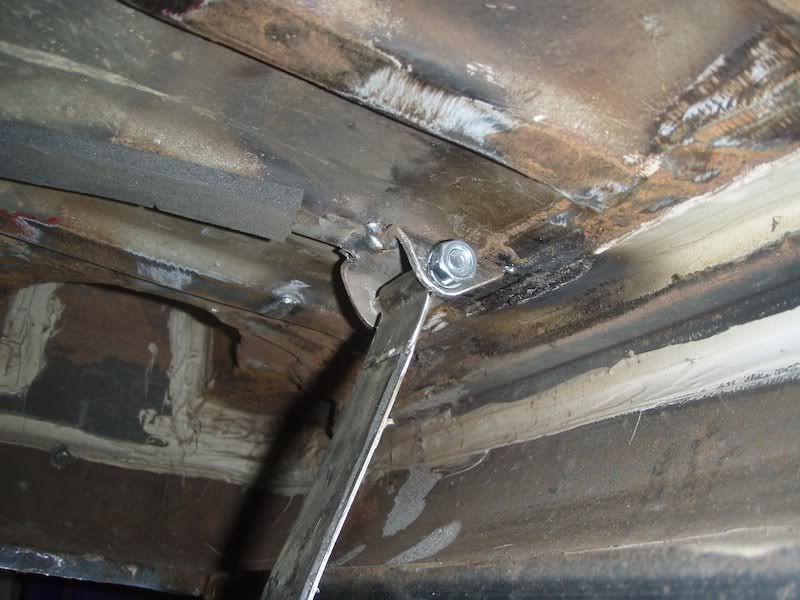
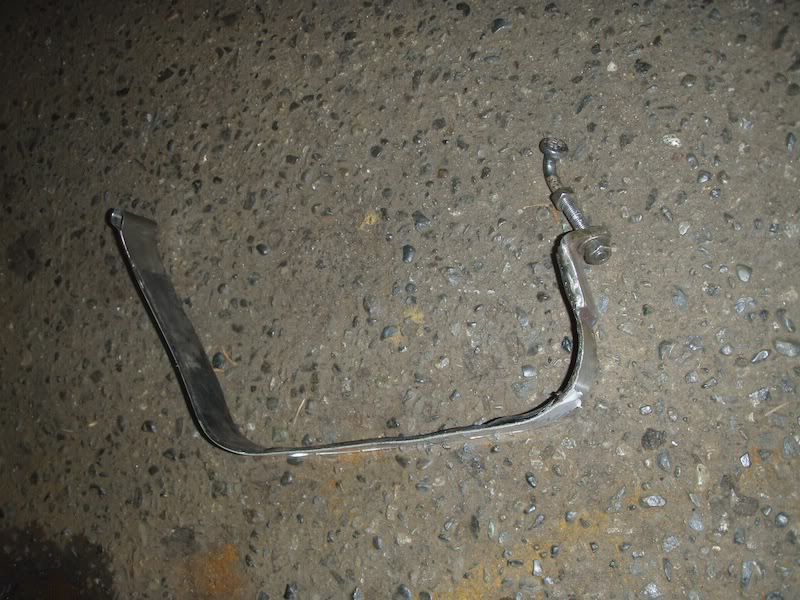
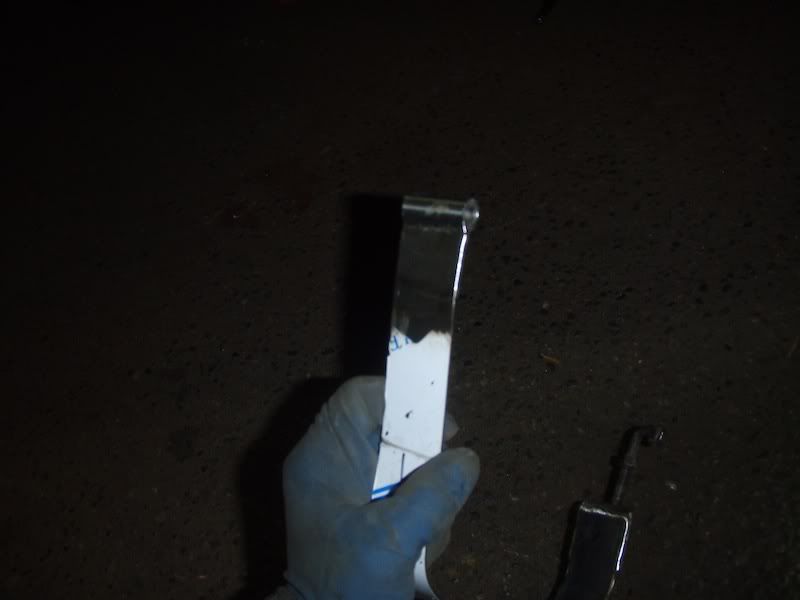
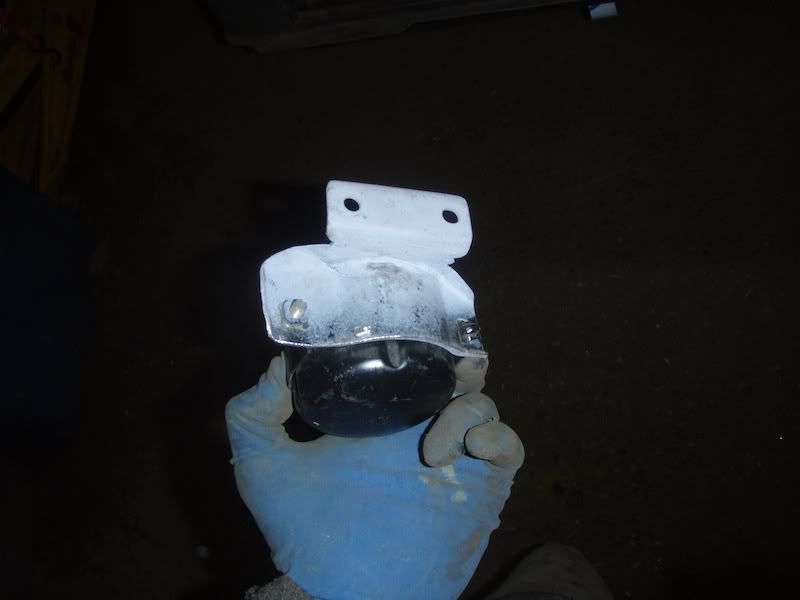
Here are some pics of the mounts for my petrol tank mounting straps. I made the straps out of stainless but I used the donor Honda bolts with the hook on the end to mount them.
This is the mount at the rear of the car.
Image
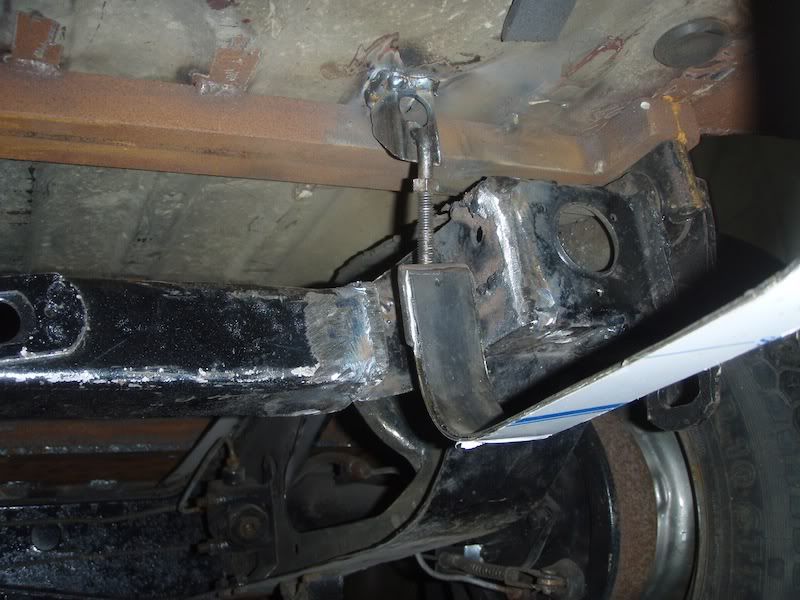
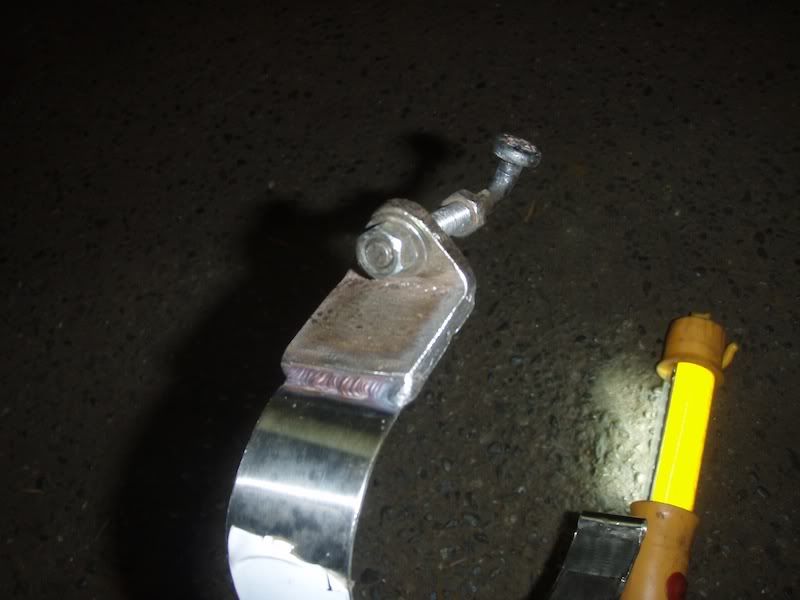
This is a mount at the front of the tank. I notched the subframe to make it easier to get to the bolt. I may add a little more strengthening around the notch when I pull the subframe out again. But I may not either because it should be strong enough when it's bolted to the floor. I also plan to replace the rear subframe with just a bar to mount the radius arms to since I run coil overs.
Image
I will peel the plastic off the stainless strips when I put the tank in for the last time.
Image
Image
Image
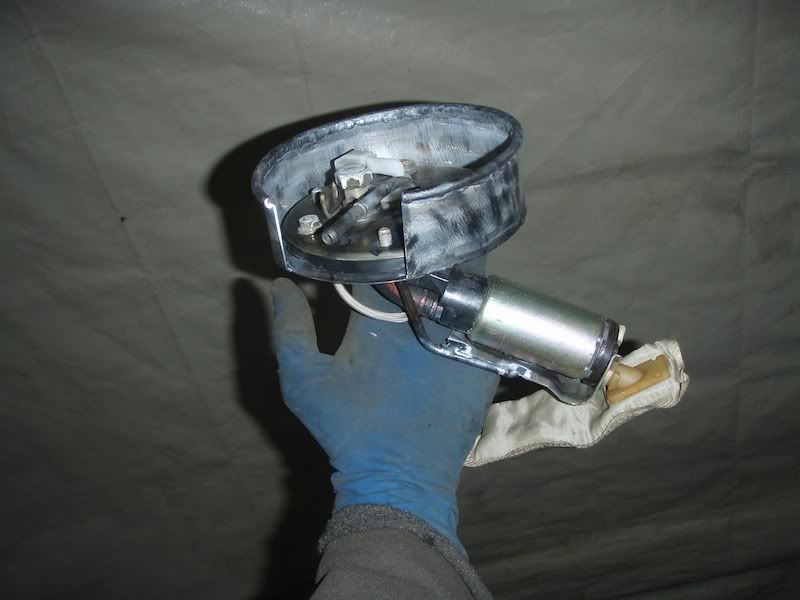
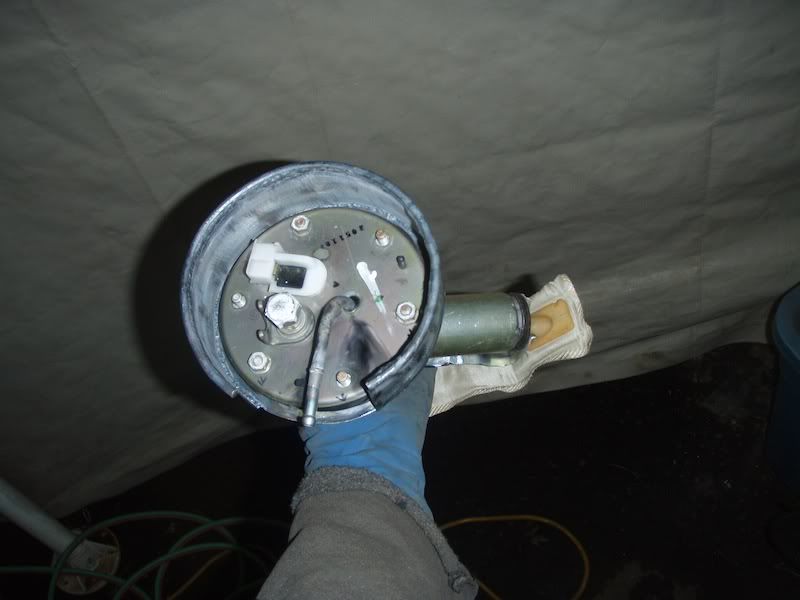
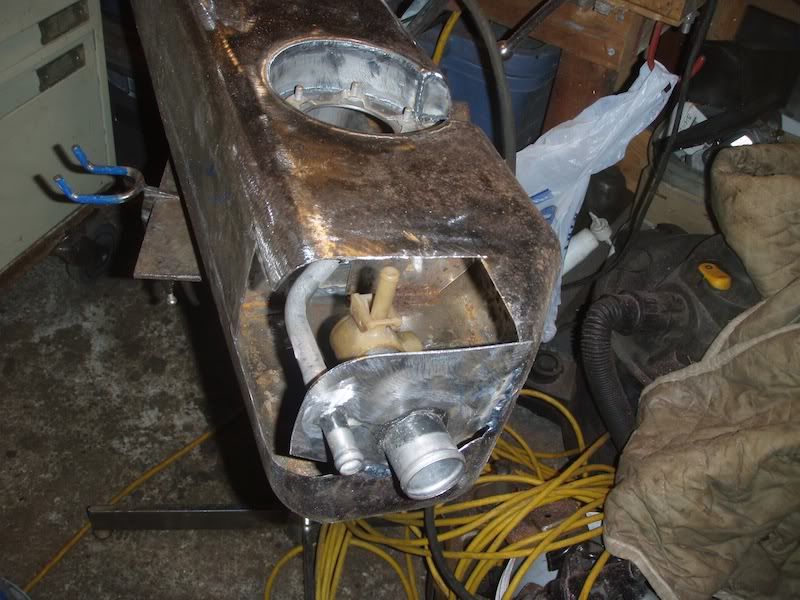
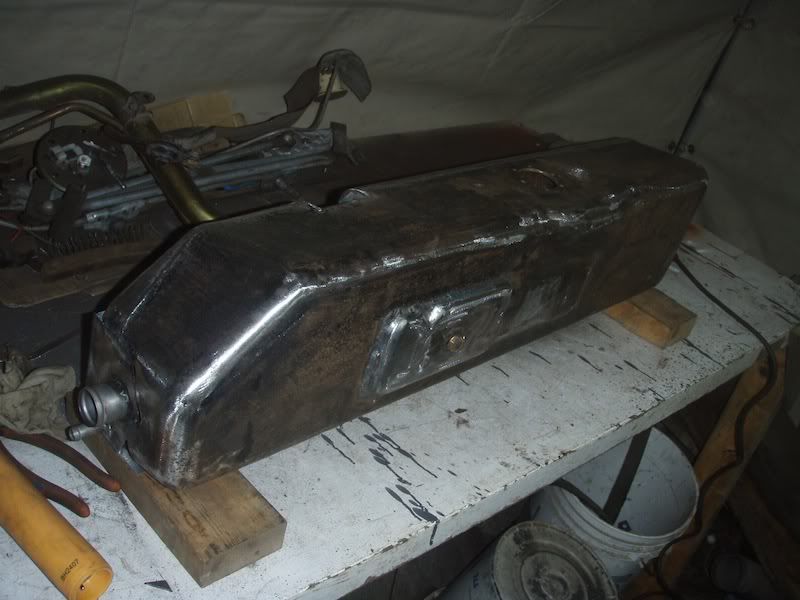
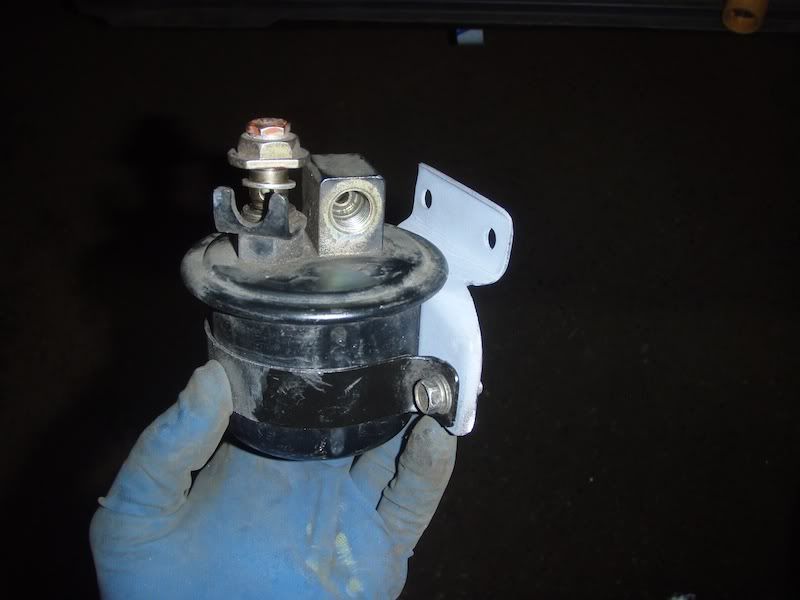
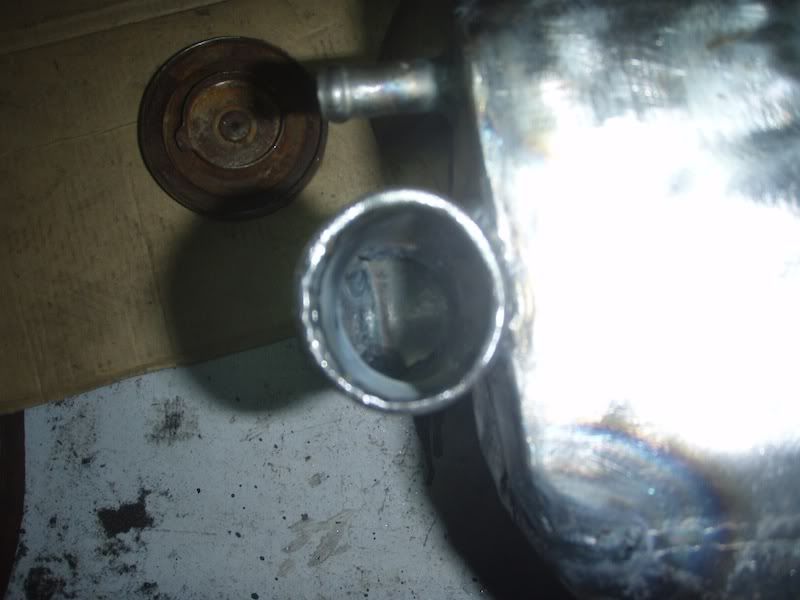
I modified the Honda fuel filter today and I probably eliminated half of it, much lighter now! I'm going to mount the filter back near the tank instead of in the engine bay the way it was in the Honda.
Image
Image
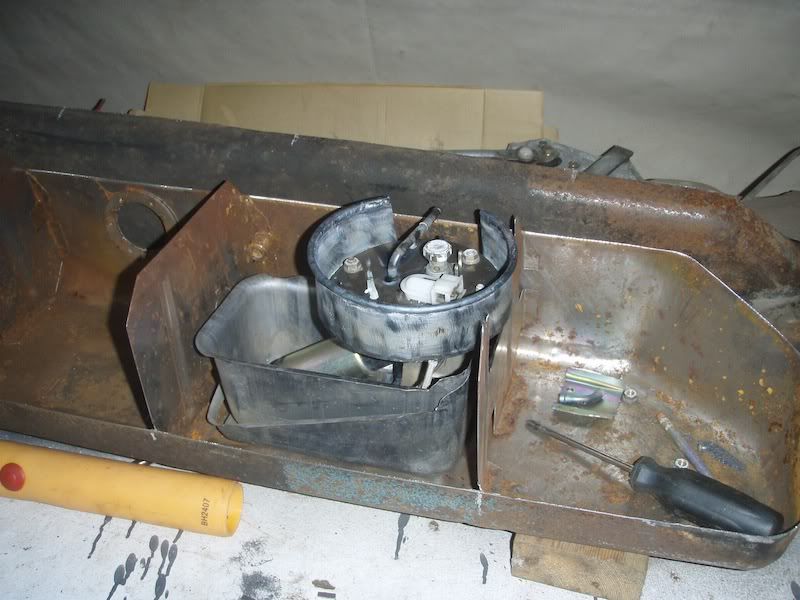
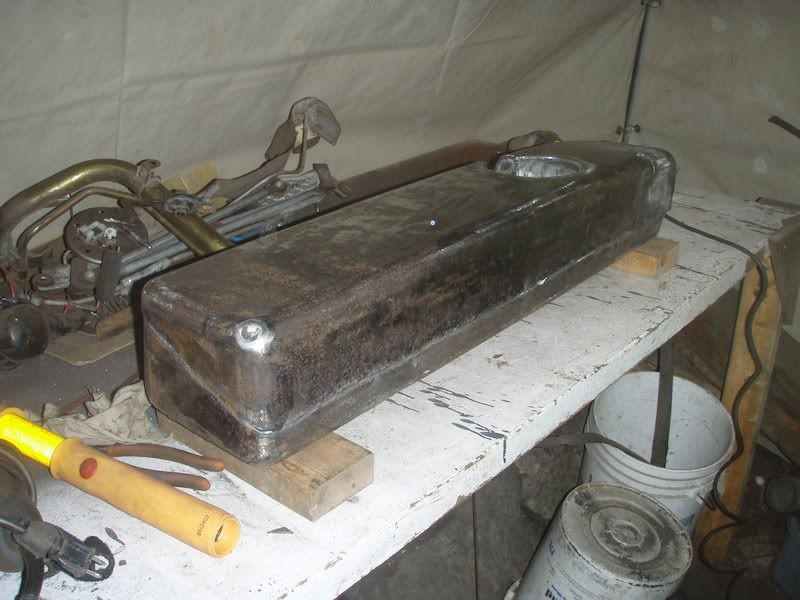
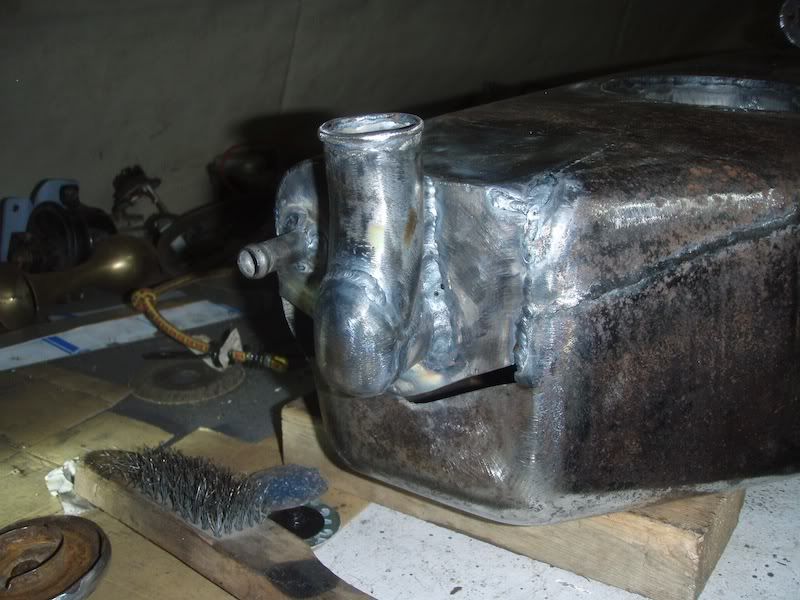
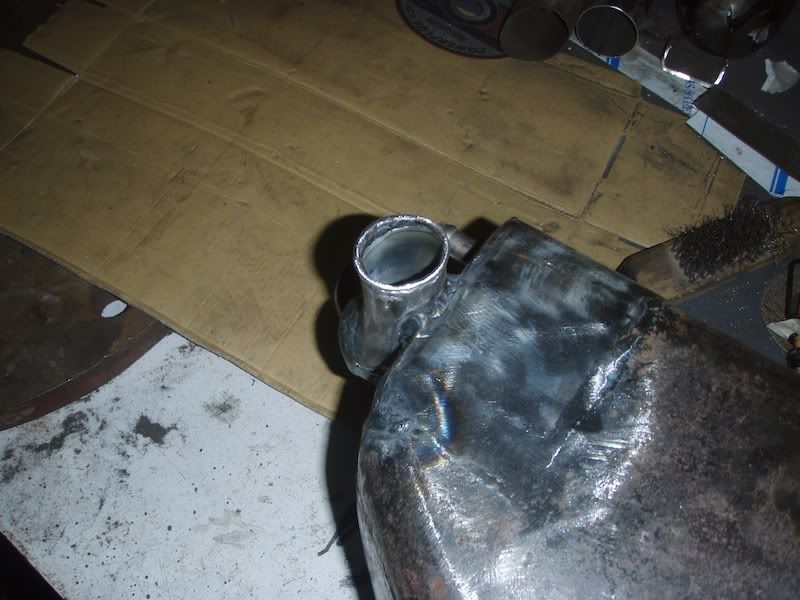
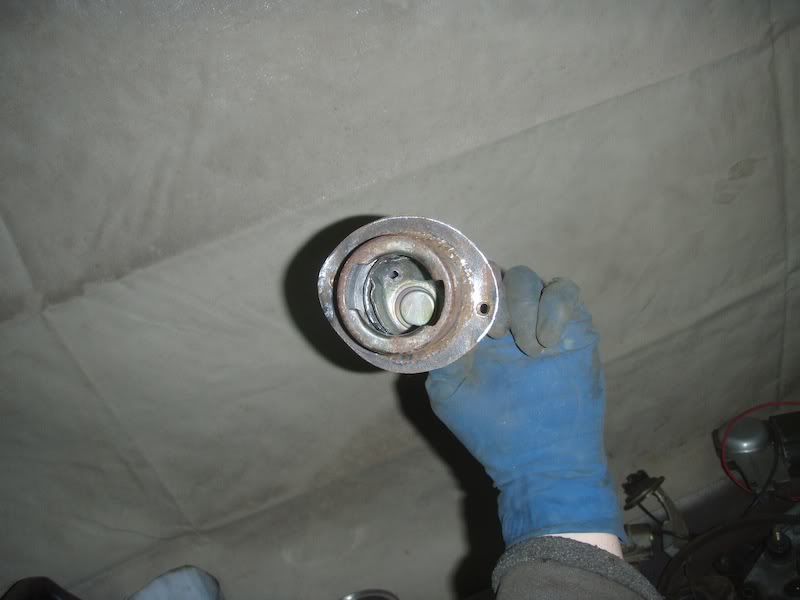
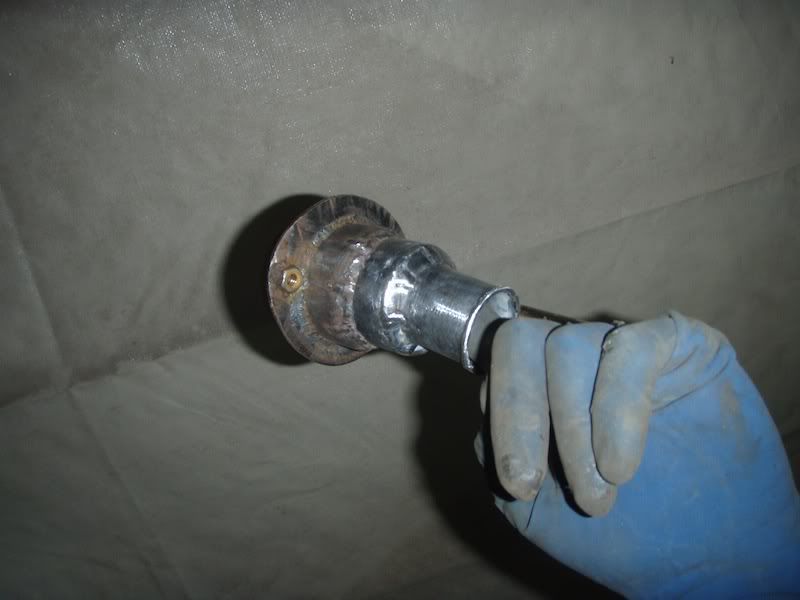
I've finished up the filler on the tank. It looks kind of funny because of the position of the tank and because I used the filler from the Honda tank and I tried to position it in a similar fashion as it was in the Honda. But I had to shorten it up alot. I will attach the filler end where the nozzle goes in with a piece of rubber fuel hose so it has some flex. I TIG welded a bead around the end since I don't have a tool to flare the end.
Image
Image
Image
Image
Image
Just a little more work left to do on the tank to seal it up.

_________________
email - [email protected]
http://s28.photobucket.com/albums/c207/TurboOrangie/
Image
67 Traveller - Needs restoration
www.victoria-chiropractors.ca


Top
 Profile  
 
 Post subject:
PostPosted: Tue Feb 23, 2010 9:54 pm 
Offline
1275cc
1275cc
User avatar

Joined: Thu May 24, 2007 7:19 pm
Posts: 5370
Location: Yandina,Sunshine Coast,QLD
Looks good, personally I wouldn't have worried about the lip on the filler pipe I would have relied on the hose clamp/s, you've got a very high attention to detail.
You may have covered this already but where is your battery going?

_________________
Respect mine and I'll respect yours.


Top
 Profile  
 
 Post subject:
PostPosted: Wed Feb 24, 2010 5:19 am 
Offline
1098cc
1098cc
User avatar

Joined: Wed Aug 04, 2004 6:21 am
Posts: 1788
Location: Wullingtun, Unzud
TurboOrangie wrote:
I feel sorry for car dudes who don't have welders.


Amen to that. I'm impressed you're doing brackets etc in stainless. I had to fab some simple brackets for our Volvo's top box so I did them in stainless. Good god, that stuff is a PITA to drill.

I love your work. This is one project I always check for updates.


Top
 Profile  
 
Display posts from previous:  Sort by  
Post new topic Reply to topic  [ 219 posts ]  Go to page Previous  1 ... 6, 7, 8, 9, 10, 11, 12 ... 15  Next

All times are UTC + 10 hours


Who is online

Users browsing this forum: No registered users and 13 guests


You cannot post new topics in this forum
You cannot reply to topics in this forum
You cannot edit your posts in this forum
You cannot delete your posts in this forum
You cannot post attachments in this forum

Jump to:  

© 2016 Ausmini. All garage work involves equal measures of enthusiasm, ingenuity and a fair degree of irresponsibility.