Ausmini
It is currently Wed Jun 25, 2025 6:26 pm

All times are UTC + 10 hours


Post new topic Reply to topic  [ 27 posts ]  Go to page 1, 2  Next
Author Message
 Post subject: G13B into LS1275
PostPosted: Tue May 08, 2007 4:58 pm 
Offline
848cc
848cc
User avatar

Joined: Fri Oct 22, 2004 5:31 pm
Posts: 181
Location: Central Tilba NSW
Thought it was about time I got these pics up
The conversion started Xmas 2004 & after quiet a few delays, like a rebuild on my
Cooper S after it broke a valve spring, lack of finances, just getting p*******d off with
spending heeps of time on it & seeing no real progress the car is now finally finished
& on the road YAHOO!

The car was purchased in Toowoomba early 2004 & although was generally in quite
good nick was fitted with an Aplus 1275 that was a little disapointing as far as power
was concerned but smooth. I decided to go down the Suzuki G13B conversion route
rather than rebuild the A series & (hot) it up

First the engine bay was stripped out & front subframe removed, the wireing harness
was a disarster so that ended up getting the big chop & thrown into the corner
I knew basically how I was going to build the new subframe (thanks to DT) but how to
bend the tubes presented a bit of a problem. I sent some samples to a friend in Sydney
he computor bent a few sets for me Problem Solved & he still has the program.
Next build a jig to hold the subframe to stop things twisting when the welding started

Here's the jig note the big yellow brace bolted to the top of the towers, this stops the towers from twisting & pulling in


Image


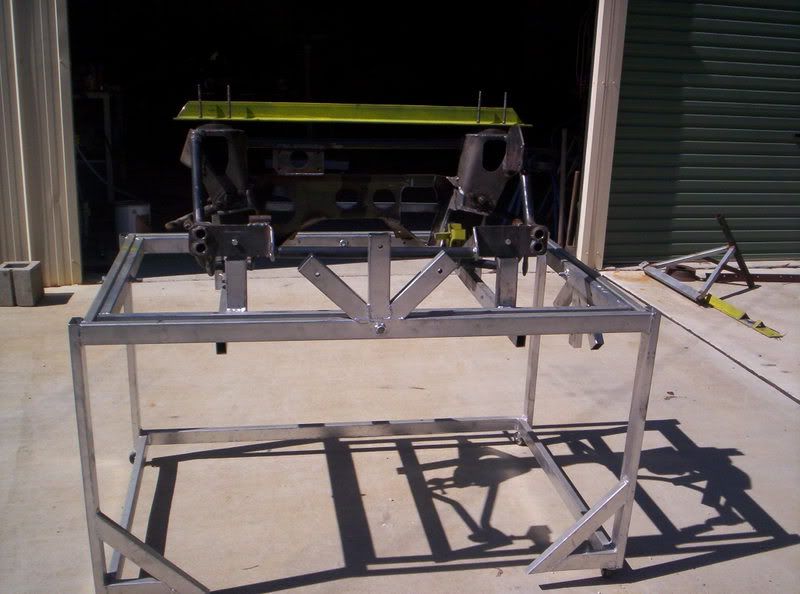
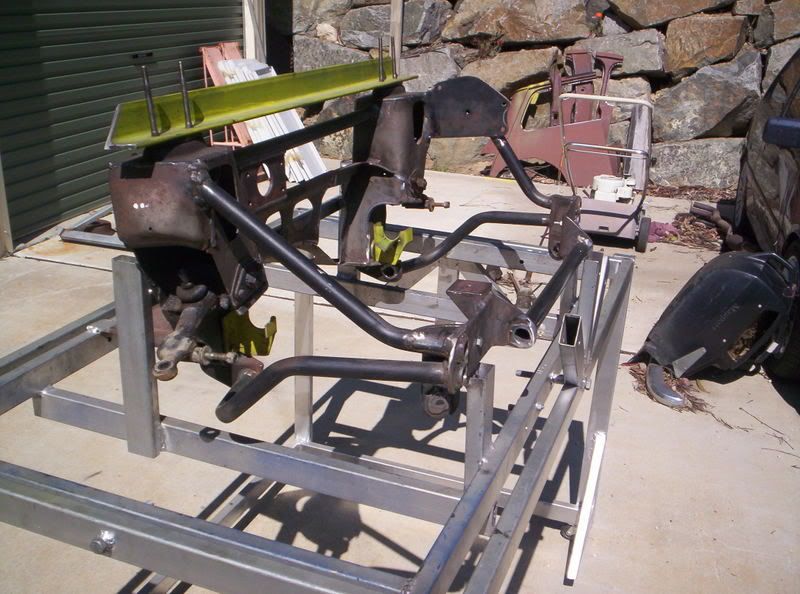
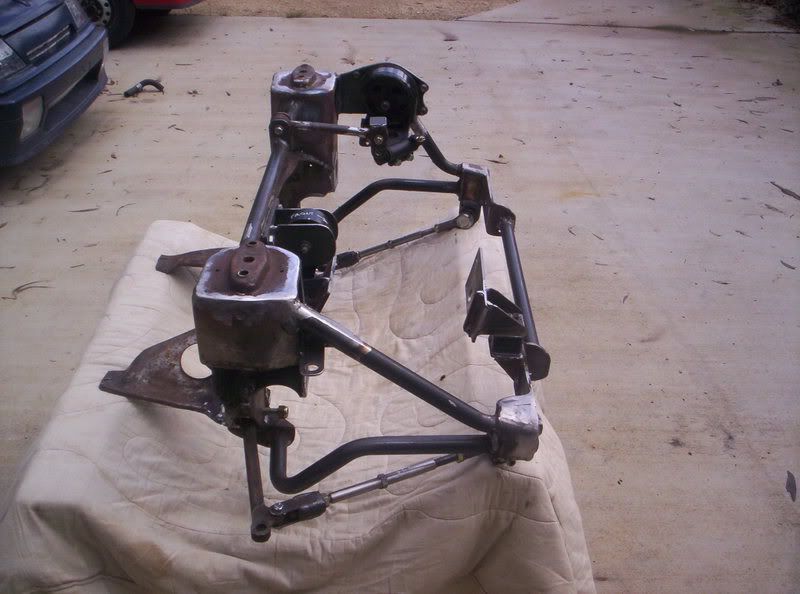
This photo shows the almost completed subframe in the jig, the yellow brackets where
the bottom suspension arms go were use to locate the engine. I had a dummy gearbox &
just put a long shaft through the diff to support the engine on these brackets


Image

Here's the completed subframe
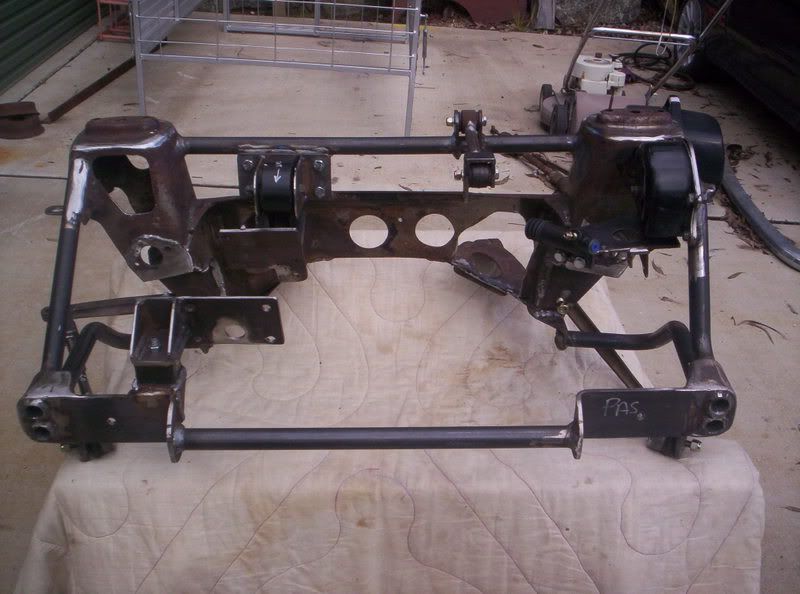
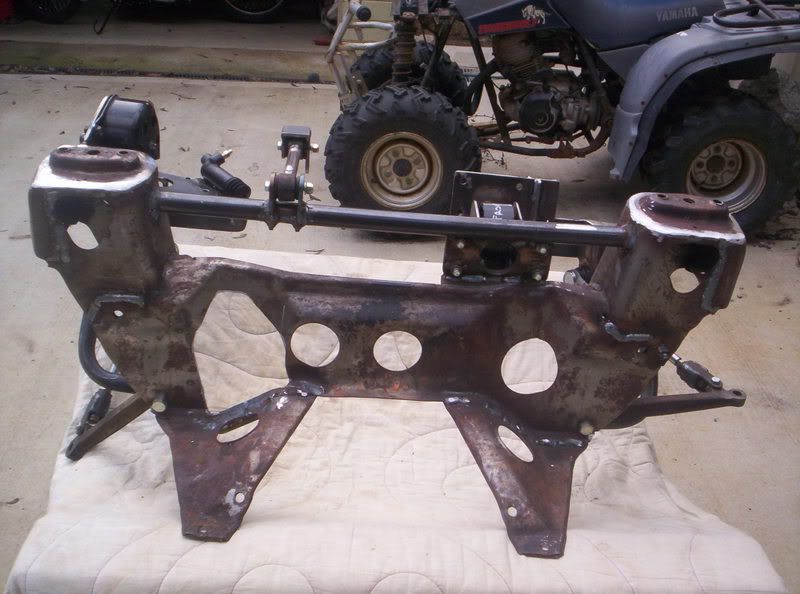
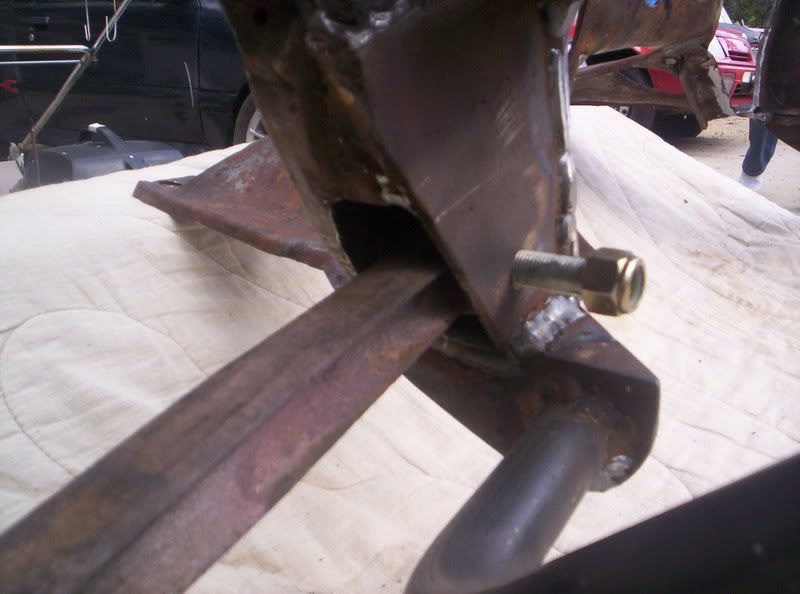


Image
Image
Image
Image

Engine mounts

Image
Image
Image

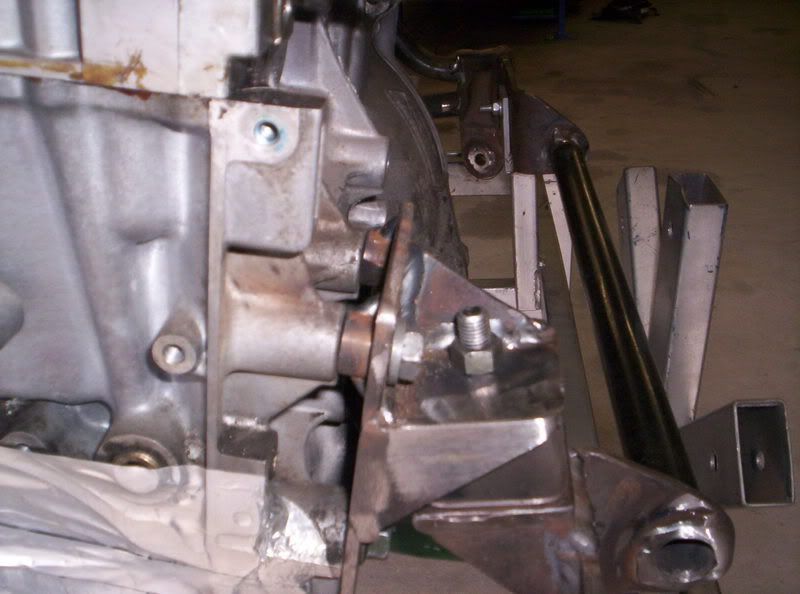
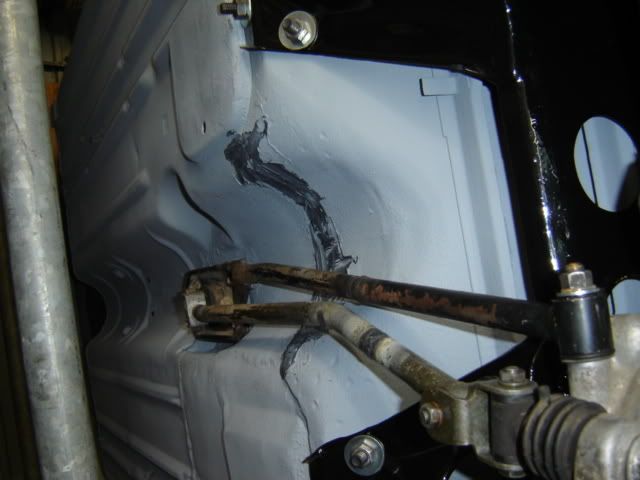
The bottom suspension arm mount is boxed in

Image

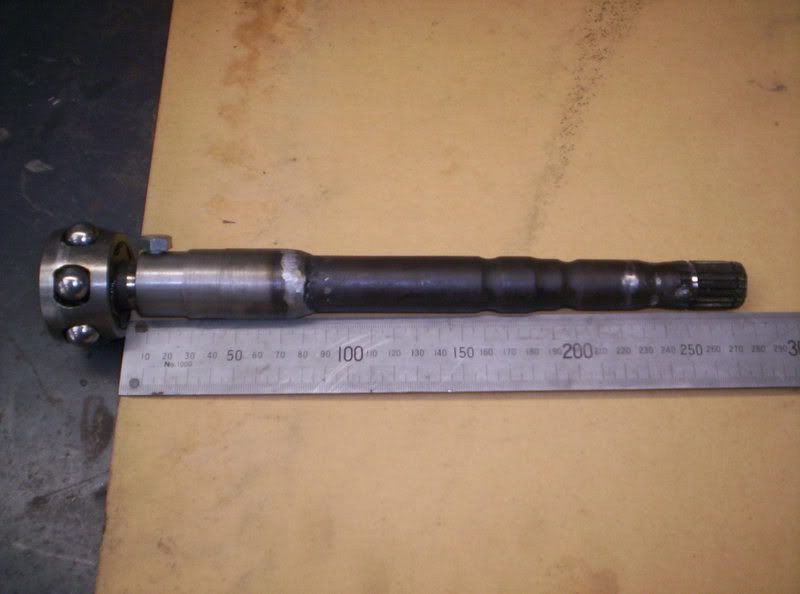
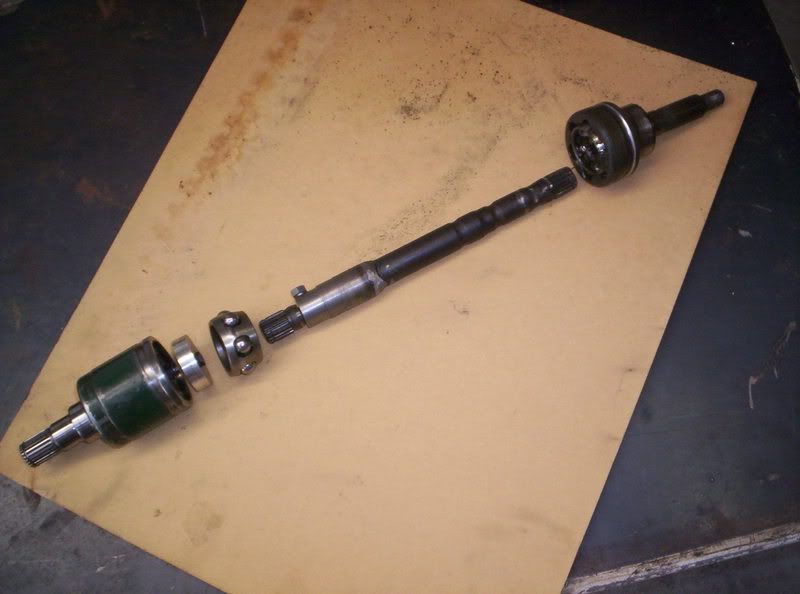
Mini pot joint driveshafts are used. This is the sliding jig I used to get the correct length
for each shaft. The shaft was cut & resplined to suit the Suzuki pot joint

Image
Image

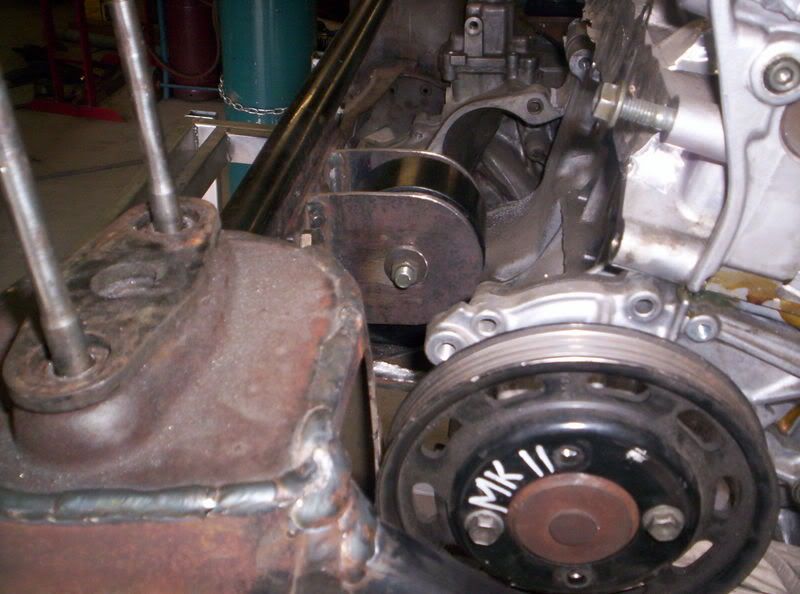
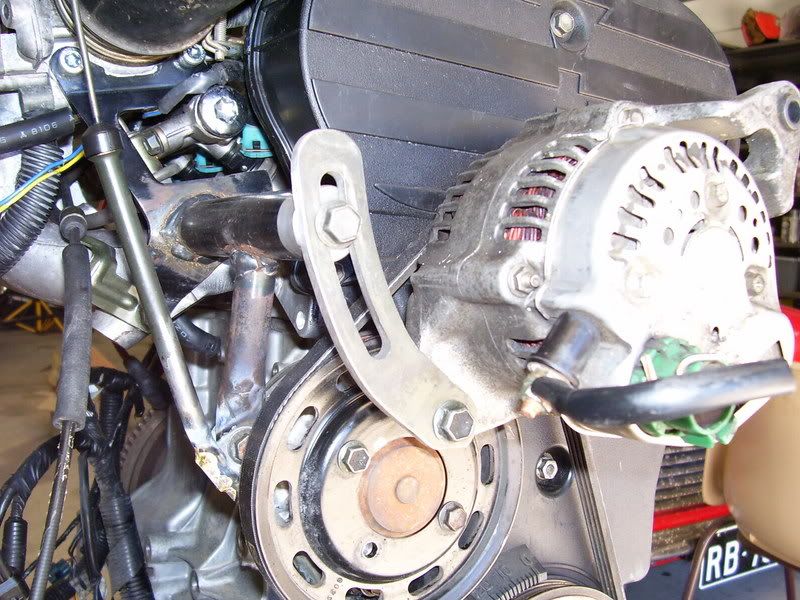
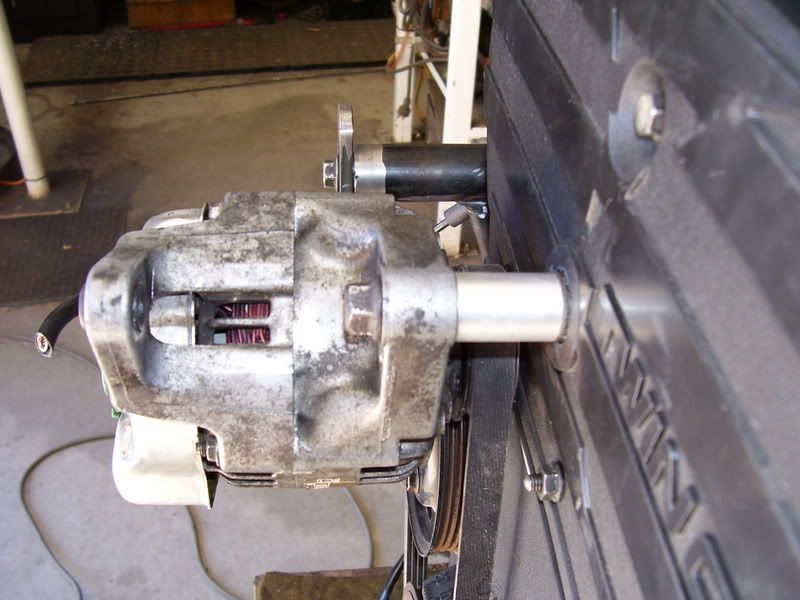
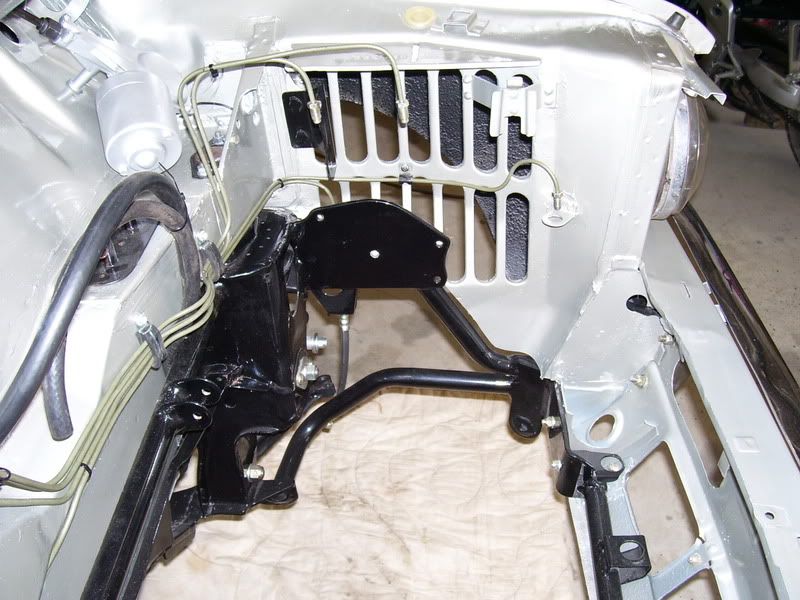
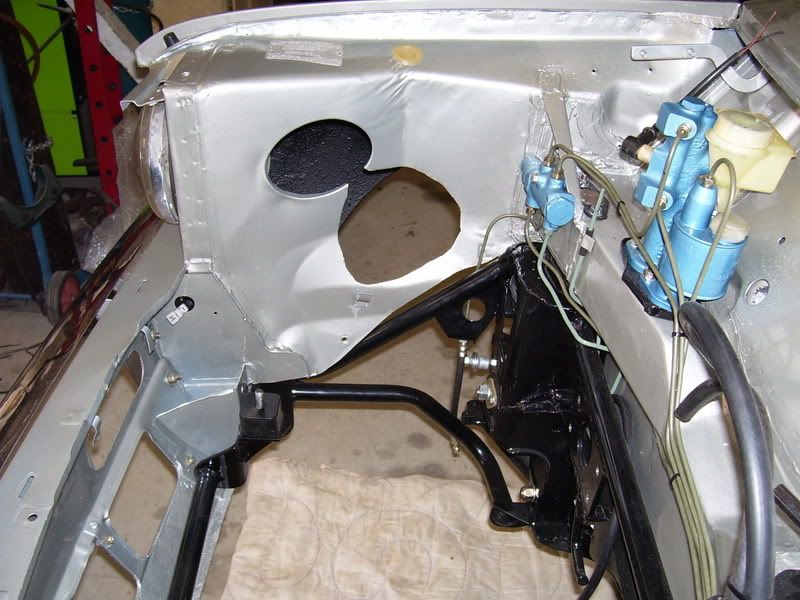
A hole is cut in the r/h inner guard to alloy the mounting of the alternator

Image

Alternator mount was then fabricated

Image
Image

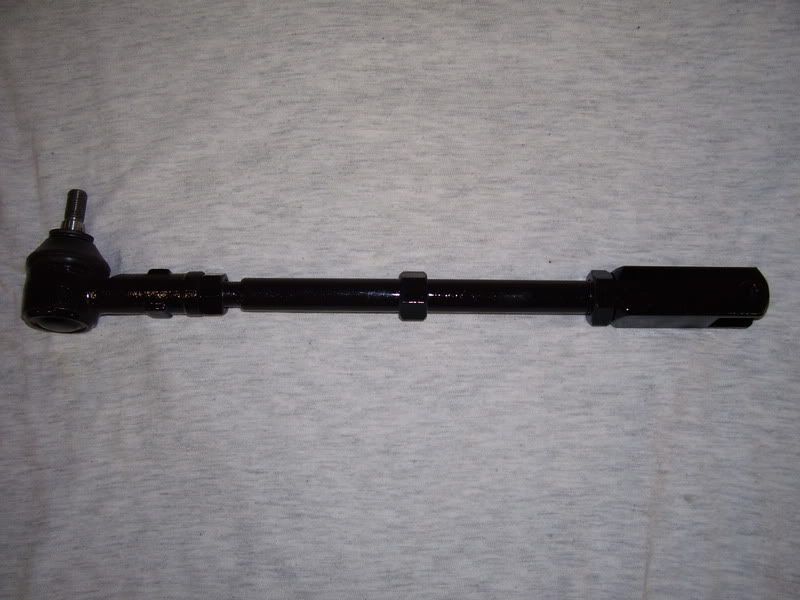
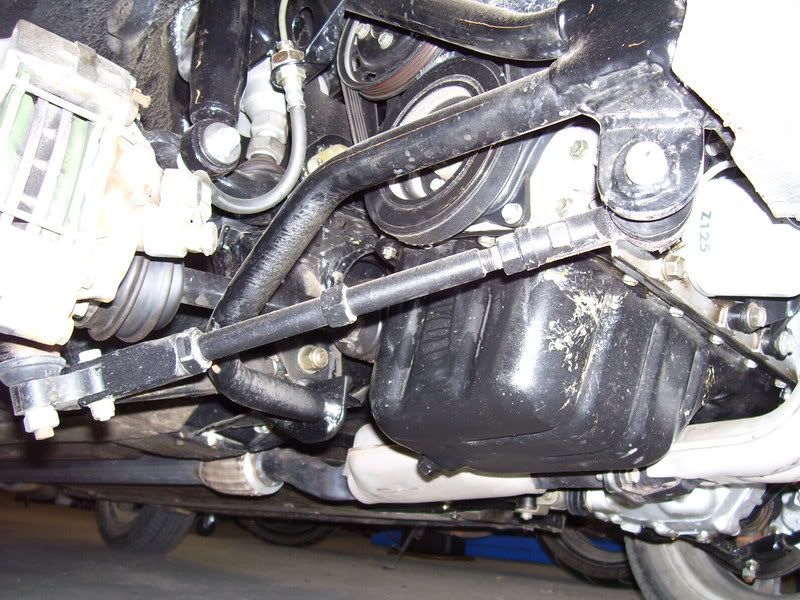
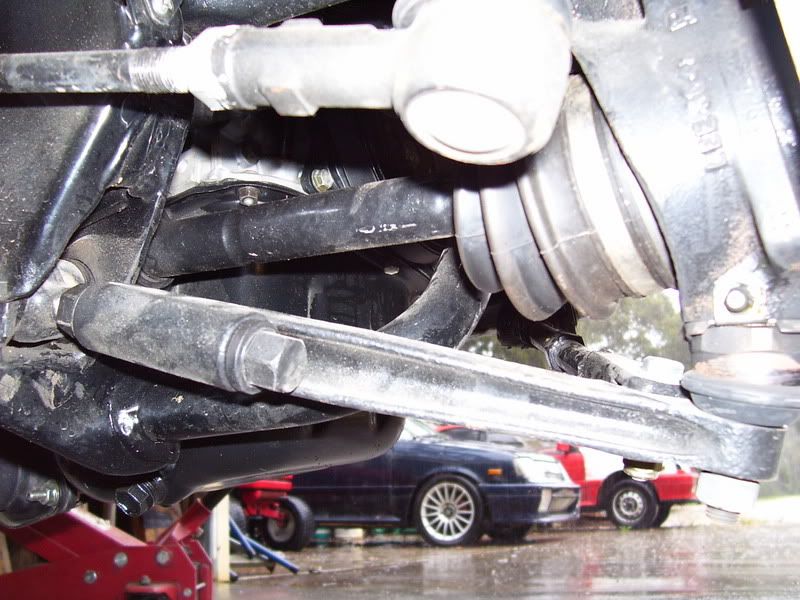
Fabricated adjustable tie bars & Mini Spares adjustable bottom suspension arms

Image
Image
Image

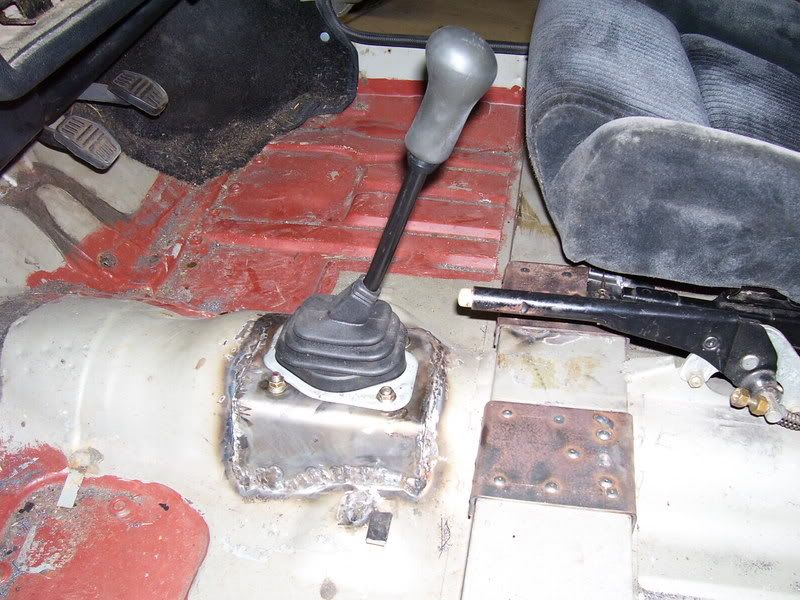
Suzuki gearshift mount & cut/shut shift rods

Image
Image

Engine bay all nicely repainted with subframe installed

Image
Image
Image


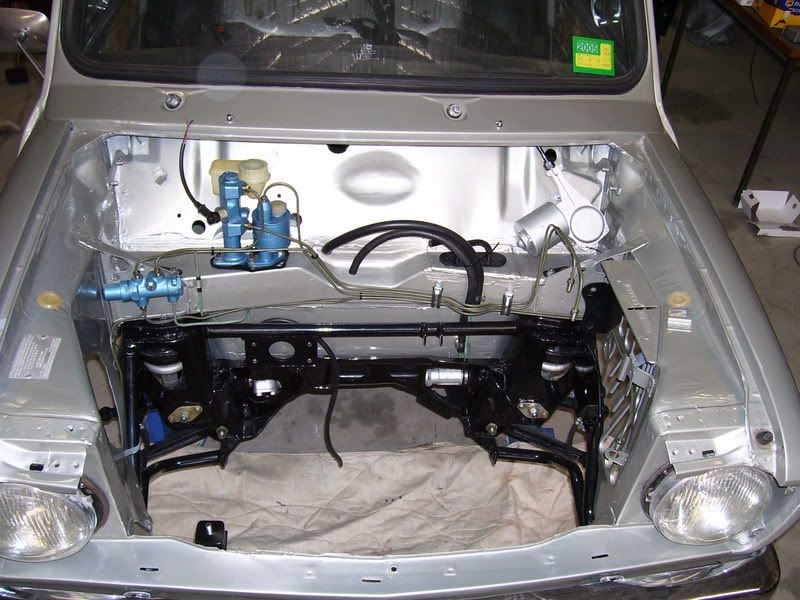
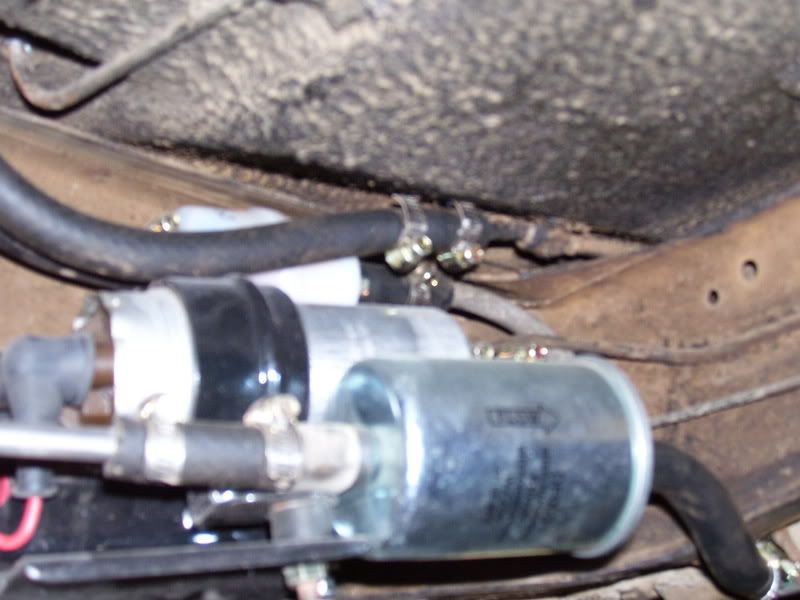
VL Commodor fuel pump & filters

Image

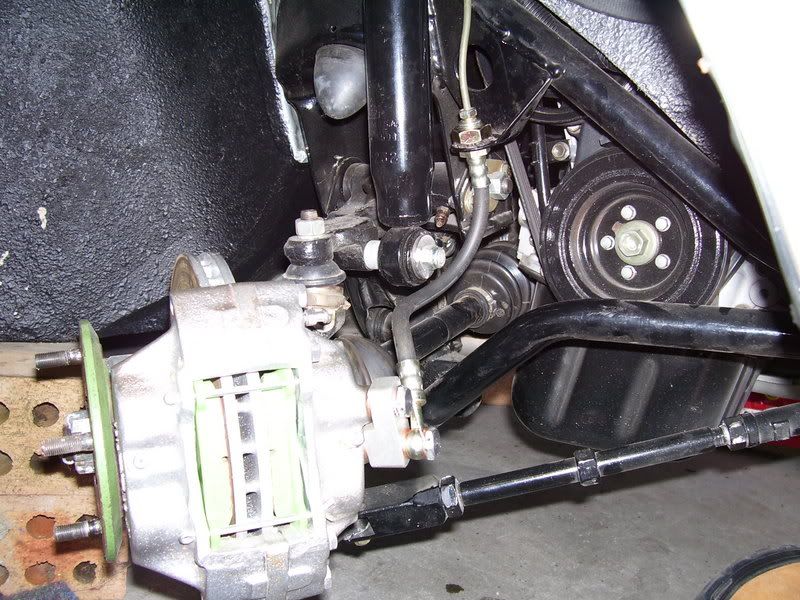
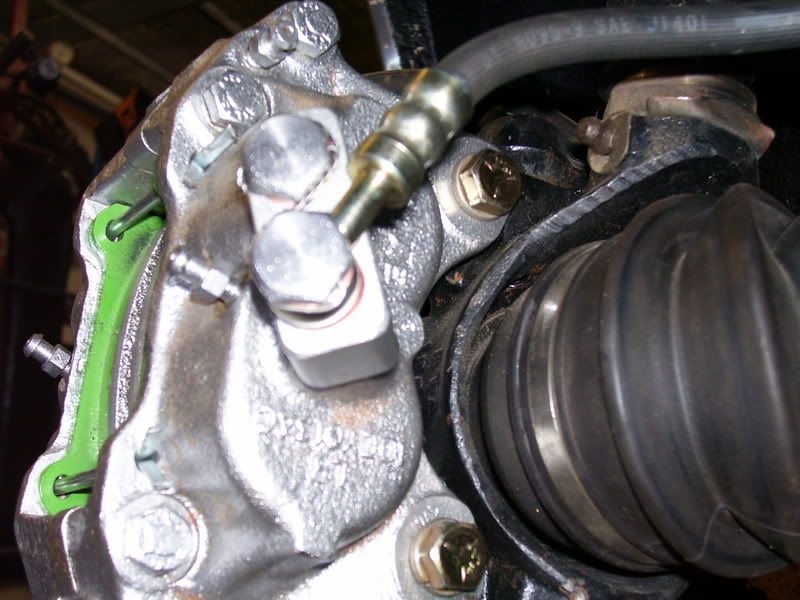
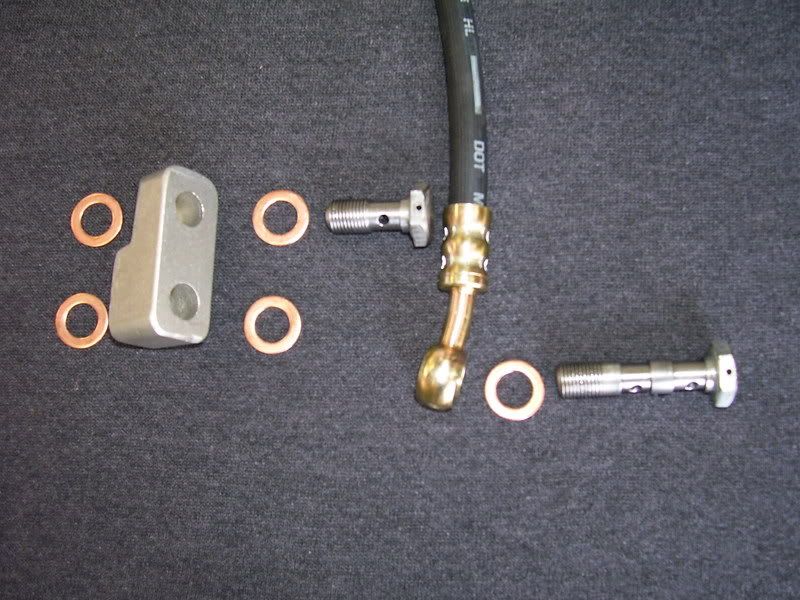
Metro turbo ventilated brakes useing a single hose. The machined up block joins the
ports in the 4 spot calliper

Image
Image
Image

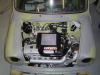
Final engine installed with SR20 throttle body & front mount AFM & K&N filter

Image

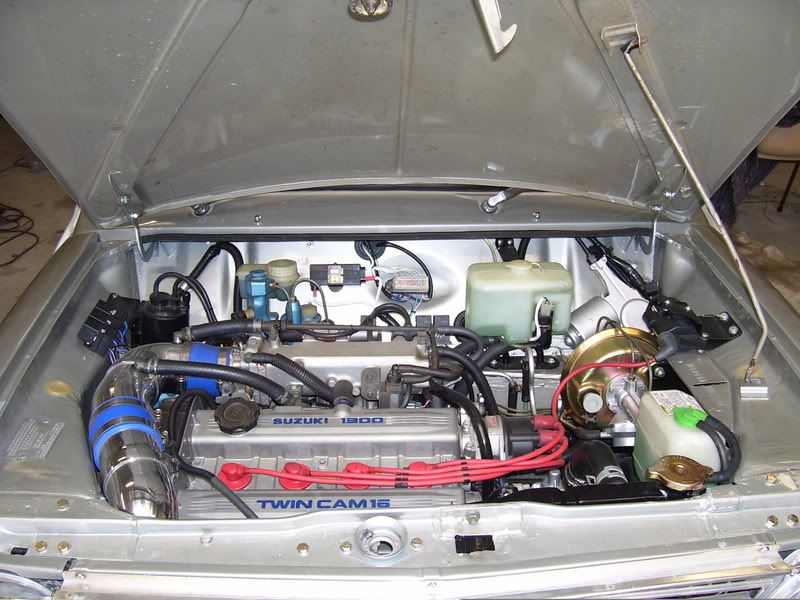
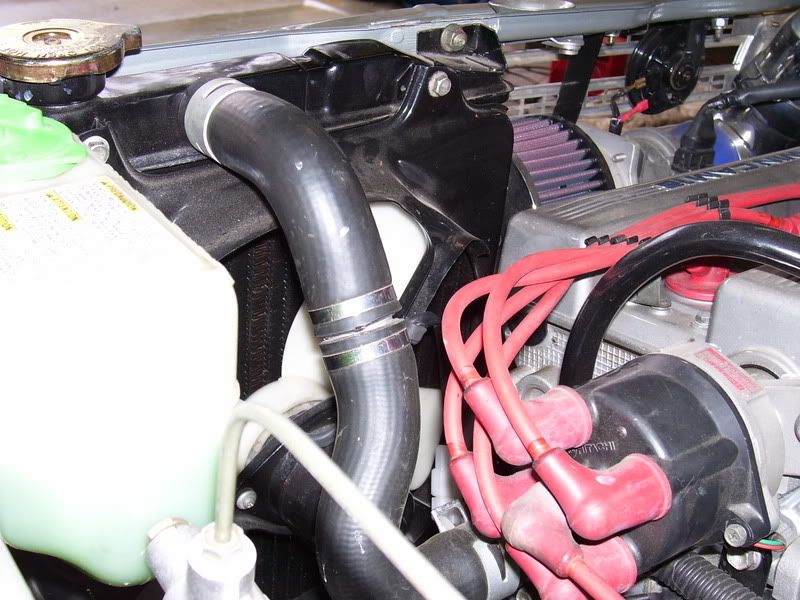
A Diahatsu 1200 radiator fits perfectly with just a little taken out of the fan shroud
A combination of V8 Valiant & Datsun 1200 make up the radiator hoses

Image

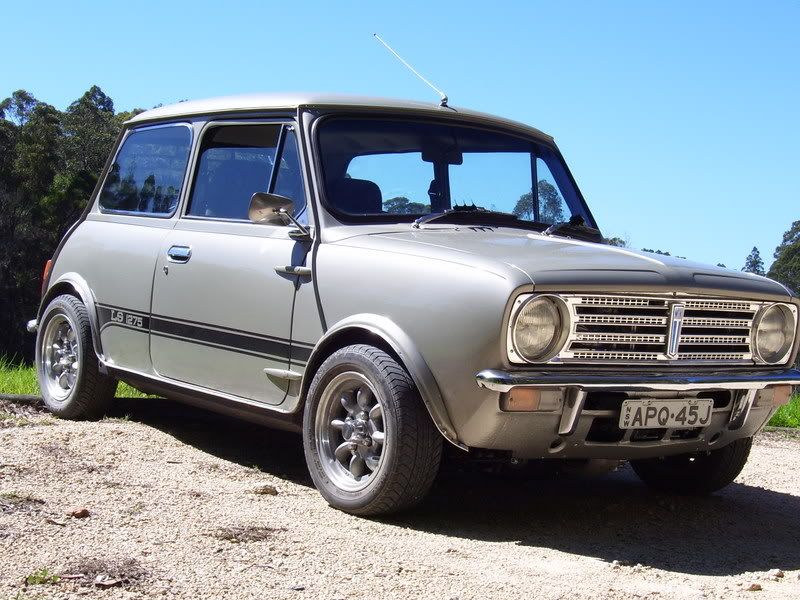
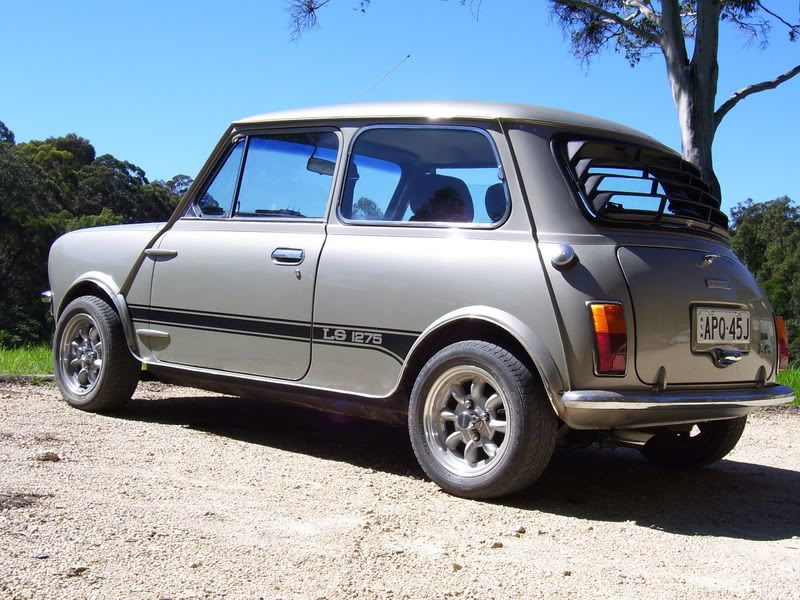
So here it is all finished, looking fairly standard (which is what I wanted) complete with
"granny" rear louver, Honda Prelude front bucket seats & 12x5 Superlites
Next job fit the Mini Spares dash & redo the interior
Who can pick the decals?
ENJOY

Image
Image

_________________
Keep shiny side up


Top
 Profile  
 
 Post subject:
PostPosted: Tue May 08, 2007 5:11 pm 
Offline
1275cc
1275cc
User avatar

Joined: Fri Oct 28, 2005 10:40 pm
Posts: 2051
Location: newcastle
nice write up mate.......

love the sleeper look...

your hard work has paid off ..

_________________
Image


Top
 Profile  
 
 Post subject:
PostPosted: Tue May 08, 2007 5:15 pm 
Offline
1275cc
1275cc
User avatar

Joined: Sun Mar 21, 2004 10:28 am
Posts: 2452
Location: Wollongong
UNREAL job there blue, awsome effort mate!

The motor looks like it came out of the factory like that. Heres to many years of trouble free mini driving 8)

cant wait to see it in person, hopefully wakefield next year you can line up beside me in it hehe :D

_________________
1974 Moke - 998cc
76 Clubman B16a2 Vtec AWD Turbo 12.9@105mph
https://www.youtube.com/watch?v=V9PW49e1hYs


Top
 Profile  
 
 Post subject:
PostPosted: Tue May 08, 2007 5:43 pm 
Offline
1360cc
1360cc
User avatar

Joined: Thu Feb 03, 2005 1:41 pm
Posts: 12311
Location: Rockingham - Collie WA
Very tidy. A lot of planning & well thought out work has gone into that.

_________________
Too many cars, and too little time.


Top
 Profile  
 
 Post subject:
PostPosted: Tue May 08, 2007 9:10 pm 
Offline
998cc
998cc
User avatar

Joined: Wed Jul 20, 2005 8:23 pm
Posts: 776
Location: Concord West, NSW
Excellent work, i like the fact it looks like a sleeper 8) .

Dan


Top
 Profile  
 
 Post subject:
PostPosted: Tue May 08, 2007 9:32 pm 
Offline
Yay For Hay!
User avatar

Joined: Wed Sep 08, 2004 9:27 pm
Posts: 15912
Location: Wodonga - Vic/NSW border
neato mosquito!

loving that subframe - what's the full story with the computer tube bending??

_________________
did I tell you that I won a trophy?


Top
 Profile  
 
 Post subject: G13B into LS1275
PostPosted: Tue May 08, 2007 10:08 pm 
Offline
848cc
848cc
User avatar

Joined: Fri Oct 22, 2004 5:31 pm
Posts: 181
Location: Central Tilba NSW
skssgn wrote:
what's the full story with the computer tube bending??


The guy who bent the tubes up manufactures motorcycle stands & the machine that bends them uses a computor generated drawing/program to make the compound bends at the correct distance & angle. Although the bends are'nt "mandrel bent" you would think they were they are that good

Blue

_________________
Keep shiny side up


Top
 Profile  
 
 Post subject:
PostPosted: Wed May 09, 2007 6:21 am 
Offline
1275cc
1275cc
User avatar

Joined: Fri Jun 17, 2005 10:31 am
Posts: 3183
Location: Burpengary, Queensland - Home of Tricky Performance Engineering
Great job Blue!

Another succesful Suzuki conversion......

Enjoy the fruits of your labour - and good to see you sharing your wealth on knowledge wit the rest of us.

Q: Is there sufficient clearance between the alternator and the wheel on full lock and full compression (bump)??

Nice use of alternative parts too (Datsun 1200 rad etc)

Cheers,
Tricky

_________________
"Not Speeding Officer..........Qualifying"


Top
 Profile  
 
 Post subject: G13B into LS1275
PostPosted: Wed May 09, 2007 10:21 am 
Offline
848cc
848cc
User avatar

Joined: Fri Oct 22, 2004 5:31 pm
Posts: 181
Location: Central Tilba NSW
Archangel007 wrote:
.

Q: Is there sufficient clearance between the alternator and the wheel on full lock and full compression (bump)??


Yes mate, heaps, comes no where near it

Blue

_________________
Keep shiny side up


Top
 Profile  
 
 Post subject: Re: G13B into LS1275
PostPosted: Wed May 09, 2007 12:47 pm 
Offline
Yay For Hay!
User avatar

Joined: Wed Sep 08, 2004 9:27 pm
Posts: 15912
Location: Wodonga - Vic/NSW border
blumin wrote:
skssgn wrote:
what's the full story with the computer tube bending??


The guy who bent the tubes up manufactures motorcycle stands & the machine that bends them uses a computor generated drawing/program to make the compound bends at the correct distance & angle. Although the bends are'nt "mandrel bent" you would think they were they are that good

Blue


very interesting.... I'll keep that in mind - will he do it for others?

I'm sure you have this under control, but it made me have a double-take. the adjustable tie bars you've made using a steering tie-rod end - tie rod ends aren't made for those kind of forces, and do wear out. Just keep an eye on them for wear, as using them for caster control does put a lot of force on them....

_________________
did I tell you that I won a trophy?


Top
 Profile  
 
 Post subject: G13B into LS1275
PostPosted: Thu May 10, 2007 11:09 pm 
Offline
848cc
848cc
User avatar

Joined: Fri Oct 22, 2004 5:31 pm
Posts: 181
Location: Central Tilba NSW
The forces on the tie rod ends are in the same plane, weather they be used on the
steering rack or on the tie bars
DT has been useing the same sutup for about 6 years still with the original tie rod ends
& they are as good as new

Blue

_________________
Keep shiny side up


Top
 Profile  
 
 Post subject: Re: G13B into LS1275
PostPosted: Fri May 11, 2007 1:54 pm 
Offline
Yay For Hay!
User avatar

Joined: Wed Sep 08, 2004 9:27 pm
Posts: 15912
Location: Wodonga - Vic/NSW border
blumin wrote:
The forces on the tie rod ends are in the same plane, weather they be used on the
steering rack or on the tie bars
DT has been useing the same sutup for about 6 years still with the original tie rod ends
& they are as good as new

Blue


okey dokey, as long as it's in hand :)

_________________
did I tell you that I won a trophy?


Top
 Profile  
 
 Post subject: great job
PostPosted: Fri Jun 08, 2007 10:00 pm 
Offline
848cc
848cc

Joined: Mon Apr 25, 2005 8:42 pm
Posts: 89
Location: Adelaide
Gday mate just wondering the place you did this conversion does he or she wreck gti swifts as there is a blue and red mk1 gti swift in the photos number 4,9,17 ?

thanks Ralph.


Top
 Profile  
 
 Post subject: great job
PostPosted: Fri Jun 08, 2007 10:01 pm 
Offline
848cc
848cc

Joined: Mon Apr 25, 2005 8:42 pm
Posts: 89
Location: Adelaide
Gday mate just wondering the place you did this conversion does he or she wreck gti swifts as there is a blue and red mk1 gti swift in the photos number 4,9,17 ?

thanks Ralph.


Top
 Profile  
 
 Post subject:
PostPosted: Fri Jun 08, 2007 10:33 pm 
Offline
848cc
848cc

Joined: Mon Dec 13, 2004 10:53 am
Posts: 14
Location: Nthrn Suburbs, NSW
Did you use the GTI g/box? Or Cino g/box?


Top
 Profile  
 
Display posts from previous:  Sort by  
Post new topic Reply to topic  [ 27 posts ]  Go to page 1, 2  Next

All times are UTC + 10 hours


Who is online

Users browsing this forum: No registered users and 6 guests


You cannot post new topics in this forum
You cannot reply to topics in this forum
You cannot edit your posts in this forum
You cannot delete your posts in this forum
You cannot post attachments in this forum

Jump to:  

© 2016 Ausmini. All garage work involves equal measures of enthusiasm, ingenuity and a fair degree of irresponsibility.