Ausmini
It is currently Tue Jul 08, 2025 6:07 am

All times are UTC + 10 hours


Post new topic Reply to topic  [ 64 posts ]  Go to page 1, 2, 3, 4, 5  Next
Author Message
PostPosted: Wed Sep 26, 2007 7:47 pm 
Offline
This space for rent
User avatar

Joined: Thu Feb 08, 2007 12:40 pm
Posts: 5455
Location: Melbourne
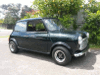
I've been planning this conversion for months now, and it's finally time to get stuck in 8) 8)

The car is a 1970 hydro K with a warm 1152, twin 1-1/4" SUs, BL 731 cam (I think), 12G295 head, and 3-1 extractors into a 1-3/4" stainless exhaust.

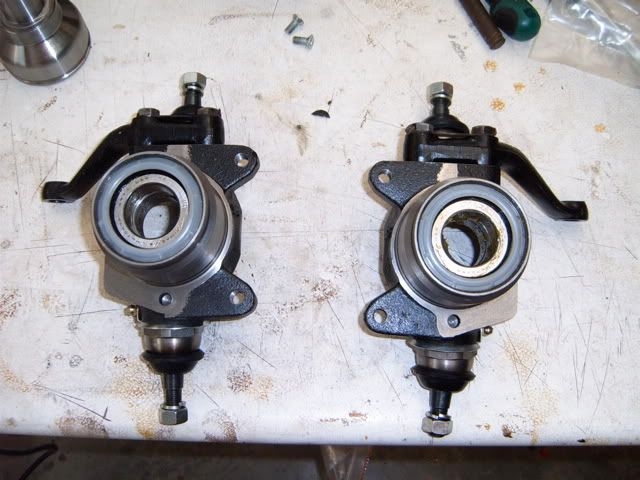
What I'm doing is ditching the spaced drum setup, in favour of a set of Mini Spares' alloy 4-spot calipers, clamping slotted 7.5" discs. This is purely a road car, but the aim is to get the car stopping really well before I start belting the thing around inner-city Melbourne traffic again.

In its current state the drums stop reasonably well, but only just after they've been adjusted after which they deteriorate pretty quickly. I hate adjusting drums all the time, hence the discs 8)

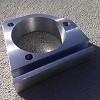
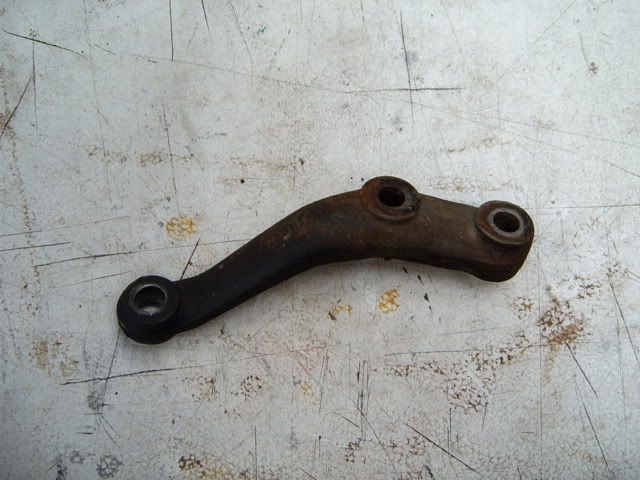
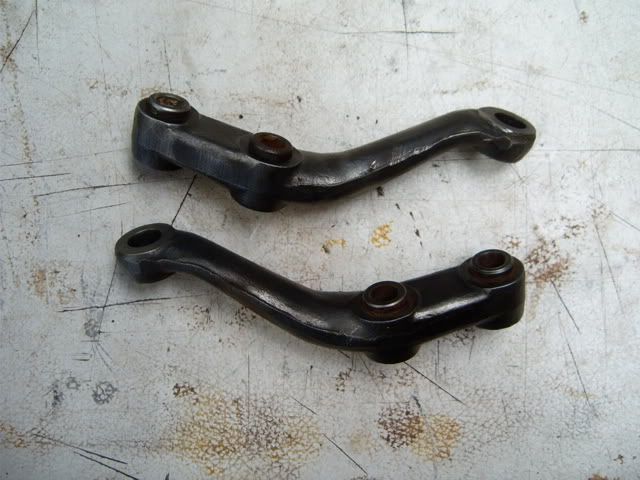
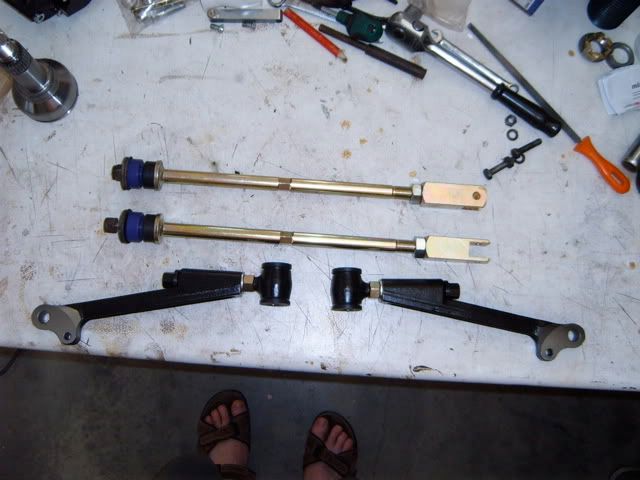
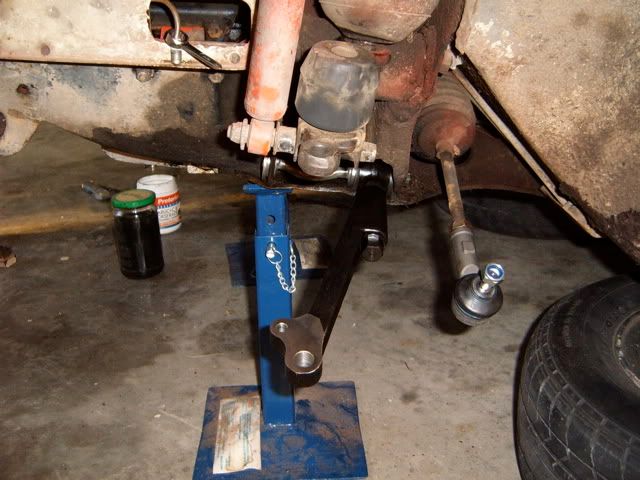
While I'm swapping hubs, CVs, etc. I figured I'd also throw a set of adjustable lower arms and caster rods on at the same time, with the intent of dialling out a bit of a geometry problem resulting from a whack in a PO's life.

When researching the conversion, I took a bit of a gamble on the Mini Spares alloy 4-pot calipers. Their documentation says they're designed to fit under most 10" alloy rims, but no specifics. I've got a set of ROH S-offset Contessa's, so I figured they'd be the most common wheel for this setup and the calipers should fit.

Hopefully.

The other gamble is that Mini Spares specifically mention that there are "clearance problems" fitting these calipers with adjustable lower arms & caster rods to hydro cars, but again they don't like to elaborate. Umm... :roll:

So, anyhoo. Enough ramble, the horde wants pics :lol: :lol:

This is a wheel. Hey, I had to start somewhere :lol:

Image

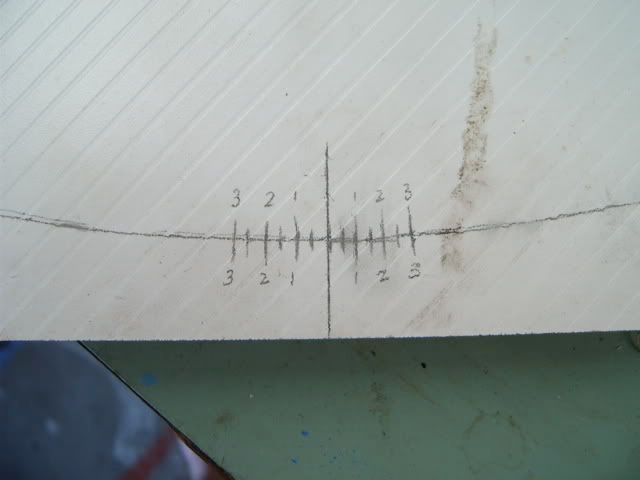
This side of the car has about one degree of negative camber, but the other side is about 0.75° positive. Can't wait to get those arms on...

Image

Oh, this is my home-made camber gauge. Take one piece of MDF, three screws, some fishing line, a washer and a brush up on high-school trigonometry and viola!

Image

Image

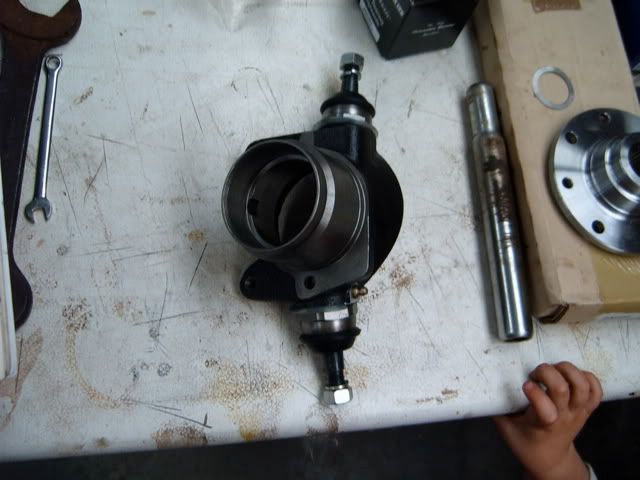
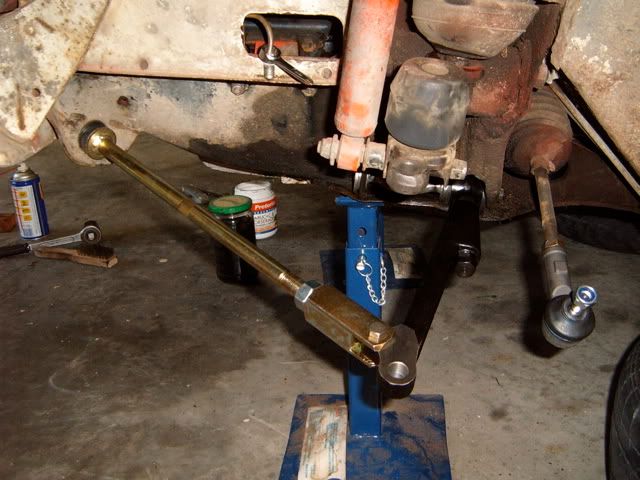
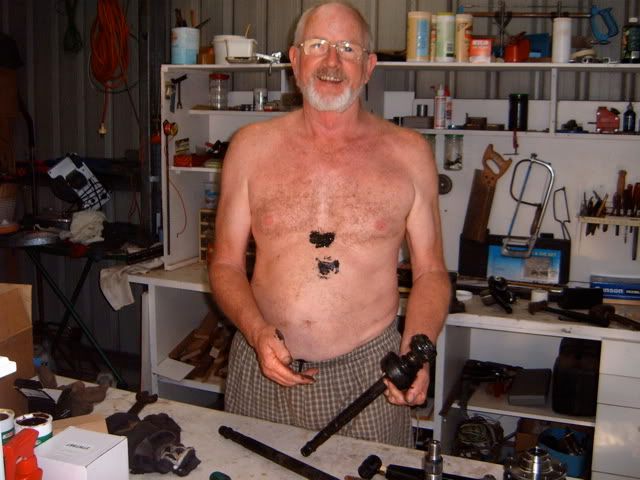
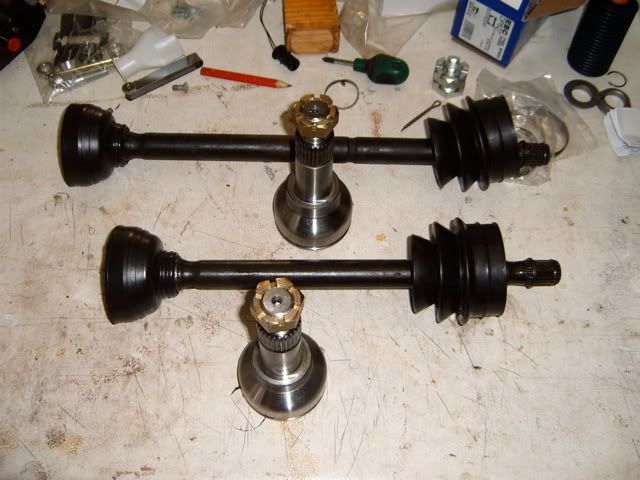
First cab off the rank after measuring the existing camber was to bench assemble one hub, drive flange, disc, caliper and CV, and throw the lot in a wheel and pray it will fit. This is the assembly ready for its test fit.

Image

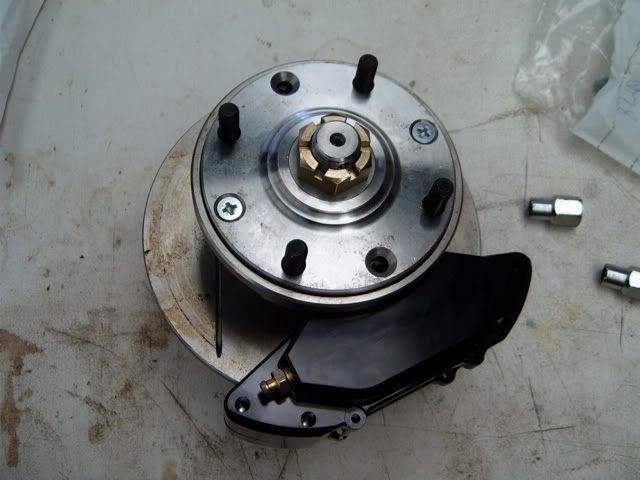
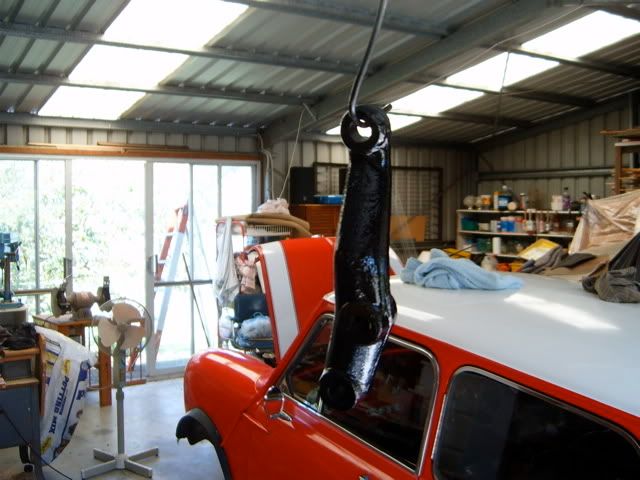
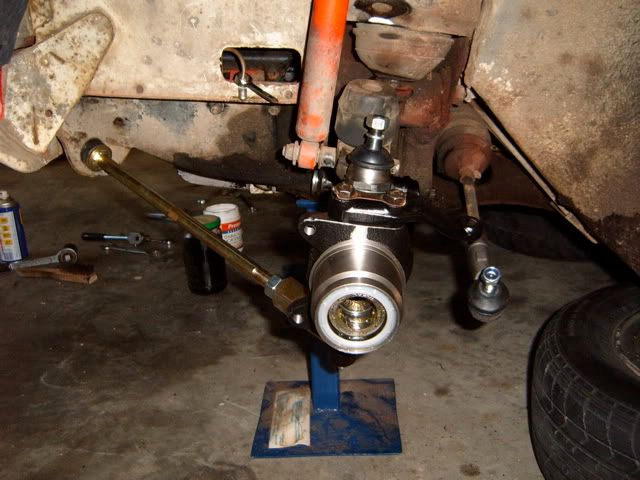
Man, those alloy calipers are pure sex incarnate :twisted:

I was really nervous at this point.. the whole project hinged on what happened next:

Image

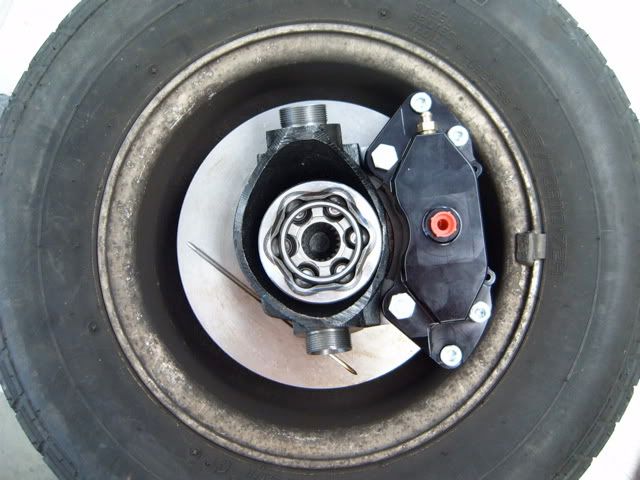
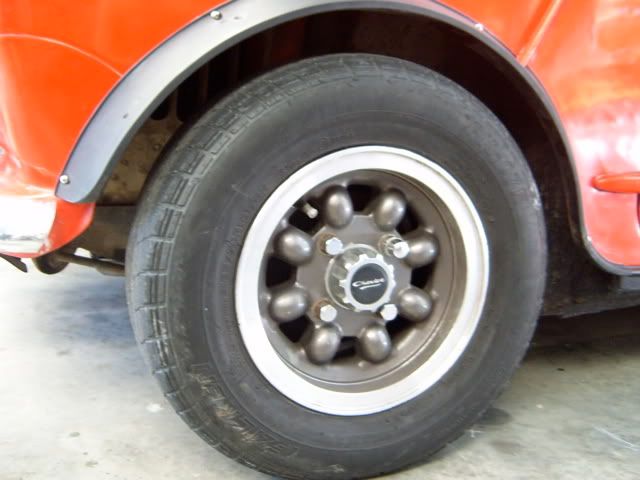
Woooooooooooooooo HOOOOOOOOOOOOOOOOO!!! It FITS!

.. but only JUST:

Image

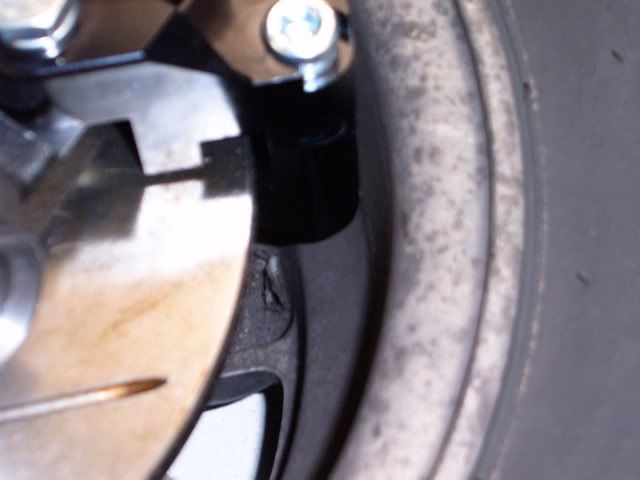
The outside edge of the caliper is probably only 2mm from the inside of the rim... now I'm hoping the wheels are true :lol:

So, now that there's a chance this is all going to work, it's time to get hands dirty and pull the drums off.

Image

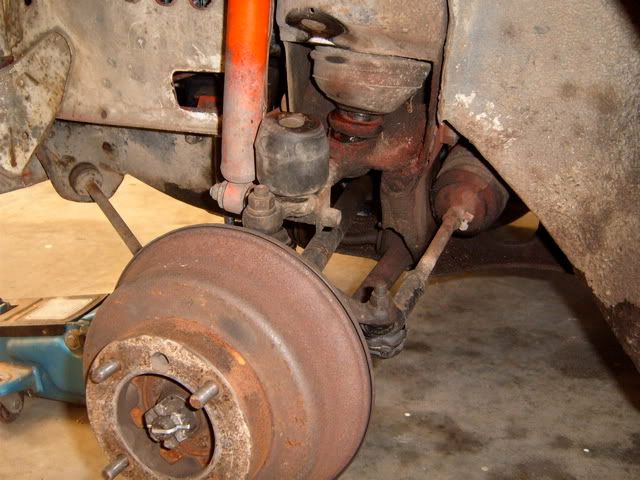
She's a bit road-weary...

It took only about half an hour to get from that, to this:

Image

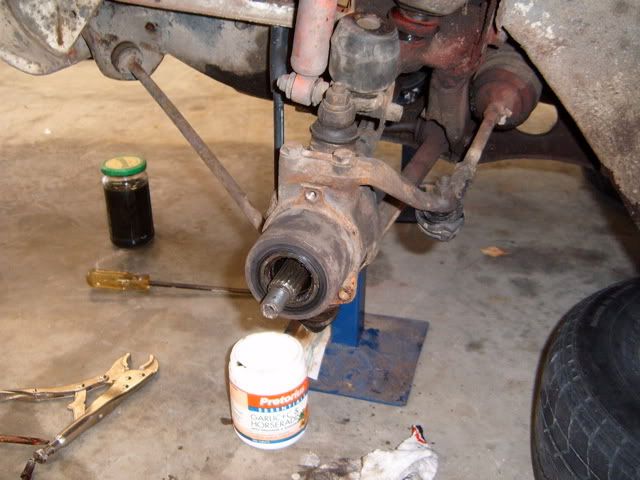
This is all going too well, surely? :lol:

Image

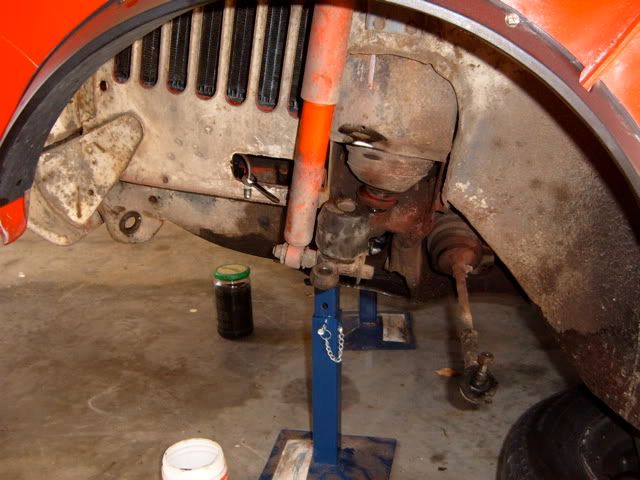
And there we are. One fully disassembled Mini front suspension. All the ball joints split really easily.. I expected a much tougher fight.

Tomorrow we start pulling down the other side.

_________________
Simon

The adventures of an owner builder in the Tallarook Ranges

Image


Top
 Profile  
 
 Post subject:
PostPosted: Wed Sep 26, 2007 9:38 pm 
Offline
The Forkmeister
User avatar

Joined: Sun Sep 17, 2006 3:33 pm
Posts: 1029
Location: camden
Good on ya mate, it's always good to get that start and by the looks of it should go smoothly,oop's I shouldn't have said that :wink: .Good luck with the conversion and keep the updates comming.

cheers Gerg

_________________
Image
May the fork be with you.


Top
 Profile  
 
 Post subject:
PostPosted: Thu Sep 27, 2007 7:13 am 
Offline
Postally Verbose
Postally Verbose
User avatar

Joined: Mon Jan 02, 2006 9:12 am
Posts: 19595
Location: Northern NSW
I'd love to see what's going to happen the first time you put the brakes on hard being used to drum brakes and then fitting those , that strange bouncing sensation will be your back wheels on the road .

_________________
Image


Top
 Profile  
 
 Post subject:
PostPosted: Thu Sep 27, 2007 8:07 am 
Offline
1098cc
1098cc
User avatar

Joined: Fri Aug 26, 2005 1:03 pm
Posts: 1540
Location: Napier, NZ
Congrats on giving a reasonable reason for switching to disks....none of this unqualified "they stop better" crap 8)


Top
 Profile  
 
 Post subject:
PostPosted: Thu Sep 27, 2007 9:50 am 
Offline
Give Ash some flowers Nick .
User avatar

Joined: Wed Aug 09, 2006 1:22 pm
Posts: 10149
Location: Toowoomba Region, QLD
That's starting to look really good. I think this may have to be put in the "how to" section. You're lucky with those wheels, I hope they are true!

_________________
"In two years time your car will be like a lady's clothes, out of date, my car will still be in fashion when I am dead" - Sir Alec speaking to Pininfarina


Top
 Profile  
 
 Post subject:
PostPosted: Thu Sep 27, 2007 12:07 pm 
Offline
This space for rent
User avatar

Joined: Thu Feb 08, 2007 12:40 pm
Posts: 5455
Location: Melbourne
sports850 wrote:
I'd love to see what's going to happen the first time you put the brakes on hard being used to drum brakes and then fitting those , that strange bouncing sensation will be your back wheels on the road .


Yeah, looking forward to that 8) 8) Gotta go get me a set of ⁵⁄₈" (IIRC) 'S' rear slave cylinders, otherwise I forsee a pirouette or two in my near future :lol:

Brief lunchtime update: The driver's side was more like I expected -- the steering rod end didn't want to split, so I had to introduce Messrs WD40 and BFH. Where there's a will...

The other hold up has been the removal of the steering arms from the drum hubs. One came off really easily, but the driver's side was seized fast and we had to bring out the grinder and take the head off one of the bolts. So now it's off to find a new HT item. Likewise, the bushes on the driver's side lower suspension arm pin were seized on solid, so the grinder got another workout.

The agenda for this afternoon is to build up the uprights, fit the CV's and wheel bearings and get some bits fitted to the car :D

-- Simon

_________________
Simon

The adventures of an owner builder in the Tallarook Ranges

Image


Top
 Profile  
 
 Post subject:
PostPosted: Thu Sep 27, 2007 1:33 pm 
Offline
1275cc
1275cc
User avatar

Joined: Mon Jan 01, 2007 11:34 am
Posts: 2425
Location: Hurstbridge n/e Melbourne
this looks fantastic! and you're making it seem so easy.

some may realise that we've been looking for a decent clubby with discs for a while without a whole heap of success - if the conversion works as well as you make it seem to this may be a better option.

can I be so rude as to ask for a ball-park $ figure?

_________________
'62 Morris 850 (Marion)
'65 Mini Delux - sleeper 1275/S discs (Ms Plum)
'69 Vanden Plas Princess 1300
'71 Wolseley 1300
'74 Austin 1300 Countryman
'94 XJ6 Sport 3.2
'04 Rover 75 CDTi


Top
 Profile  
 
 Post subject:
PostPosted: Thu Sep 27, 2007 5:43 pm 
Offline
This space for rent
User avatar

Joined: Thu Feb 08, 2007 12:40 pm
Posts: 5455
Location: Melbourne
rehab1964 wrote:
can I be so rude as to ask for a ball-park $ figure?


I brought all the bits in direct from Mini Spares in the UK, and the breakdown was as follows:

4-pot alloy caliper disc conversion kit (includes ball joints, disc CVs, disc uprights, bearings, drive flanges, discs, pads, alloy calipers, etc): £550

Adjustable suspension kit (includes lower arms, tie rods, all bushes and rear camber/toe brackets): £86

Long-type steering track rod ends: £12

Freight (wait for it): £197 (!!!) although that's express, at your door in 4 business days.

Customs duty: Next to nothing (they calculated duty on the steering rod ends, not the whole order)

GST: 10%

.. which at today's exchange rate is a total around the $2,000 mark delivered. I'm not sure you could get the same parts locally for the same $$.. some may disagree though. Certainly the alloy 4-pot calipers are an exxy item locally, but not so direct from the UK. Take maybe three or four hundred $$ off for standard 'S' cast iron calipers and standard (i.e. non-slotted) 7.5" discs.

I'm fitting everything myself, so there's obviously no labour charge involved in getting the car on the road, aside from getting a full wheel alignment done.

Every part is brand new, so if you're looking for a disc-equipped car you should factor in around $2,000 assuming everything is in as-new condition.

-- Simon

_________________
Simon

The adventures of an owner builder in the Tallarook Ranges

Image


Top
 Profile  
 
 Post subject:
PostPosted: Thu Sep 27, 2007 7:50 pm 
Offline
This space for rent
User avatar

Joined: Thu Feb 08, 2007 12:40 pm
Posts: 5455
Location: Melbourne
OK, so here's tonight's update.

Work is progressing well, with few major roadblocks. The biggest problem today was getting the steering arms off the old hubs, but Mr Grinder solved that. This is what the arms looked like:

Image

Cleaned up on the bench wire wheel:

Image

.. and with a coat of paint:

Image

Building up the hubs:

Image

Seems we didn't get enough shims in the ball joint kits :x Each joint assembled dry measures about 62 thou to the hub, which means we need around 30 thou of shims, while the kit only supplies enough shims for 20-25 thou per joint. Ended up spending a bit of time pulling apart the old ball joints to rob them of shims :x

After an hour or two, this was the result -- two hubs ready to go on.

Image

One thing we were unsure of -- the Timkin tapered bearing kit was supplied with two different oil seals. One was the type I've seen before, and the other had a concave inner surface and a lip around the face to locate a teflon "cover". Seemed these were a better fit to the drive flange than the CV, so they went on the outside. Anyone know which is right?

Before we can fit the hubs, the lower arms need to go on. These are niiiiice 8)

Image

First on was the lower arm:

Image

There was a small problem here -- the pin locating the lower arm has to compress the bushes in the arm in order to be tightened. When fully tight, the keyed face of the end of the pin is supposed to mate with a welded plate on the subframe in order to prevent the pin from rotating.

Problem is, I couldn't get the bushes compressed far enough to engage the pin end. Going tighter on the nut would probably compress the bushes more, but I don't think the UNF thread will take it without stripping.

Both sides are the same -- the lower arm pin key isn't engaged with the subframe. I'm guessing I'll need to re-tighten these once the suspension has a few miles under its belt and the bushes have compressed.

The tie rod presented no such challenges :)

Image

I couldn't help myself and had to see what it's going to look like :roll:

Image

The next job was to remove the old pot-joint boots on the drive shafts, as they were getting a bit old. My Chief Mechanic (aka Dad) took this job, and learned how not to do it :lol: :lol:

Image

Note to self: The passenger side drive shaft is shorter than the driver's side :lol: :lol:

Image

Much laughter later, we have two drive shafts ready to be mated to their CVs.

Image

.. which is a job for tomorrow.

-- Simon

_________________
Simon

The adventures of an owner builder in the Tallarook Ranges

Image


Top
 Profile  
 
 Post subject:
PostPosted: Thu Sep 27, 2007 7:59 pm 
Offline
religious status
religious status
User avatar

Joined: Fri Mar 19, 2004 6:19 pm
Posts: 39753
Location: near Baulkham Hills, NSW
The lippy seals go on the C/V side.
The outer white plastic bit is a water/muck/salt etc excluder, Pommy cars used them.

_________________
DrMini- 1970 wasaMatic 1360, Mk1S crank, 86.6HP (ATW) =~125 @ crank, 45 Dellorto (38 chokes), RE282 sprint cam, 1.5 rockers, 11.0:1 C/R. :mrgreen:


Top
 Profile  
 
 Post subject:
PostPosted: Thu Sep 27, 2007 8:06 pm 
Offline
This space for rent
User avatar

Joined: Thu Feb 08, 2007 12:40 pm
Posts: 5455
Location: Melbourne
drmini in aust wrote:
The lippy seals go on the C/V side.
The outer white plastic bit is a water/muck/salt etc excluder, Pommy cars used them.


Crap. Crap. Crap.

I really don't want to try to pull those seals out.. does it really matter if they're inside out?

_________________
Simon

The adventures of an owner builder in the Tallarook Ranges

Image


Top
 Profile  
 
 Post subject:
PostPosted: Thu Sep 27, 2007 8:08 pm 
Offline
religious status
religious status
User avatar

Joined: Fri Mar 19, 2004 6:19 pm
Posts: 39753
Location: near Baulkham Hills, NSW
Not really, it never rains much here- but I'd fling the plastic bit if it fouls the drive flange. :wink:

_________________
DrMini- 1970 wasaMatic 1360, Mk1S crank, 86.6HP (ATW) =~125 @ crank, 45 Dellorto (38 chokes), RE282 sprint cam, 1.5 rockers, 11.0:1 C/R. :mrgreen:


Top
 Profile  
 
 Post subject:
PostPosted: Thu Sep 27, 2007 8:17 pm 
Offline
This space for rent
User avatar

Joined: Thu Feb 08, 2007 12:40 pm
Posts: 5455
Location: Melbourne
Sweeeet, there they stay then. Thanks for the tip, next time they'll go in the right way :)

_________________
Simon

The adventures of an owner builder in the Tallarook Ranges

Image


Top
 Profile  
 
 Post subject:
PostPosted: Thu Sep 27, 2007 9:07 pm 
Offline
848cc
848cc

Joined: Tue May 01, 2007 10:18 pm
Posts: 114
Since u got front disc dont u need a different master cylinder? or a different diferential switch/port for the difference in braking power from drum to disc?


Top
 Profile  
 
 Post subject:
PostPosted: Thu Sep 27, 2007 9:13 pm 
Offline
religious status
religious status
User avatar

Joined: Fri Mar 19, 2004 6:19 pm
Posts: 39753
Location: near Baulkham Hills, NSW
On early Minis when fitting S discs it's usual to replace the 3/4" rear wheel cylinders with the smaller 5/8" ones used on Cooper S.
If you don't, the car can lock the rears up in emergency braking. Not nice on the freeway at 110 kliks, as I found out... :!:

_________________
DrMini- 1970 wasaMatic 1360, Mk1S crank, 86.6HP (ATW) =~125 @ crank, 45 Dellorto (38 chokes), RE282 sprint cam, 1.5 rockers, 11.0:1 C/R. :mrgreen:


Top
 Profile  
 
Display posts from previous:  Sort by  
Post new topic Reply to topic  [ 64 posts ]  Go to page 1, 2, 3, 4, 5  Next

All times are UTC + 10 hours


Who is online

Users browsing this forum: No registered users and 16 guests


You cannot post new topics in this forum
You cannot reply to topics in this forum
You cannot edit your posts in this forum
You cannot delete your posts in this forum
You cannot post attachments in this forum

Jump to:  

© 2016 Ausmini. All garage work involves equal measures of enthusiasm, ingenuity and a fair degree of irresponsibility.