Ausmini
It is currently Mon Jun 23, 2025 8:41 pm

All times are UTC + 10 hours


Post new topic Reply to topic  [ 154 posts ]  Go to page Previous  1, 2, 3, 4, 5, 6, 7, 8 ... 11  Next
Author Message
 Post subject:
PostPosted: Thu Nov 15, 2007 3:41 pm 
Offline
1275cc
1275cc
User avatar

Joined: Fri Jun 17, 2005 10:31 am
Posts: 3183
Location: Burpengary, Queensland - Home of Tricky Performance Engineering
But it can make you get off your @ss gordo.

I love it when you start ticking things off!

_________________
"Not Speeding Officer..........Qualifying"


Top
 Profile  
 
 Post subject:
PostPosted: Fri Nov 16, 2007 11:49 am 
Offline
998cc
998cc
User avatar

Joined: Tue Nov 13, 2007 4:17 pm
Posts: 953
Location: NOR, Perth, W.A.
Archangel007 wrote:
Hi Morrie,

Thanks. The wastegate pipe will join up with the dump pipe proper just before the next 45 degree bend is welded on, so at the very end of the large pipe as you see it. They say try and make the wastegate pipe about 18 inches long before joining into the main exhaust stream.

Miniboy - the exhaust is made out of mild steel tubing, mandrel bent. Its the standard pipe that exhaust shops would use.


Excellent idea. My other car is a R33 Nissan Skyline (2.5L 6cyl Turbo) and the difference between fitting a "split" dump pipe (like Tricky/Tony will be using) and a open bellmouth was an additional 9 or 10rwkw - with no other changes Although you need to consider that the Skyline has 229rwkw but will provide a an excellent improvement in any car.

-Alan

_________________
-Alan
I blame my dad for my love of minis. I think I was conceived in the back seat of one :D
I also blame my Dad for me being 6' 1" - not really the optimum height for driving a Mini.


Last edited by Mearcat on Fri Nov 16, 2007 12:41 pm, edited 1 time in total.

Top
 Profile  
 
 Post subject:
PostPosted: Fri Nov 16, 2007 12:40 pm 
Offline
998cc
998cc
User avatar

Joined: Tue Nov 13, 2007 4:17 pm
Posts: 953
Location: NOR, Perth, W.A.
Oh and Tricky - did you change the design of the passengers engine mount since the El Gato subframe build? I seem to recall something different in El Gato vs Barbie???

_________________
-Alan
I blame my dad for my love of minis. I think I was conceived in the back seat of one :D
I also blame my Dad for me being 6' 1" - not really the optimum height for driving a Mini.


Top
 Profile  
 
 Post subject:
PostPosted: Fri Nov 16, 2007 1:29 pm 
Offline
1275cc
1275cc
User avatar

Joined: Fri Jun 17, 2005 10:31 am
Posts: 3183
Location: Burpengary, Queensland - Home of Tricky Performance Engineering
Mearcat,

Well done, good memory.

Yes we did, we went to the MKII subframe which had some slight changes, like the passenger side engine mounts.

QBR has now progressed onto the MKIII that has seen even more refinement. It's a continual proicess to make it safer, stronger and easier to manufacture.

For those who are interested, Barbie is coming back to QBR this weekend to have all his bits finished in a bid to meet the Xmas deadline.

Stay tuned.

Cheers,
Tricky

_________________
"Not Speeding Officer..........Qualifying"


Top
 Profile  
 
 Post subject:
PostPosted: Fri Nov 16, 2007 2:49 pm 
Offline
998cc
998cc
User avatar

Joined: Tue Nov 13, 2007 4:17 pm
Posts: 953
Location: NOR, Perth, W.A.
Considering there is a MKIII, I take it that QBR has been busy with making subframes.

Looking forward to the (bear) completed Barbie too !

_________________
-Alan
I blame my dad for my love of minis. I think I was conceived in the back seat of one :D
I also blame my Dad for me being 6' 1" - not really the optimum height for driving a Mini.


Top
 Profile  
 
 Post subject:
PostPosted: Fri Nov 16, 2007 2:54 pm 
Offline
1275cc
1275cc
User avatar

Joined: Fri Jun 17, 2005 10:31 am
Posts: 3183
Location: Burpengary, Queensland - Home of Tricky Performance Engineering
Yep, we have done a few this year!

_________________
"Not Speeding Officer..........Qualifying"


Top
 Profile  
 
 Post subject:
PostPosted: Fri Nov 16, 2007 3:52 pm 
Offline
1098cc
1098cc
User avatar

Joined: Thu Sep 30, 2004 3:12 pm
Posts: 1461
Location: Brisbane
Archangel007 wrote:
But it can make you get off your @ss gordo.

I love it when you start ticking things off!


Yeah but but but.....
I supose :roll:

_________________
If you want more inches, stroke it
Life's a garden.... Dig It!
http://www.ausmini.com/forums/viewtopic.php?t=20746


Top
 Profile  
 
 Post subject:
PostPosted: Fri Nov 16, 2007 7:03 pm 
Offline
1275cc
1275cc
User avatar

Joined: Thu Jun 03, 2004 2:56 pm
Posts: 3981
Location: Brisbane
Archangel007 wrote:
Yep, we have done a few this year!


Mk1 The Cat
Mk1.5 Hefty (the gti frame)
Mk2 Hefty
Mk2.5 Barbie
Mk 3 The Clubman Ute
Mk 3 Da Moke Man

Have I missed any?

_________________
But he's thriving and striving and hugging the turns.


Top
 Profile  
 
 Post subject:
PostPosted: Sat Nov 17, 2007 5:33 am 
Offline
1275cc
1275cc
User avatar

Joined: Fri Jun 17, 2005 10:31 am
Posts: 3183
Location: Burpengary, Queensland - Home of Tricky Performance Engineering
Nah, that's about it.

But in reality The Cat was the Mk I model

Hefty, Barbie, the Moke and the Ute were all MkII's

El Gato's new subframe (I used El Gato's old subframe on the ute, because his subframe was twisted) and any subsequent ones going forwrd, will be MkIII's.

MKIII's will, IMHO, be superior to the MKII's and easier for Tricky to build (which has to be a good thing).

Edit: Simon Kerr is actually designing the new subframe for our Honda conversions atm using SolidWorks (he is a God on SolidWorks). It will have no physical resemblance to the MKIII so we will have to start a new line of subframes. We are still deciding whther this one will be commercially available.
Cheers,
Tricky

_________________
"Not Speeding Officer..........Qualifying"


Top
 Profile  
 
 Post subject:
PostPosted: Sat Nov 17, 2007 9:27 am 
Offline
1275cc
1275cc

Joined: Sun Apr 02, 2006 2:38 pm
Posts: 2210
Location: Huon Valley, TAS
Archangel007 wrote:
We are still deciding whether this one will be commercially available.
Cheers,
Tricky
Yes please. I still like the Honda route as I used to be a Honda Service Manager before becoming a sysadmin.

Dicko


Top
 Profile  
 
 Post subject:
PostPosted: Sat Nov 17, 2007 9:36 am 
Offline
1275cc
1275cc
User avatar

Joined: Fri Jun 17, 2005 10:31 am
Posts: 3183
Location: Burpengary, Queensland - Home of Tricky Performance Engineering
Dicko,

Dont worru Ol' Son, wont forget about you! :wink:

_________________
"Not Speeding Officer..........Qualifying"


Top
 Profile  
 
 Post subject:
PostPosted: Sun Dec 02, 2007 8:23 pm 
Offline
1275cc
1275cc
User avatar

Joined: Fri Jun 17, 2005 10:31 am
Posts: 3183
Location: Burpengary, Queensland - Home of Tricky Performance Engineering
See below - double post! :wink:

_________________
"Not Speeding Officer..........Qualifying"


Last edited by Archangel007 on Sun Dec 02, 2007 8:46 pm, edited 1 time in total.

Top
 Profile  
 
 Post subject:
PostPosted: Sun Dec 02, 2007 8:46 pm 
Offline
1275cc
1275cc
User avatar

Joined: Fri Jun 17, 2005 10:31 am
Posts: 3183
Location: Burpengary, Queensland - Home of Tricky Performance Engineering
Hi People,

Well as I stated earlier, Barbie will be coming back to QBR so I can finish her off and get her on the road to be registered (figurative translation please!).

There was quite a list of things to do, as those of you who have read this thread can testify, so last weekend we had her dropped off to QBR to get the stuff done.

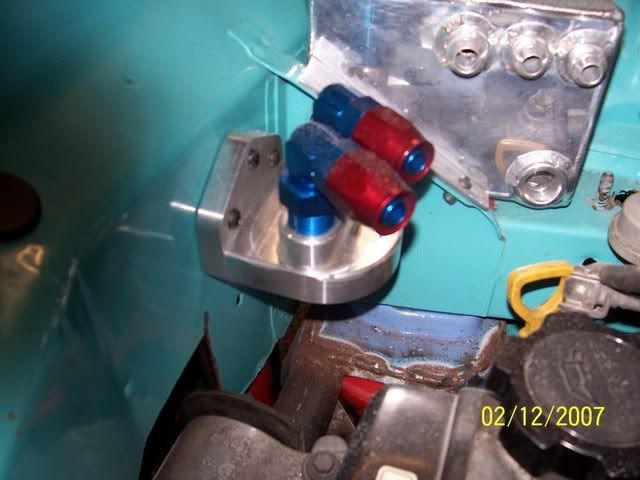
Firstly, I poked around the engine bay a bit, and removed the Toyota oil filter extension housing from the block, which added a whole heap of room down there. Then, I mounted the remote oil filter housing to the drivers side inner guard. Everything in this car is mounted using 6mm or 8mm allen bolts, either domed or countersunk, into nutserts - no self tappers here!

Oil filter:
Image

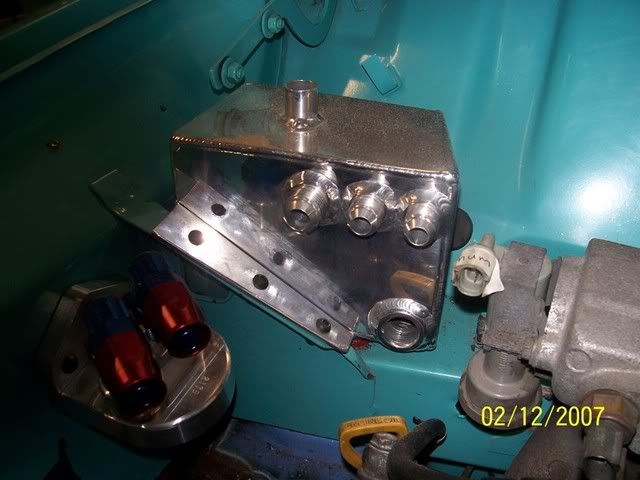
And then I decided to mount the oil catch can which has been specially made to QBR specs. It will take the two lines from the valve cover and one line from the manifold.
Image

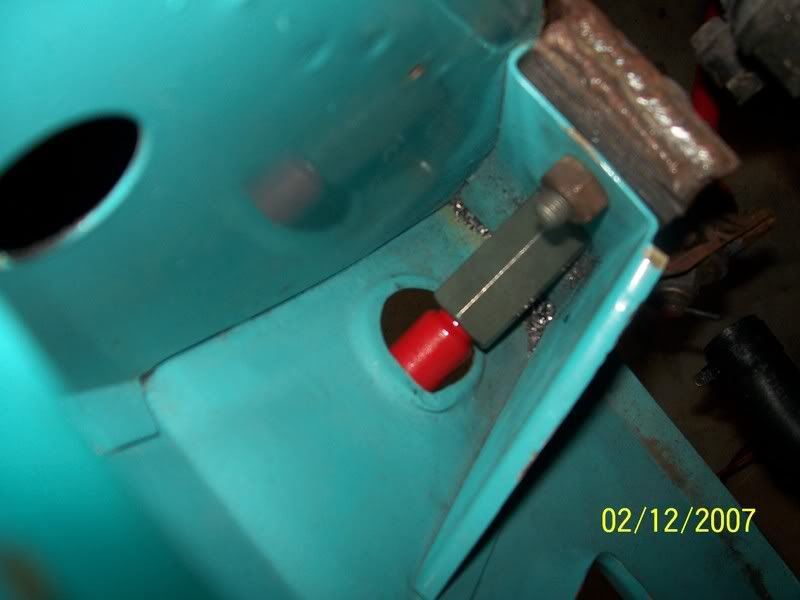
The next thing I looked at was one of Tony's wish list items, and that is a toeing and tie-down hook on the front and rear of Barbie. We came across the need for these a second time when the tow-truck driver complained of nowhere to tie the car down, except for around the lower control arms. I decided to have a look at what could be done - it seemed simple enough. Replace the standard mini 1/2" subrame mounting bolt with a 16mm hi-tensile item, then screw onto that an extended nut used for cyclone rod. Then, simply screw in the fabricated eye tow hook. When its screwed out, you cant notice a thing. Simple.

There is one each side. Here is a shot of the nut:
Image

And with the tow-hook screwed into place - lovely!
Image

Then I decided to do a bit of work inside the car. The shifter mechanism needs to be mounted on the floor of the car. I had Tony come over and dummy fit the drivers seat into the car so we could guage exactly where the shifter mechanism had to be located. This meant that the car and the driving position will be taylor-made to Tony, not Tony to the car. So when the position was located exactly, we found ( as is the norm if you are doing it right), that the handbrake lever had to be relocated.

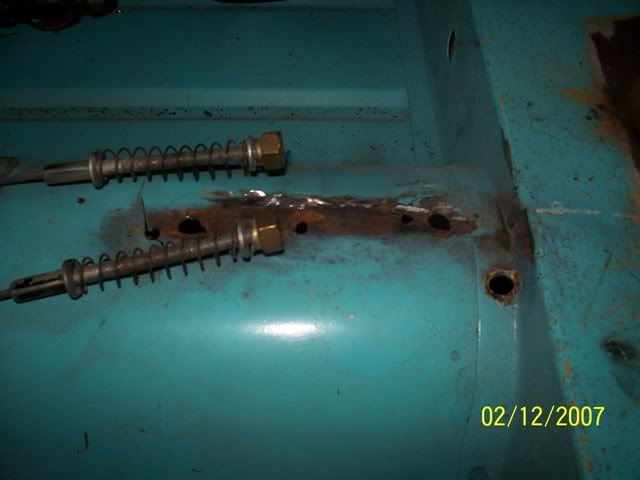
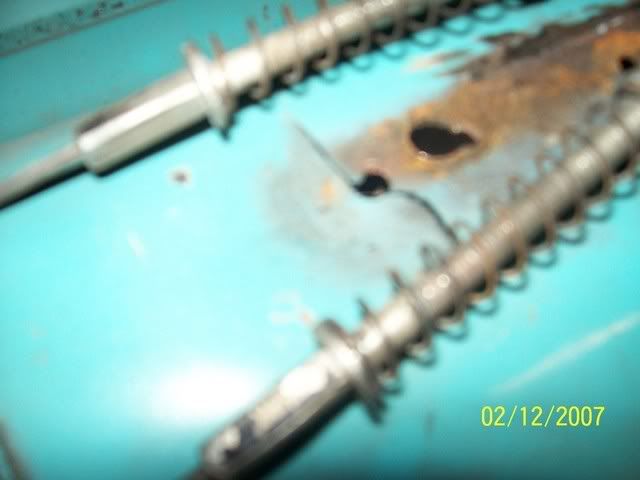
So, this meant cutting through all the welds and chiselling the handbrake off. Interesting thing to note with Barbie, was that the handbrake lever had been off before, and the previous mechanic had bolted it and welded it to the floor. Once I got it off I noticed a tear in the floor where it had previously come adrift - this had not been repaired, and another hole was just bodged up with silastic!

Handbrake off:
Image

Tear in floor where it had come adrift previously:
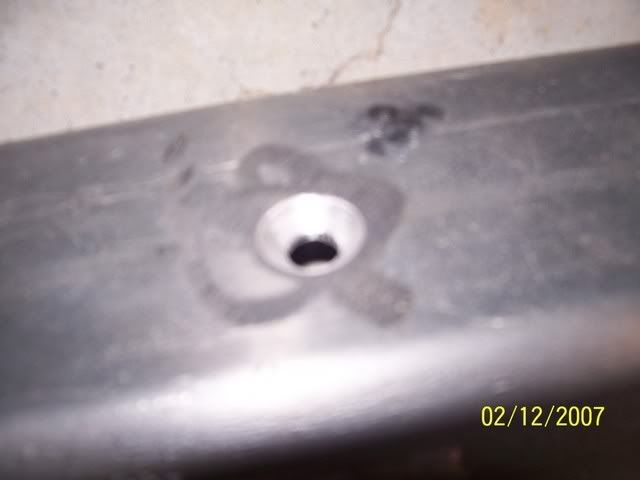
Image

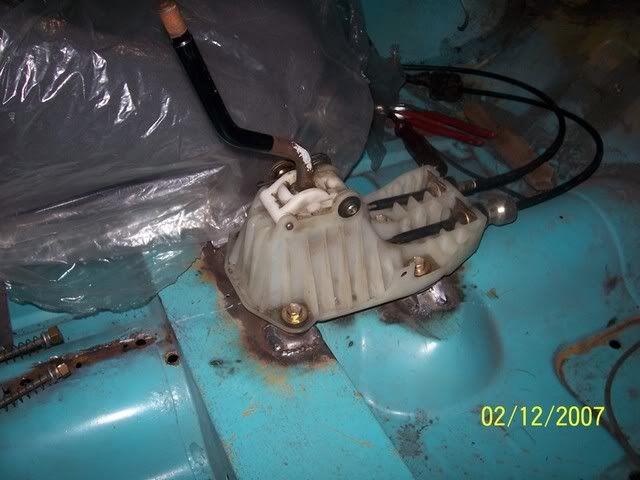
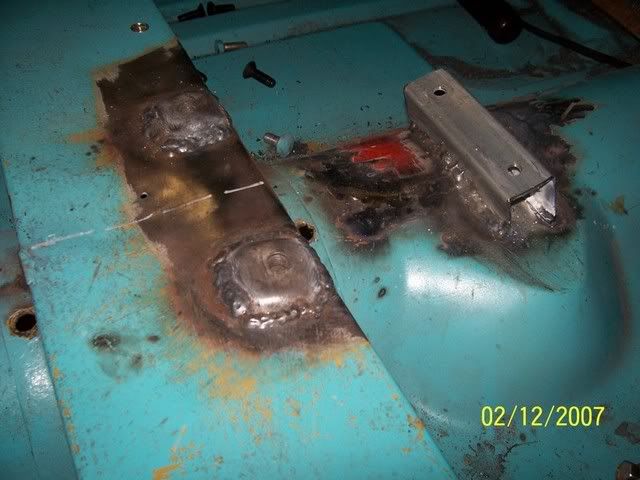
So, now that that was out of the way, one can mount the shifter mechanism. My usual method of mounting the mechanism is to cut the mounting bosses out of the starlet front cut and then weld those to the mini floor. With Tony's, because the front cut was now disposed of, this front mounts were unavailable. So, I just profiled a short piece of 30x30 RHS to the floor with the right angle and welded that in instead. Luckily, I had cut the rear mounting bosses out of a previous front-cut before it was turfed.

Notice the in-fill piece (in red, it was part of El Gato's bonnet!) I welded into the floor to cover the hole where the Mini remote shifter poked through. This whole area will of course, have to be re-painted and bitumened underneath.

The mounts welded in:
Image

And the shifter bolted in place:
Image

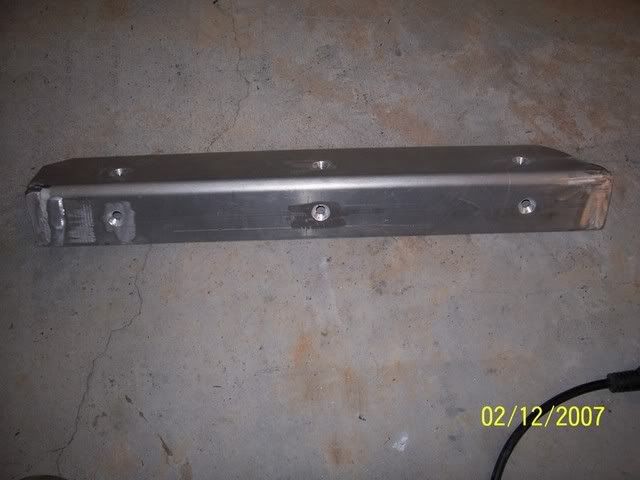
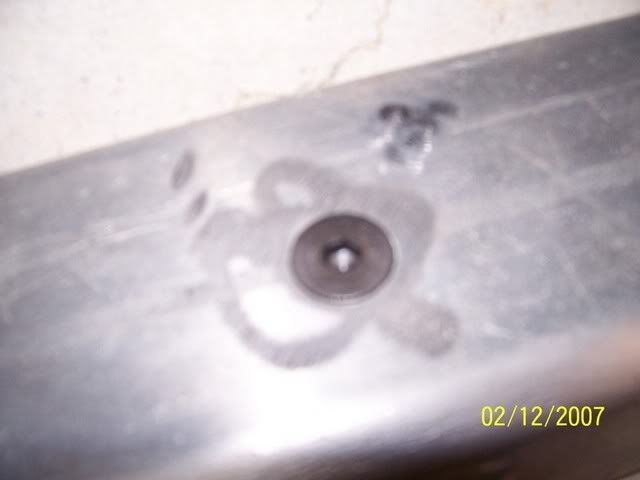
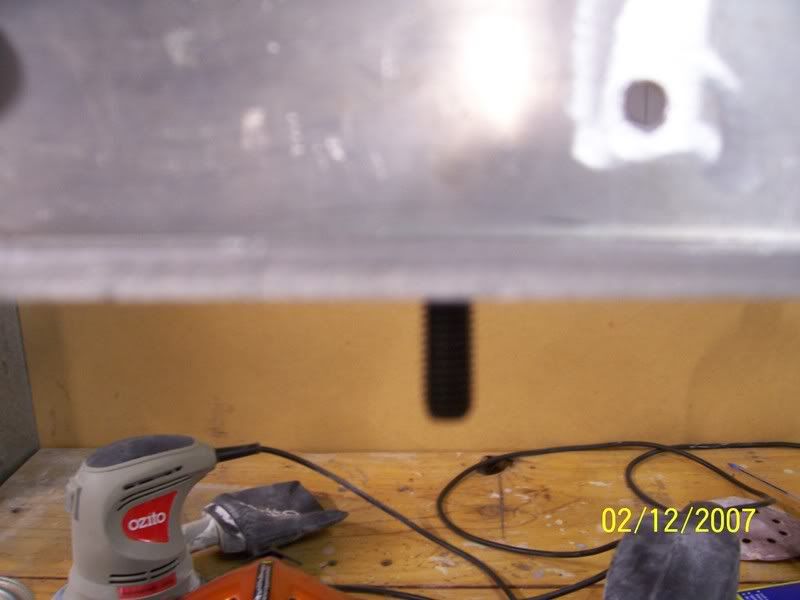
Next I moved onto doing the seat mounts. Tony had purchased a nice, brand new set of SAAS seats from Repco a while back, that needed a set of custom mounts made up in order for them to mount into the car. The front mount was a piece of 5mm aluminium I had bent into an angle, and then I profiled it to fit the floor. The mounting bolts used are 8mm HT countersunk allen bolts, which look the goods and also lay flush with the surface when coutersunk, ideal when you are trying to lay the seat mount hard on the cross tunnel.

This is the angle, all drilled for the mount-to-tunnel mounting bolts:
Image

Drilled and coutersunk holes:
Image

And the flush mouting countersunk allen bolts (yummy):
Image

You cant get much flusher (is that even a word?) than this:
Image

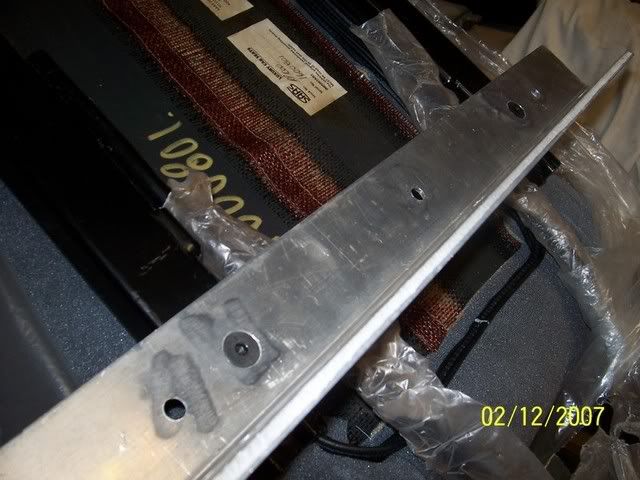
And this is the front bracket mounted to the seat. You have to mount the front and rear brackets to the seats, and then mount the brackets to the floor. This makes the whole process lengthy, as you have the mount the brackets, put the whole lot in the car, mark the holes, drill etc. Then remount everything.

Anyway, the mounts mounted to the seat ready to go into the car:
Image

And that's as far as I got, more next week!!

Cheers,
Tricky

_________________
"Not Speeding Officer..........Qualifying"


Top
 Profile  
 
 Post subject:
PostPosted: Sun Dec 02, 2007 8:56 pm 
Offline
Yay For Hay!
User avatar

Joined: Wed Sep 08, 2004 9:27 pm
Posts: 15912
Location: Wodonga - Vic/NSW border
love your work as always big boy....

Archangel007 wrote:
Edit: Simon Kerr is actually designing the new subframe for our Honda conversions atm using SolidWorks (he is a God on SolidWorks).


and 'god' is an obscene overstatement... maybe one of those wierd cult leaders who says they are a god and convinces a few nutbags to believe them, but then turns out to be an escaped mental patient

_________________
did I tell you that I won a trophy?


Last edited by simon k on Mon Dec 03, 2007 9:25 am, edited 1 time in total.

Top
 Profile  
 
 Post subject:
PostPosted: Sun Dec 02, 2007 9:34 pm 
Offline
848cc
848cc

Joined: Wed Aug 30, 2006 5:59 pm
Posts: 69
Location: kallangur qld--- boot_it mechanical
archangel007 if u need some wiring diagrams for the ecu let me know as i have some (not turbo one )but na ones for the ep91 starlet but i could proberly get some for the turbo ones

just let me know if u need help wiring the sucker up as i get lots of people wanting me to do this type of work

edit ive just found some ep82 4e-fte diagrams


Top
 Profile  
 
Display posts from previous:  Sort by  
Post new topic Reply to topic  [ 154 posts ]  Go to page Previous  1, 2, 3, 4, 5, 6, 7, 8 ... 11  Next

All times are UTC + 10 hours


Who is online

Users browsing this forum: No registered users and 5 guests


You cannot post new topics in this forum
You cannot reply to topics in this forum
You cannot edit your posts in this forum
You cannot delete your posts in this forum
You cannot post attachments in this forum

Jump to:  

© 2016 Ausmini. All garage work involves equal measures of enthusiasm, ingenuity and a fair degree of irresponsibility.