Ausmini
It is currently Tue Jul 08, 2025 9:27 am

All times are UTC + 10 hours


Post new topic Reply to topic  [ 31 posts ]  Go to page 1, 2, 3  Next
Author Message
PostPosted: Thu Nov 08, 2007 8:28 pm 
Offline
SooperDooperMiniCooper ExpertEngineering
User avatar

Joined: Fri Apr 29, 2005 9:46 am
Posts: 18887
Location: Under the bonnet son!
I'll be rebuilding the 1275 engine for my resto, and thought that if I cannot have Doc or GR or miniman Matt or any of you other gurus looking over my shoulder in the garage, then maybe I can have them look over my shoulder in cyberspace.
I've built a few engines up now, but always in a very simple manner, I've trusted that the parts are good, and that they will fit sufficiently enough to perform well. That's what I know as I am certainly no engine fitter/ machinist by trade. It's worked well for me over the years, but there is a difference. Anyone can bake a crappy packet mix cake, but it takes a little skill to make a pavlova.

Maybe if you would like to do your own, then this may be a voyeuristic way of having a go. Then maybe I will take requests and wear a little French maids outfits whilst I spank the block with a feather...................no way you sickos~!:evil:

Anyway, the background and the materials we have to work with:

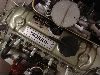
This is a Mk2 Cooper S block. Not your usual mini engine, but not so very different from any other mini engine for everything except sizes. It was once a pretty sad looking block, but it was complete. When it was pulled down, number two piston had a shattered crown from detonation. This I believe is the reason it was put aside by the previous owner.
Image

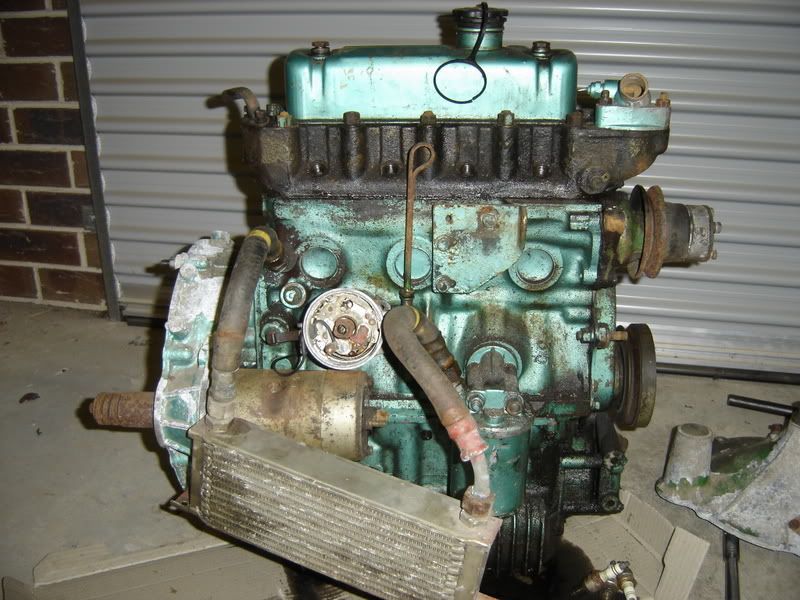
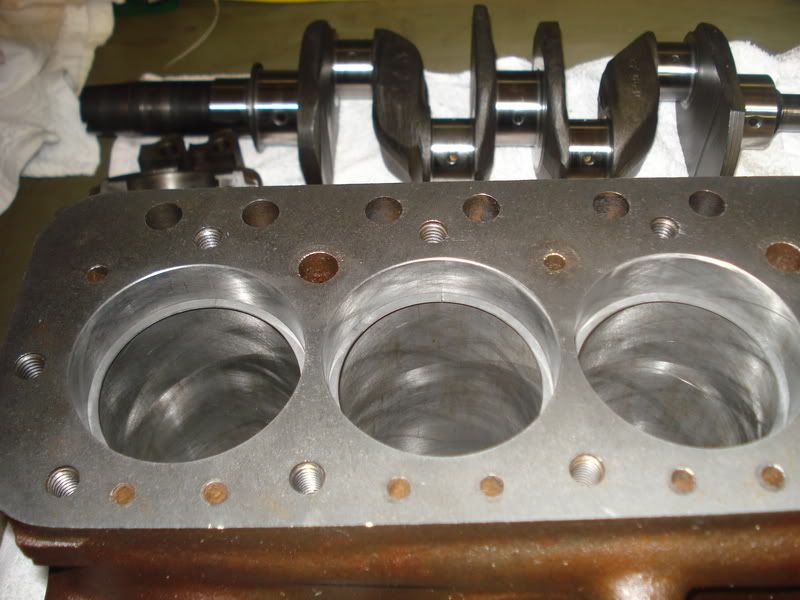
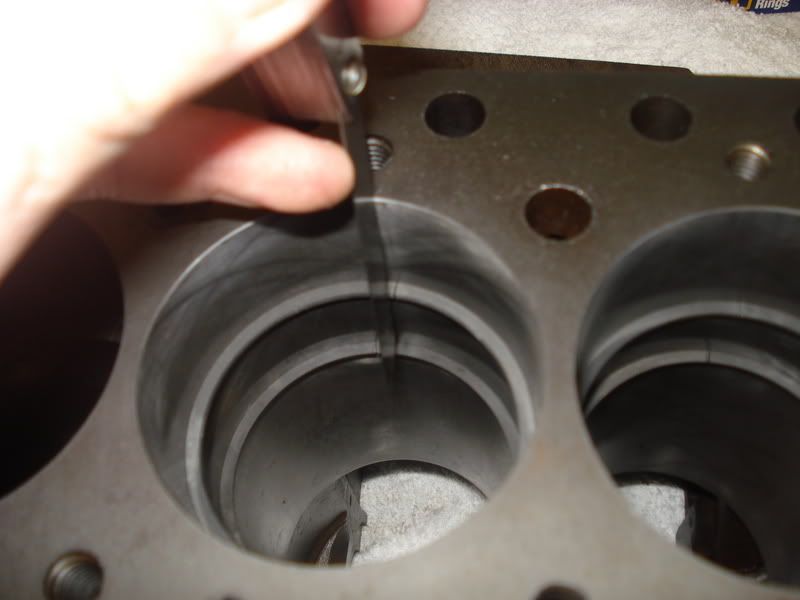
The block was hot tanked (here at home) blasted with high pressure detergent and then tanked again to remove all the grunge, slime and paint from the engine and it's galleries. All plugs were removed to do this, and have been replaced with new plugs after machining. The top of the block was machined flat, the bores re-bored to the next oversize and honed, and the crank crack tested, inspected and linished. The crank sizes on the main bearing and the big end journals are both currently at 10 thou of an inch under their original size.

Image

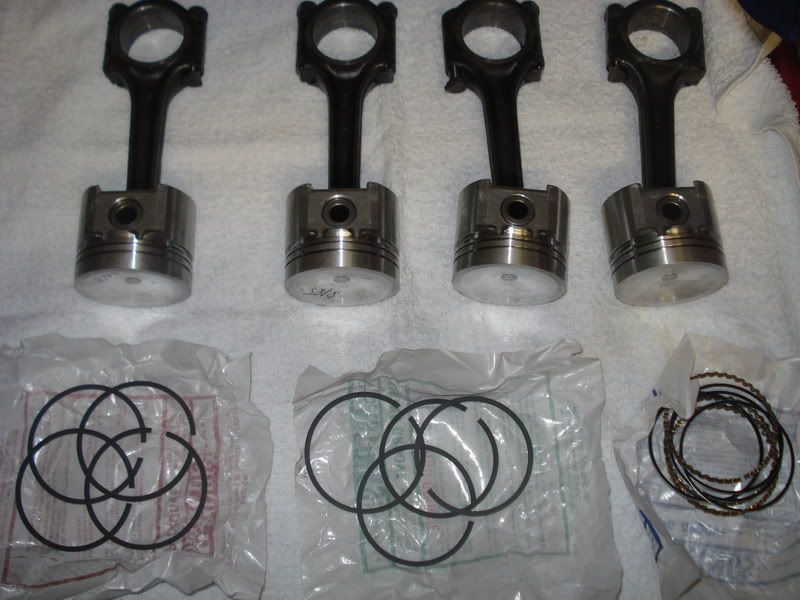
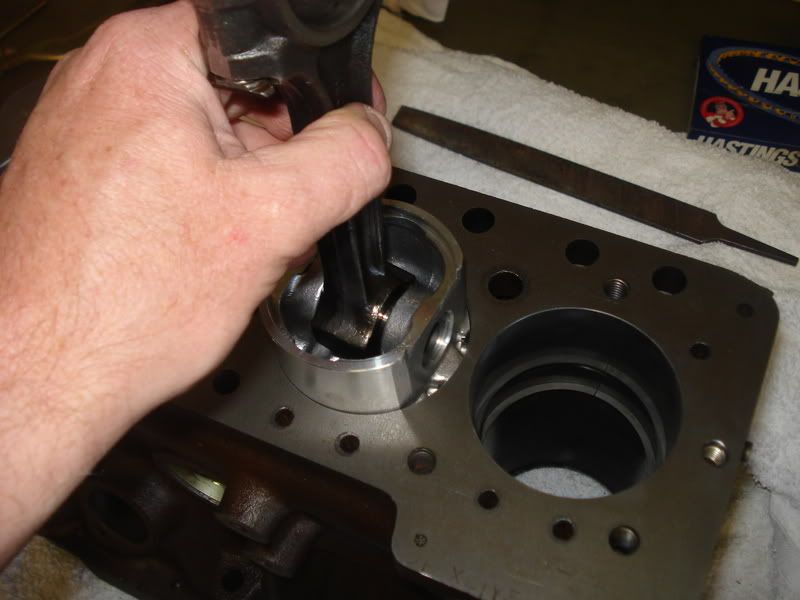
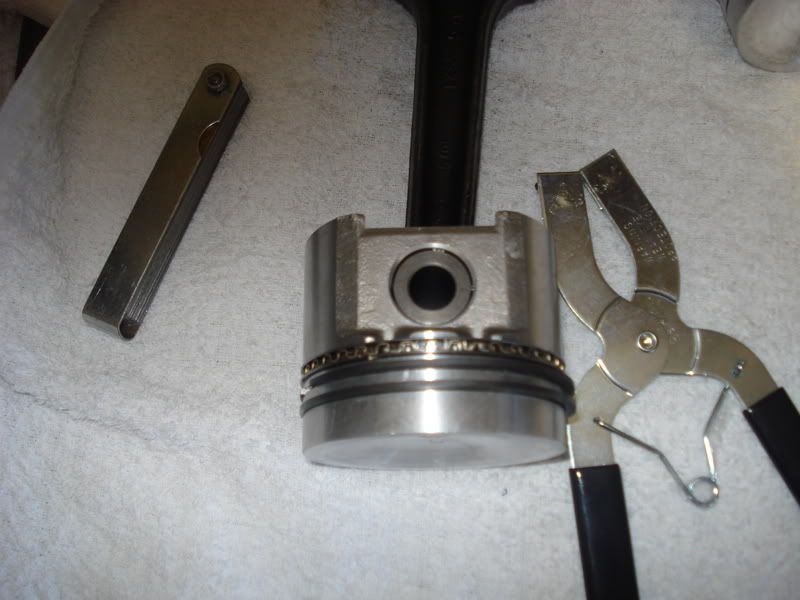
Pistons were installed onto the con rods after they too were inspected, straightened and cleaned. The rings await installation which will be the first step. The bench is cleaned and set aside for the duration of the engine build (at least until the short block is completed).

Image

_________________
SooperDooperMiniCooperExpertEngineering

All garage work involves equal measures of enthusiasm, ingenuity and a fair degree of irresponsibility.


Last edited by Mick on Thu Nov 08, 2007 8:34 pm, edited 1 time in total.

Top
 Profile  
 
 Post subject:
PostPosted: Thu Nov 08, 2007 8:31 pm 
Offline
SooperDooperMiniCooper ExpertEngineering
User avatar

Joined: Fri Apr 29, 2005 9:46 am
Posts: 18887
Location: Under the bonnet son!
Now the first step is the rings I have guessed.

I've pressed them into the bore and used a piston to make sure they are all square.
As you can see in the photo below, there is no gap to speak of in the rings once installed in the bore. What is the gap I'm supposed to see here, is there any benefit in a wider or narrower gap than recommended, and what should I use to open up a gap? A special file or tool?

Image

_________________
SooperDooperMiniCooperExpertEngineering

All garage work involves equal measures of enthusiasm, ingenuity and a fair degree of irresponsibility.


Top
 Profile  
 
 Post subject:
PostPosted: Thu Nov 08, 2007 9:32 pm 
Offline
religious status
religious status
User avatar

Joined: Fri Mar 19, 2004 6:19 pm
Posts: 39753
Location: near Baulkham Hills, NSW
Geez those ring gaps do look close Mick. :shock:
A smooth file (used carefully) is the weapon of choice, and the gap for a performance 1275 is around .012" .
The Leyland black book says .008"-.013" (for Cooper S/Clubby GT).
Remember, these rings are mostly cast iron, be gentle... :wink:

Don't touch the oil scrapers...

_________________
DrMini- 1970 wasaMatic 1360, Mk1S crank, 86.6HP (ATW) =~125 @ crank, 45 Dellorto (38 chokes), RE282 sprint cam, 1.5 rockers, 11.0:1 C/R. :mrgreen:


Top
 Profile  
 
 Post subject:
PostPosted: Thu Nov 08, 2007 9:49 pm 
Offline
1360cc
1360cc

Joined: Mon Nov 01, 2004 4:36 pm
Posts: 7673
cool, thanks for sharing


Top
 Profile  
 
 Post subject:
PostPosted: Thu Nov 08, 2007 9:50 pm 
Offline
1275cc
1275cc

Joined: Mon Mar 22, 2004 7:41 pm
Posts: 4319
Location: Plumpton, NSW
oi,
What's with the "crappy cake mix" jibes?
I WAS going to come down to melbourne and help with your motor, but now I'll just stay here and mix cake mix for the masses instead. :D
KB

_________________
Image


Top
 Profile  
 
 Post subject:
PostPosted: Thu Nov 08, 2007 9:53 pm 
Offline
religious status
religious status
User avatar

Joined: Fri Mar 19, 2004 6:19 pm
Posts: 39753
Location: near Baulkham Hills, NSW
1310/71 wrote:
oi,
What's with the "crappy cake mix" jibes?
I WAS going to come down to melbourne and help with your motor, but now I'll just stay here and mix cake mix for the masses instead. :D
KB

And your `Greens' pudding mixes are OK too. :wink:
mmmmmmmmm... pudding..... 8)

_________________
DrMini- 1970 wasaMatic 1360, Mk1S crank, 86.6HP (ATW) =~125 @ crank, 45 Dellorto (38 chokes), RE282 sprint cam, 1.5 rockers, 11.0:1 C/R. :mrgreen:


Last edited by drmini in aust on Thu Nov 08, 2007 10:01 pm, edited 1 time in total.

Top
 Profile  
 
 Post subject:
PostPosted: Thu Nov 08, 2007 9:56 pm 
Offline
SooperDooperMiniCooper ExpertEngineering
User avatar

Joined: Fri Apr 29, 2005 9:46 am
Posts: 18887
Location: Under the bonnet son!
Ha ha, there are some good packet mixes out there these days..cadbury cakes rock. But mum makes a good pav from scratch, with extra passionfruit and the odd errant fly..it's pretty hard to pass up.

_________________
SooperDooperMiniCooperExpertEngineering

All garage work involves equal measures of enthusiasm, ingenuity and a fair degree of irresponsibility.


Top
 Profile  
 
 Post subject:
PostPosted: Thu Nov 08, 2007 10:02 pm 
Offline
1275cc
1275cc

Joined: Mon Mar 22, 2004 7:41 pm
Posts: 4319
Location: Plumpton, NSW
It's OK, we make the cadbury ones too. :wink:
KB

_________________
Image


Top
 Profile  
 
 Post subject:
PostPosted: Fri Nov 09, 2007 10:17 am 
Offline
848cc
848cc
User avatar

Joined: Fri Jun 09, 2006 9:50 am
Posts: 247
Location: East Vic Park (WA)
Mick wrote:
What is the gap I'm supposed to see here, is there any benefit in a wider or narrower gap than recommended, and what should I use to open up a gap? A special file or tool?


You can get special gap grinders, which is what a machine shop would probably use, but I would just use a file like Doc says.

I haven't actually researched it or anything, but my guess is that too large a gap will let gases past (through the gap). Too small a gap means that when it gets up to temperature and expands the ends would touch and it would get tight. I guess this would smash the ring or something. It wouldn't be good anyway.

mmmmmm, cake :D


Top
 Profile  
 
 Post subject:
PostPosted: Fri Nov 09, 2007 10:19 am 
Offline
1275cc
1275cc
User avatar

Joined: Wed Jun 14, 2006 9:45 pm
Posts: 4031
Location: Adelaide, SA
What crank is it?

I mean in terms of numbers on it, being a MK2 (9F/XE/Y?) motor it'd be different from a MK1, I don't know a lot about MK2 motors.

Are Mk2's still small journal?

My Mk1 'S' motor has an odd crank in it, might be the same as a Mk2. :?

_________________
1964 Morris 850, 1330 Supercharged - 81.8hp atws.
1975 Leyland Mini S 1100S powered - Nice and reliable.
1977 Leyland Mini LS - Project LS-T 8)


Top
 Profile  
 
 Post subject:
PostPosted: Fri Nov 09, 2007 11:15 am 
Offline
SooperDooperMiniCooper ExpertEngineering
User avatar

Joined: Fri Apr 29, 2005 9:46 am
Posts: 18887
Location: Under the bonnet son!
Mk1 and Mk2 and GT engines had identical cranks at least in journal sizes.


Well I grabbed the rings out and set the gaps, I set them to 12 thou as advised using a file I have. no real dramas, the rings aren't soft, but they're not too hard either so filing the gaps took about 10 seconds of filing, and then a check, followed by further filing until the gap was correct. By the time I did a couple, I knew I would need to file for so many seconds to get them pretty well spot on. So it carried through to the second row.

Image

I pushed them down in the bore to make sure they were nice and square, I used one of the pistons to do this. I noticed you need to be sure that the ring is pushed down far enough for the piston skirt to enter the bore, or it won't be square. If it's not square to the bore the ring opens up a little giving a false measurement.

Image

_________________
SooperDooperMiniCooperExpertEngineering

All garage work involves equal measures of enthusiasm, ingenuity and a fair degree of irresponsibility.


Last edited by Mick on Fri Nov 09, 2007 1:49 pm, edited 1 time in total.

Top
 Profile  
 
 Post subject:
PostPosted: Fri Nov 09, 2007 11:20 am 
Offline
SooperDooperMiniCooper ExpertEngineering
User avatar

Joined: Fri Apr 29, 2005 9:46 am
Posts: 18887
Location: Under the bonnet son!
I have test fitted a set of rings onto a piston using the rings from each bore for their matching piston. I used a piston ring tool to get them on, but think I might have accomplished it using my fingers if I rolled them on carefully.

The instructions with the rings state that if they have dots marked on the rings to install the dots upward (but they don't have any dots..), other than that it seems to simply have the chamfered edge on the up side without any explanation.. Is this correct?

With the ring groove clearance, I haven't measured it yet, but what needs to be done if it is not in spec? Does this occur often?

I will be out of town up in the NT for 10 days, so you probably won't hear any further from me for a few days...

Image

_________________
SooperDooperMiniCooperExpertEngineering

All garage work involves equal measures of enthusiasm, ingenuity and a fair degree of irresponsibility.


Top
 Profile  
 
 Post subject:
PostPosted: Fri Nov 09, 2007 12:16 pm 
Offline
848cc
848cc

Joined: Thu Feb 08, 2007 9:35 am
Posts: 96
Location: NZ
hi, are they hypatec pistons. What oversize are they & are they the type with the slot for oil return?
What is the intended use of the completed engine

Stewart

_________________
1275


Top
 Profile  
 
 Post subject:
PostPosted: Fri Nov 09, 2007 1:48 pm 
Offline
SooperDooperMiniCooper ExpertEngineering
User avatar

Joined: Fri Apr 29, 2005 9:46 am
Posts: 18887
Location: Under the bonnet son!
73GT wrote:
hi, are they hypatec pistons. What oversize are they & are they the type with the slot for oil return?
What is the intended use of the completed engine

Stewart


Yes they are Hypatecs, they're 40 thou over with an oil slot.
The intended purpose is a for a road going Cooper S resto.
Here:
http://www.ausmini.com/forums/viewtopic.php?t=31553

_________________
SooperDooperMiniCooperExpertEngineering

All garage work involves equal measures of enthusiasm, ingenuity and a fair degree of irresponsibility.


Top
 Profile  
 
 Post subject:
PostPosted: Fri Nov 09, 2007 6:27 pm 
Offline
religious status
religious status
User avatar

Joined: Fri Mar 19, 2004 6:19 pm
Posts: 39753
Location: near Baulkham Hills, NSW
Top Hastings ring has the inside chamfer upwards.
2nd ring has it down (if it has them, mine don't). :wink:

_________________
DrMini- 1970 wasaMatic 1360, Mk1S crank, 86.6HP (ATW) =~125 @ crank, 45 Dellorto (38 chokes), RE282 sprint cam, 1.5 rockers, 11.0:1 C/R. :mrgreen:


Top
 Profile  
 
Display posts from previous:  Sort by  
Post new topic Reply to topic  [ 31 posts ]  Go to page 1, 2, 3  Next

All times are UTC + 10 hours


Who is online

Users browsing this forum: No registered users and 7 guests


You cannot post new topics in this forum
You cannot reply to topics in this forum
You cannot edit your posts in this forum
You cannot delete your posts in this forum
You cannot post attachments in this forum

Jump to:  

© 2016 Ausmini. All garage work involves equal measures of enthusiasm, ingenuity and a fair degree of irresponsibility.