From mid 1968 on, a new and unique wiper motor was fitted to the Australian Mini. It had a round wiper body,parked to the left, and had part numbers starting with Lucas 12AUW. There were two types of motors with this number – a single speed and a two speed. Both versions were designed to self park. There is little difference between them.
John Smidt wrote:
However, this ‘How To’ will not cover the details of this conversion. I only raise that quote to show the wiper motors are, for our purposes, the same. This 'How To' will cover the wiring for both of these motors and restoring the self parking function.
We’ll start with the wiring. Here’s a photo of the pins on the rear of the wiper motor:
winabbey wrote:
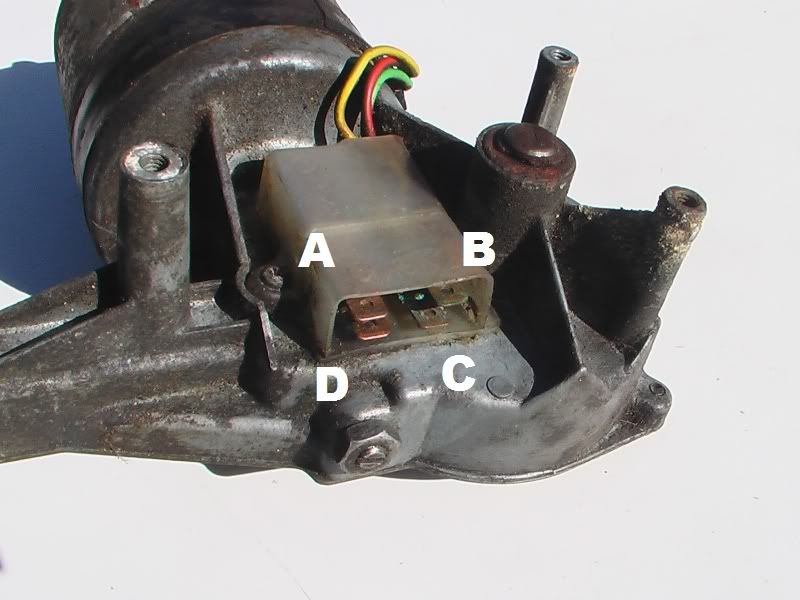
Firstly, the single speed wipers. The wiring should be:
. Green – Power supply (from 12V Instrument Voltage Regulator) -> Wiper Motor pin nearest left wheel = Pin C.
. GY (Green Yellow trace) - Wiper Motor pin nearest Engine = Pin D -> Switch Pin 8.
. BG (Black Green trace) - Wiper Motor pin nearest passenger = Pin A - > Switch Pins 1 + 7.
. Black - Wiper Body -> Earth
. Black - Switch 6 -> Earth
. Pin B does not exist on the Single Speed Motor.
This corresponds with the Scientific Publications Manual 64, the diagram on Page 207, for the Morris Mini K, but adds the descriptions for the pins on the motor (not clearly given on the SP Schematic).
For the two speed wipers, the wiring should be:
. Green – Power supply (from 12V Instrument Voltage Regulator) -> Wiper Motor pin nearest left wheel = Pin C.
. BLG (Black with Light Green trace) - Wiper Motor Pin D -> Switch Pin 2 (edit per AEG163job, was noted as pin 8 originally).
. RLG (Red with Light Green trace) - Wiper Motor Pin A - > Switch Pin 6.
. Black - Wiper Body -> Earth
. Black - Switch 4 -> Earth
. ULG – Wiper Motor Pin B -> Switch Pin 8.
This matches the following diagram:
drmini in aust wrote:

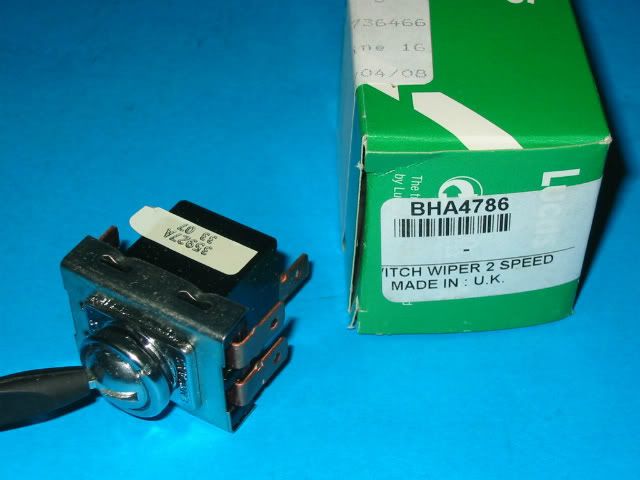
At this point, it is critical to point out that the correct switches must be used. Many have tried to use light switches for two speed wipers, however, they don’t work correctly. For the single speed wiper, you need 31780 type 57SA. For the two speed wiper, you need Switch 57sa 34/05, Number stamped on switch = 35927A. The BMC part number is BHA4786 which is an MGB item and still available as a genuine Lucas switch. If you can't get it from Mini King it's available from Heritage MG, being common with the MGB. Here’s a picture of the switch with its box:
If the wiper is not self parking, there are five main causes. They are:
1. Incorrect wiring.
2. Incorrect switch.
3. The Wiper Motor (body) isn’t earthed.
4. The Park Ring/Plate is worn out.
5. The Fingers that run on the Park Ring are worn out.
We’ve covered the first two points. The third point is fairly straight forward – there needs to be a wire connecting the body of the motor to earth. This is generally done with a pigtail off one of the wiper box bolts. The last two points are related, and both require the wiper box to be disassembled. It’s worth noting there’s no difference between the motors in this regard.
Others may have different methods for pulling the wiper motor, but this is my technique. Firstly, stop the wipers where you want them to park.
Clear the dash and remove the three screws that hold the wiper motor to the firewall.
Loosen the 3/4 nut holding the wiper cable stationary.
Rotate the wiper motor as below.
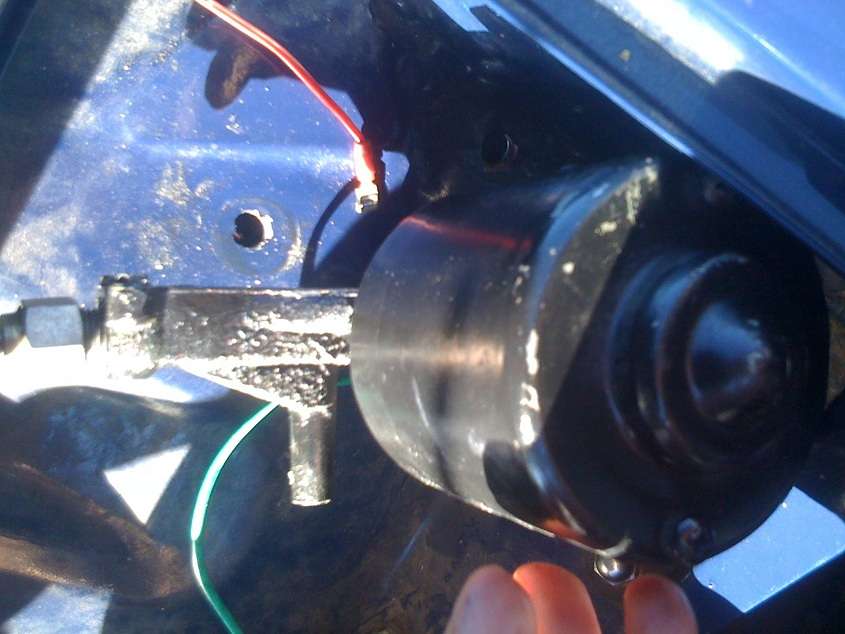
At the back of the motor, you’ll find a circlip and a small thrust washer holding the back of the wiper drive shaft. Remove it as per the following photo. Tip – don’t drop the circlip!
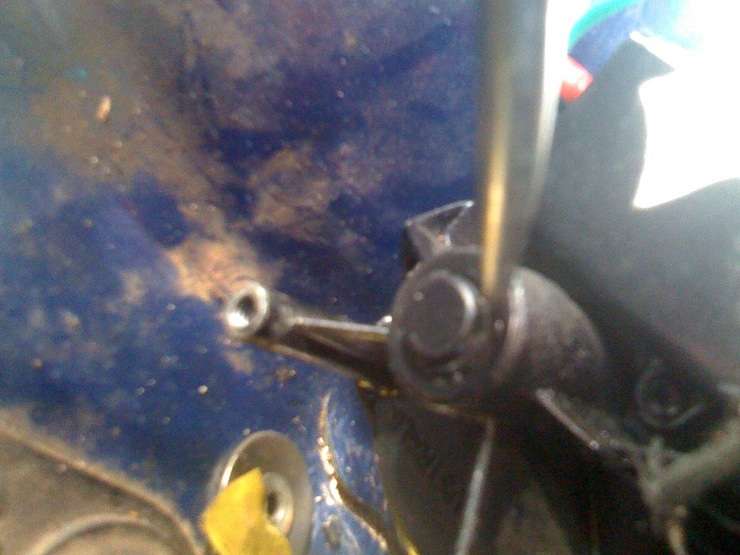
Turn the motor back around and remove the 4 bolts holding the Wiper Box Cover. They’re ¼ bolts. They’re much easier to do after the motor’s removed from the body.
With the cover off and the circlip and thrust washer removed, turn the motor back around and knock the wiper drive wheel shaft back through the body. I used a ¼ socket as a drift. You’ll need to keep knocking the shaft the whole way through the bush.
With the shaft knocked through, you’ll be able to push the crank pin out of the drive cable block. It's just a snug fit - no bolt. This will completely disconnect the wiper motor from the car, and you’ll be left with something like what’s below.
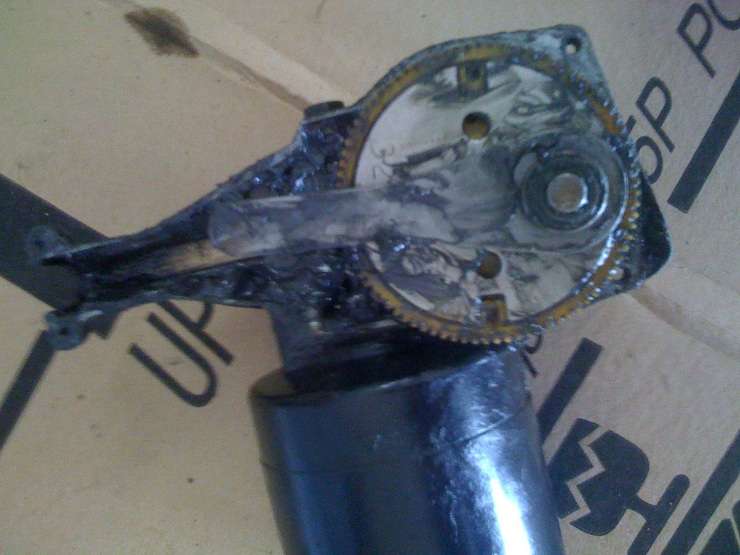
This is the wheel with the crank pin on it has the park ring on the back. Ideally, it should be at least as clean as this:
GT mowog wrote:

Or this:
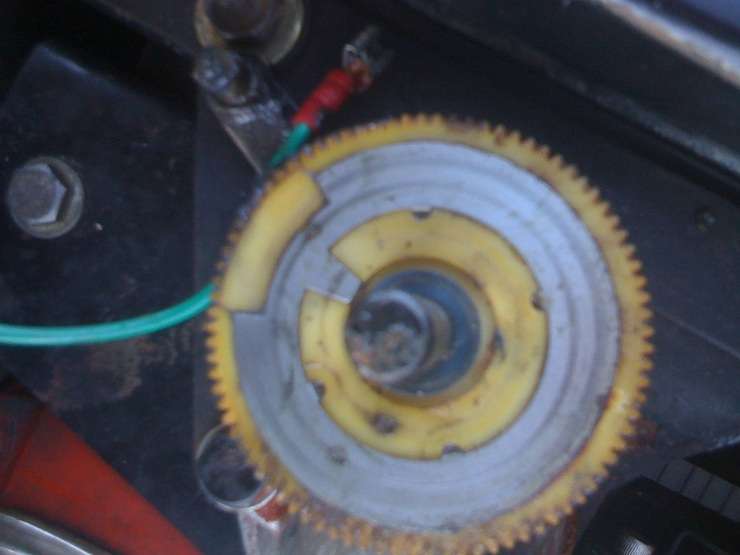
If the Park Ring is rusty, has burn marks (which can easily be caused by incorrect wiring
To replace the plate, you must first remove the drive plate (with the crank pin) from the gear wheel. This will give you access to the tabs holding the park ring onto the nylon wheel. Before removing the drive plate from the nylon gear wheel, mark the plate and the gear to ensure it can be lined up and reinstalled accurately. To remove the plate, hold the nylon gear/wheel, place the end of the drive wheel shaft on a bench, and push the nylon wheel down. If necessary, tap the wheel down, or push the nylon through the holes in the drive plate.
Before bending down the tabs on the new park ring, check to ensure that the park ring is flush with the nylon in the notched section. If the ring isn't flush, lightly sand the edges of the ring to create a small chamfer. This is best done off the nylon wheel.
When installing the drive wheel, make sure the crank pin is offset 180º from the notch in the park ring. This will ensure the wipers continue to park left. If you have the park ring and the crank pin on the same side, the wipers will park on the right.
drmini in aust wrote:
Before reinstalling the drive wheel, look at the copper park ring fingers. They’re visible below.
GT mowog wrote:

Make sure they’re all bent up, so that they run easily on the park ring. If they’re worn, there are suggestions of simply bending them further up, soft soldering a piece of brazing rod onto the end of the finger (GT Mowog has done this successfully), building them up with silver solder (SBA45 – DrMini’s idea, not yet tested), or trying to replace them with pins from another motor. They are NLA new (according to both Convertible Mini and John Smidt).
At this point, you may also like to refurbish the actual motor itself. The round body motor is different to the old square body motors in that they use permanent magnets for the field. The method for refurbishing them is as follows:
1. Undo and remove the 2 long bolts.
2. Remove the cover. The armature will come with the cover due to the magnetic attraction of the field pole pieces.
3. You can pull the armature out if the commutator needs cleaning up- use some 240 wet/dry paper and petrol. But if it's worn away at all, source another.
4. If you want to get the cover replated with zinc, the 2 magnetic pole pieces need to come out, mark them for refitting in their original position. An alternative is to use a coat of chrome paint – it looks exactly the same, and no stripping is required.
5. Beginning to reassemble, put a couple of drops of oil into the oilite bush in the end of the cover.
6. Fit the armature back into the cover.
7. Hold all 2 or 3 brushes (depending on whether it’s a single or two speed motor – and whether or not you’ve added the extra brush to convert it) back in their holders (I use a bit of string) before refitting the motor to the housing. If you are not careful to do this, they can BREAK during reassembly.
8. Note there is a mark on the cover and gear housing, align them, then refit the 2 bolts.
Before reassembling the wiper box, it’s worth contemplating the rust problem. If the park ring is rusted, then clearly water can get into the motor to rust it. Tips for preventing this are to buy Convertible Mini’s Stainless ring, to add a small smear of grease on the park ring (not too much!), to fill the cable section with much grease, and also to drill a small hole (say Ø6) in the lowest part of the wiper box. I used heaps of grease and added the hole. It’s best to use a grease such as a Lithium EP2, not a thick grease, as a thick grease may be cut through by the cable, making the grease effectively useless as a lubricant. The suggested additional hole is visible below.
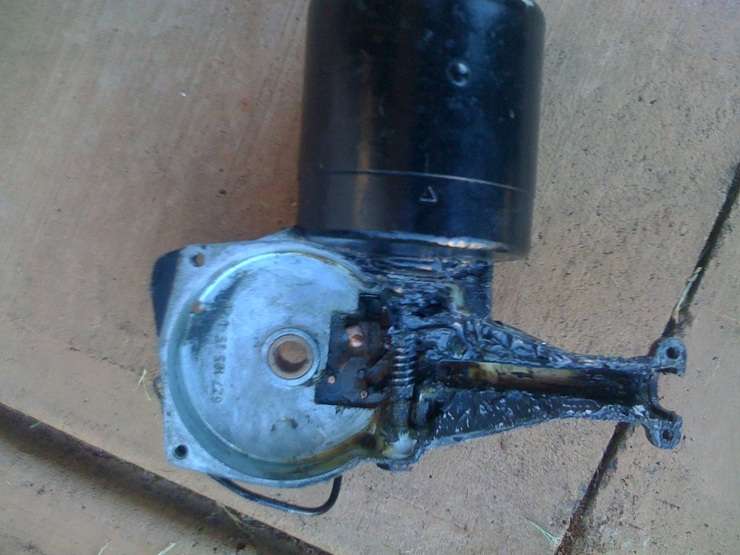
Before reinstalling the motor, and this is something I haven’t done myself, I believe it’s worth considering gluing at least the plastic washers between the body and the wiper motor to the wiper motor legs. Without fixing them to one of the surfaces, it becomes a nightmare trying to fix the motor to the firewall, given you’ve got to hold washers on both sides of the firewall whilst positioning the motor, as well as screwing in the bolts without crossthreading them.
To reassemble and reinstall the wiper motor! Firstly, a little grease on the drive wheel shaft is a good thing, and a lot of grease in the cable slot is a great thing. Try not to get any past the worm gear. Ensure that the thrust washer is in place between the park ring and the wiper box. Push the crank pin into the drive cable end block before you push the drive wheel fully home into the wiper box. This reattaches the wiper motor to the body. Ensure the park plate is in a 'parked' position (bearing in mind we 'parked' our wipers before starting), and slot the gear wheel down onto the worm gear.
Turn the wiper motor assembly over. Install the thrust washer and the circlip onto the drive wheel shaft. It’s important to do this before the cover plate goes back on, as you will need to be able to push the drive wheel harder into the wiper box. For people as new to this as me, use a flat head screwdriver to get the shaft through the bush properly, and use multigrips to squeeze the circlip over the shaft.
Turn the wiper motor back over. Install the cover plate on the wiper wheel box. Screw the motor through the firewall. I find it easiest if I leave the bottom connection until last, and start with the easiest (top) one first, though I don’t even make the first/top one even finger tight until I’ve got all three started. Once all three are tight, reconnect the wires, do up the 3/4 nut on the wiper cable, and you're done!
As a further note, if anyone wishes to follow me in adding a single push/single sweep option to their wipers, all you do is short between Pin 1 and Pin 6 through a momentary switch. I’m in the process of doing this, as I don’t believe it’s convenient or necessarily wise to constantly flick a 42 year old switch for a single sweep at a time.
Lastly, many thanks to DrMini, John Smidt, Convertible Mini, Winabbey, 64Cooper, Bubbaclubby, and GT Mowog for the information posted in several threads and sent by PM/Email which I have done little more than collate and organize.