Ausmini
It is currently Wed Nov 13, 2024 4:26 pm

All times are UTC + 10 hours


Post new topic Reply to topic  [ 355 posts ]  Go to page Previous  1 ... 20, 21, 22, 23, 24
Author Message
PostPosted: Mon Nov 06, 2023 1:15 pm 
Offline
998cc
998cc
User avatar

Joined: Mon Jan 16, 2006 1:15 pm
Posts: 683
Location: Melbourne
Hi All,

So I finally had a new website built a while back and had to figure out how to re-host all the photos. Hopefully this is working for everyone now.

In other news I took the Morris to Calder Park drags last friday. Never having done it before I didn't know what to expect, but the car ran 14.98 first go. Massive traction issues which I hope to sort soon, but pretty happy with that result:)

Cheers
Madmorrie

_________________
Madmorrie

https://www.youtube.com/watch?v=oczLolENFMQ


Top
 Profile  
 
PostPosted: Tue Jun 25, 2024 1:27 pm 
Offline
998cc
998cc
User avatar

Joined: Mon Jan 16, 2006 1:15 pm
Posts: 683
Location: Melbourne
So here's the best video of my runs at Calder. I have since fitted the good wheels and stickier tyres so next time out will be interesting.

https://www.youtube.com/watch?v=TGb88u--zoA

_________________
Madmorrie

https://www.youtube.com/watch?v=oczLolENFMQ


Top
 Profile  
 
PostPosted: Tue Jun 25, 2024 9:32 pm 
Offline
Yay For Hay!
User avatar

Joined: Wed Sep 08, 2004 9:27 pm
Posts: 15912
Location: Wodonga - Vic/NSW border
damn, the guy in Skyline must have been pissed!

:D

_________________
did I tell you that I won a trophy?


Top
 Profile  
 
PostPosted: Wed Jun 26, 2024 1:44 pm 
Offline
998cc
998cc
User avatar

Joined: Mon Jan 16, 2006 1:15 pm
Posts: 683
Location: Melbourne
Wow, people still read this?

And yeah, while I technically 'won' on the timesheet, his 10.5 was significantly faster. He may have seen how much I was moving around the lane on my first run and wisely decided to hang around on the start line for a bit:)

In lieu of an actual update. Here's how the car looked a few days back, right before I swapped these tyres out for some slightly more sensibly sized ones. These 185s looked ace, but did rub a little too much.

Image

_________________
Madmorrie

https://www.youtube.com/watch?v=oczLolENFMQ


Top
 Profile  
 
PostPosted: Sun Jul 28, 2024 12:45 pm 
Offline
998cc
998cc
User avatar

Joined: Mon Jan 16, 2006 1:15 pm
Posts: 683
Location: Melbourne
The Morris is entered for Summernats, so I have to get it finished and painted by end of December, to then roadtrip it to Canberra. I have two of the hanging panels painted, and they came out great. It's going to hurt a little to cut a big hole in that bonnet!

Image

Image

Image

Image

Image

The rest of them in the shed for prep. However it is currently too cold to paint:(

I've also decided to try to document this journey in video form. Because finishing a project car is not enough of a challenge, I might as well add filming and editing to the large pile of tasks that need to be done by then...

Anyway, https://youtu.be/Z1JNAOglqRI

_________________
Madmorrie

https://www.youtube.com/watch?v=oczLolENFMQ


Top
 Profile  
 
PostPosted: Fri Sep 27, 2024 12:07 am 
Offline
998cc
998cc
User avatar

Joined: Mon Jan 16, 2006 1:15 pm
Posts: 683
Location: Melbourne
One of the hardest and most time consuming things on this car has been sorting better brakes. The stock system is barely adequate for spirited driving with the factory performance, so tripling the horsepower certainly requires a suitable increase in stopping power also.

I have literally spent hours and hours combing through the internet, magazines, the DBA catalog and anywhere else I could find to figure out a way to get bigger brakes under this thing. Strangely enough nobody makes a big brake kit for a Morris 1100.

Years ago I bought a fancy Tarox big brake kit designed for a Mini from another member on here. Given the interchangeability of some mechanicals I had hoped it would work, but it was not to be. Those featured a 234mm disc and nice alloy mounting bells plus six pot alloy calipers. All lovely stuff, but when I would have to remake the mounting brackets and bells, only using half the kit hardly seemed worth it, and so they were on-sold.

The Metro turbo vented discs are the largest bolt on solution I could get at 213mm x 20mm. At one point I even looked at Austin princess brakes, which were 270mm diameter, as they seemed like they would also bolt on, however they were not vented and I doubt would fit inside any wheel I could make work.

The brakes I have fitted (Metro turbo vented discs with Renault Clio sliding single calipers) did pass the engineering brake test, but only just. And my engineer did recommend I fit a booster.

I improved them somewhat with some EBC greenstuff pads, but fitting a booster was always going to be a pain given the late mini split master cylinder braking system.


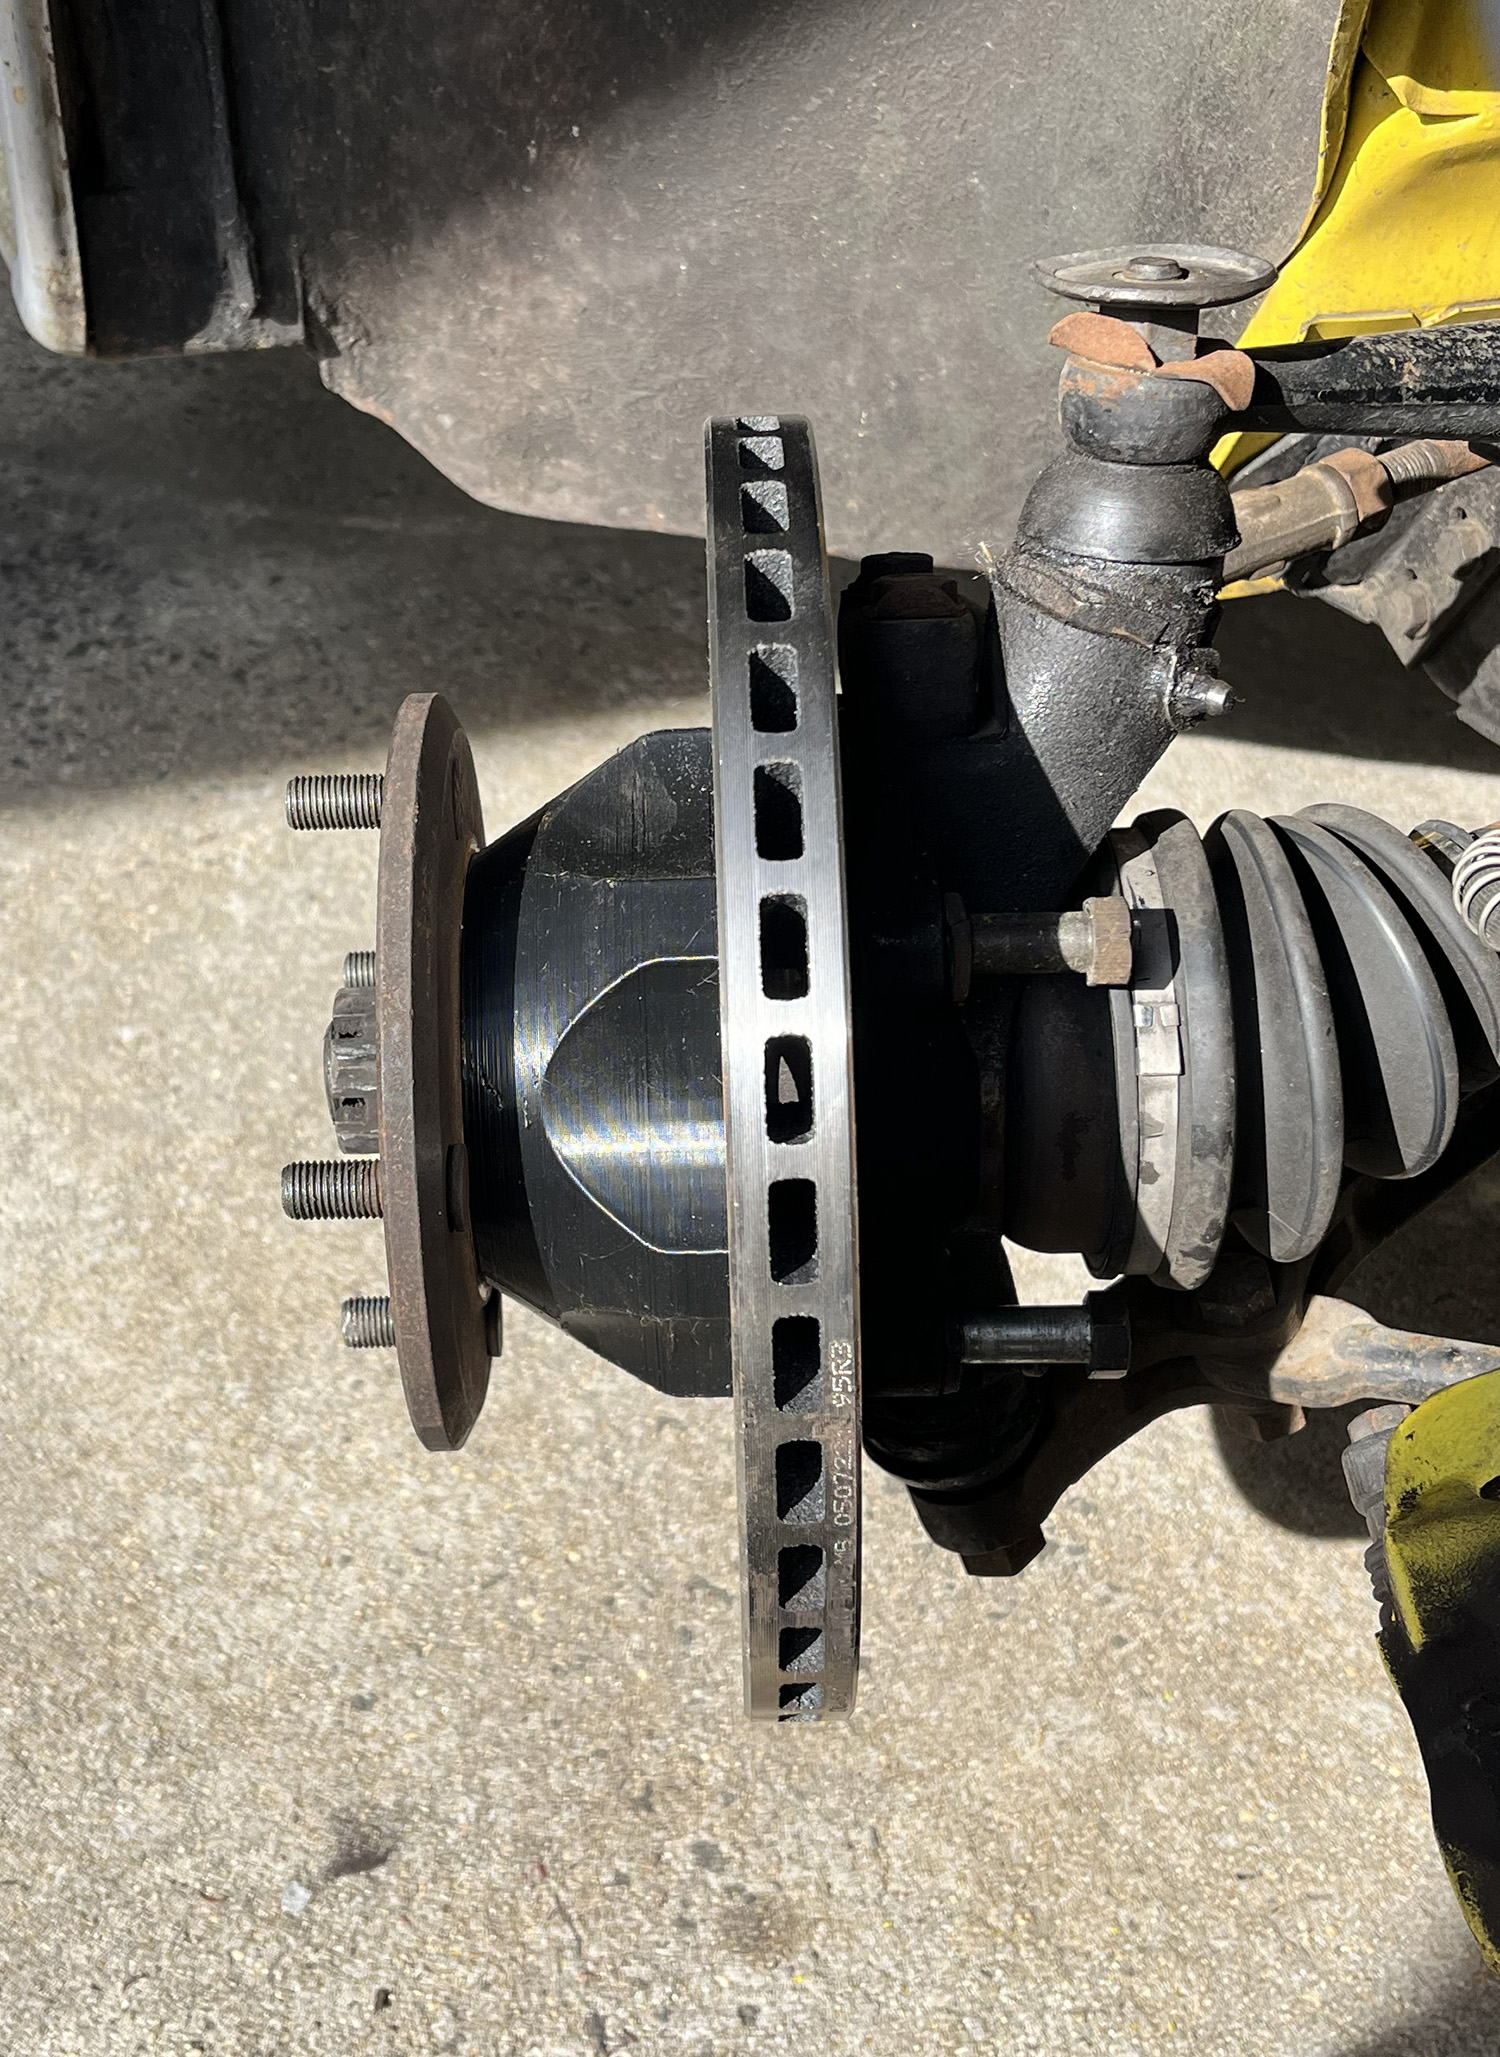
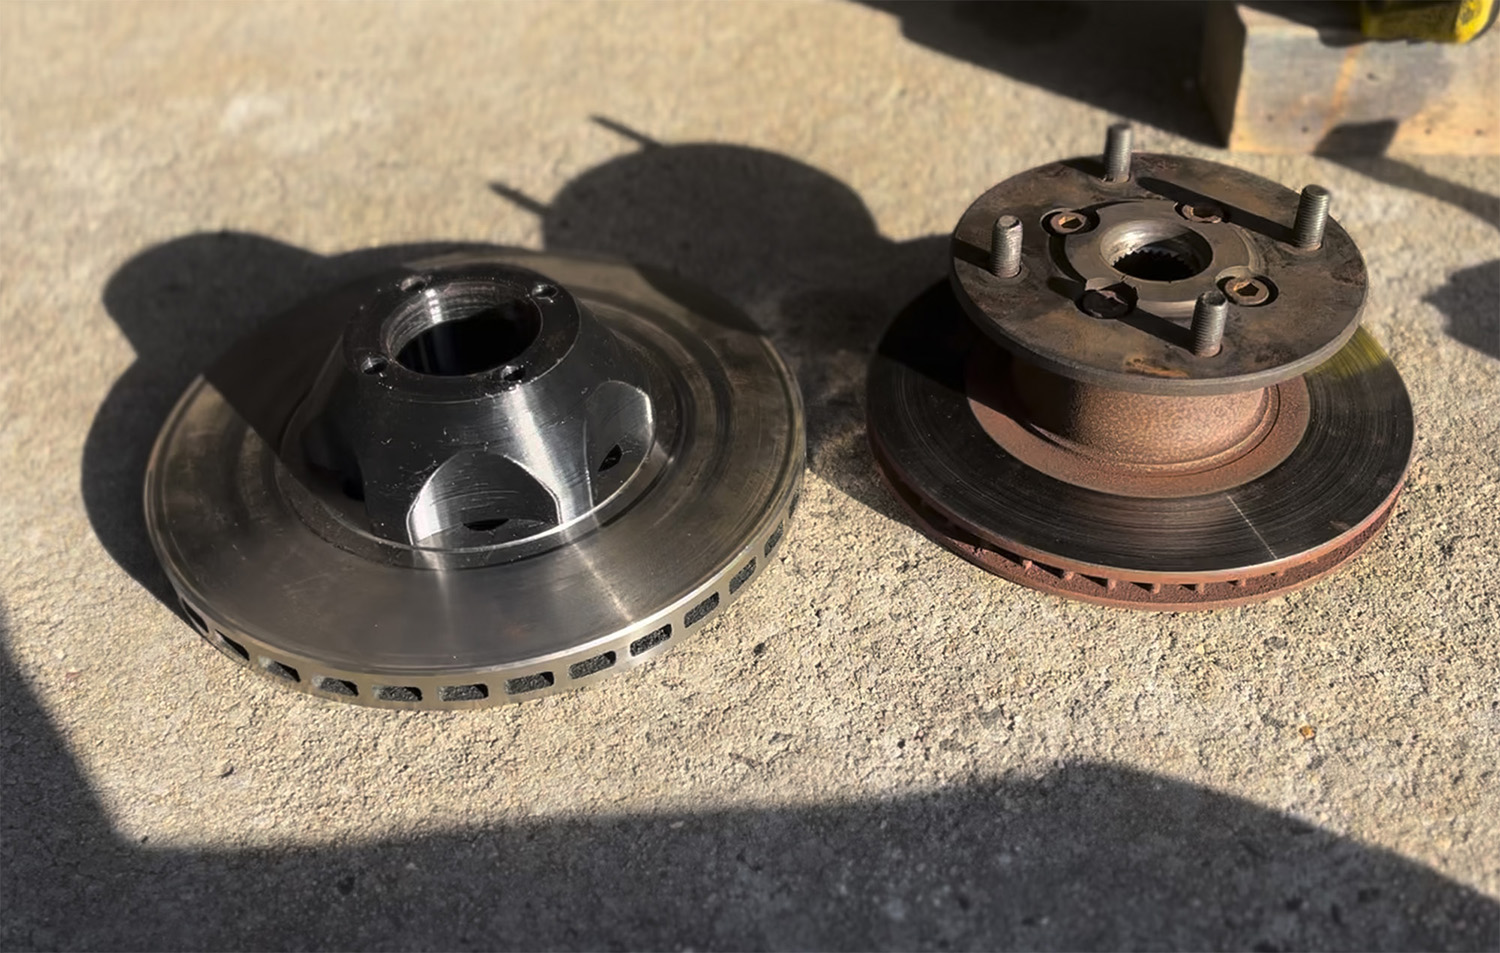
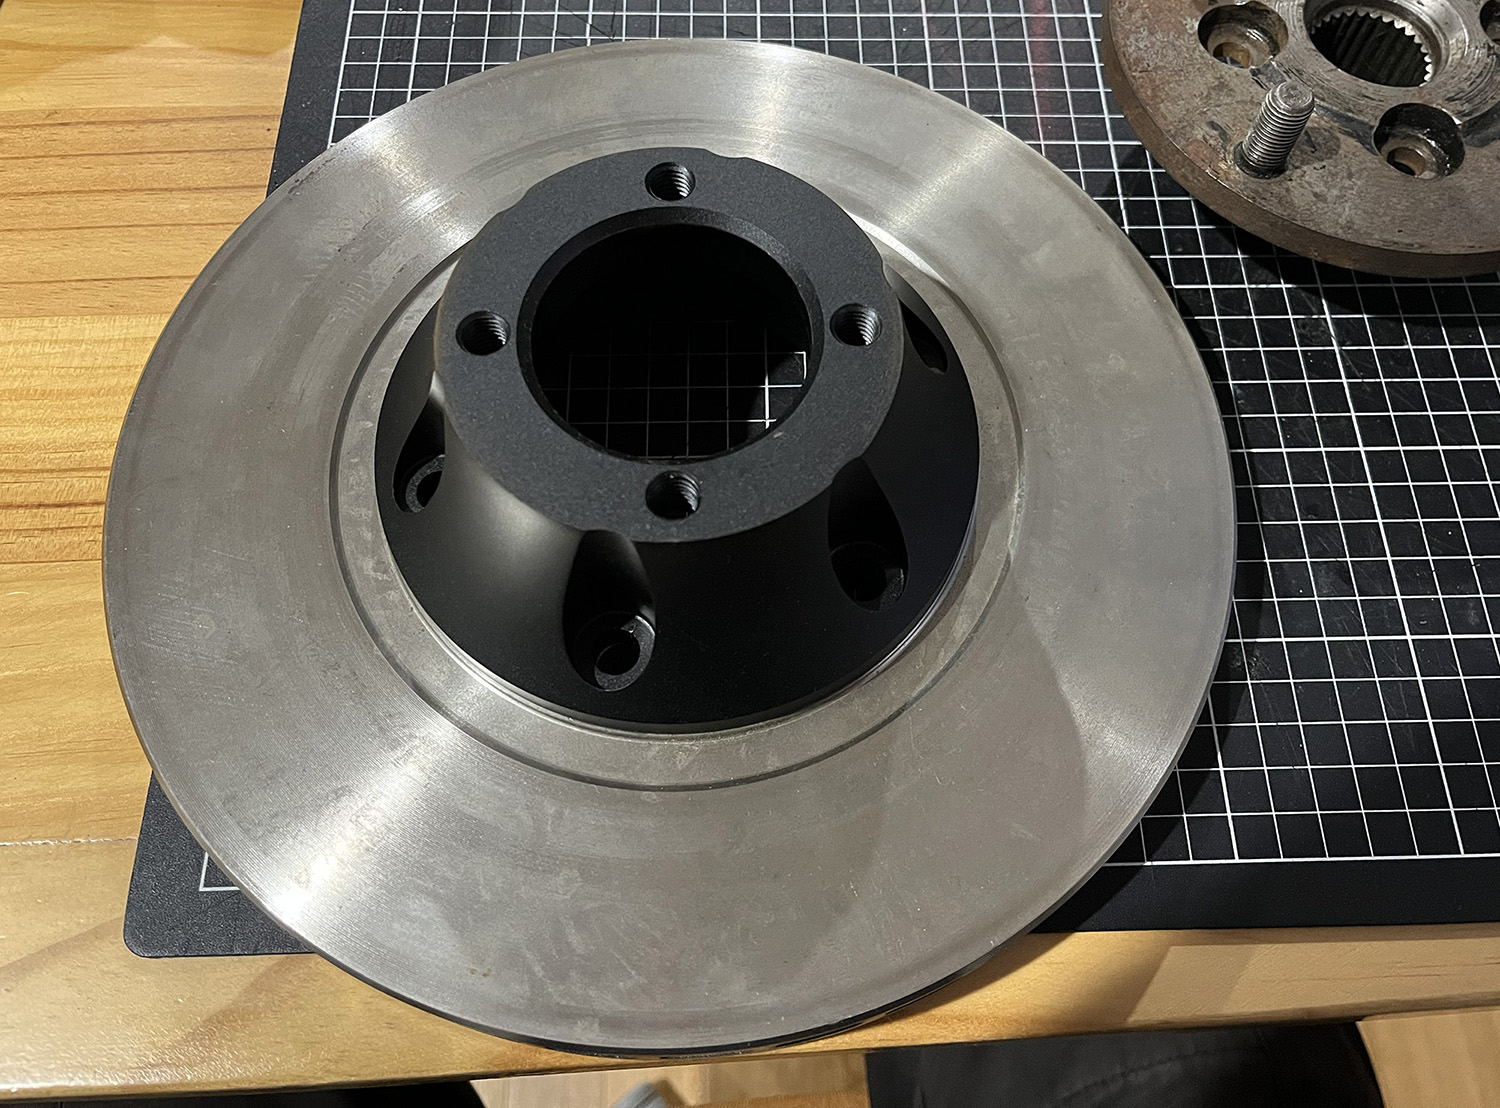
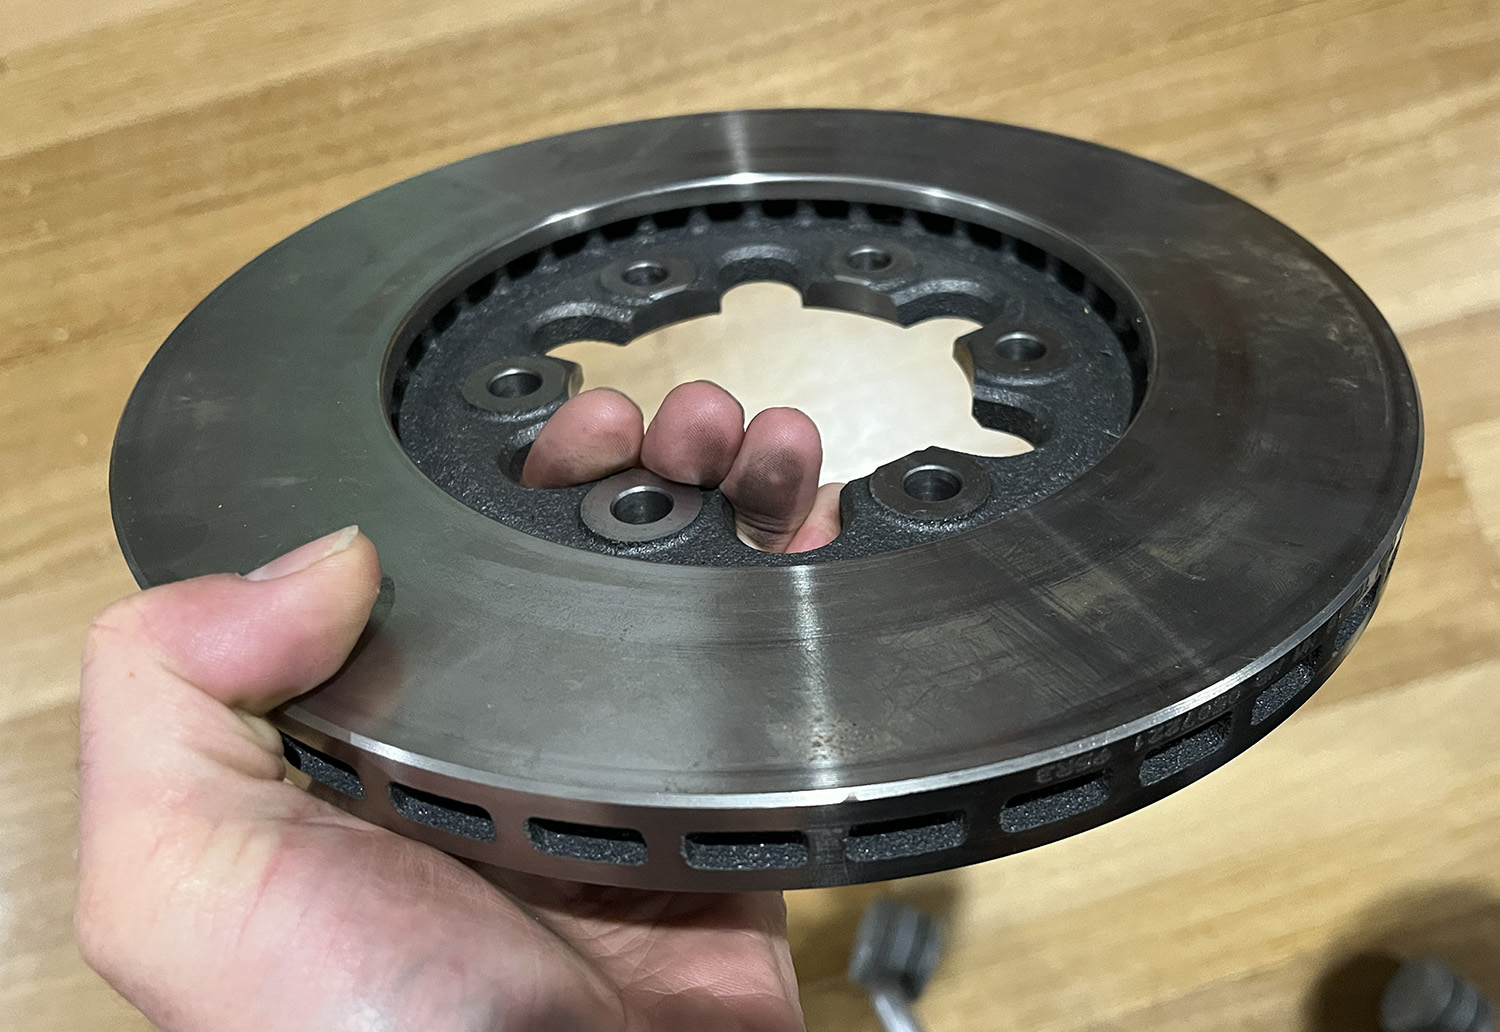
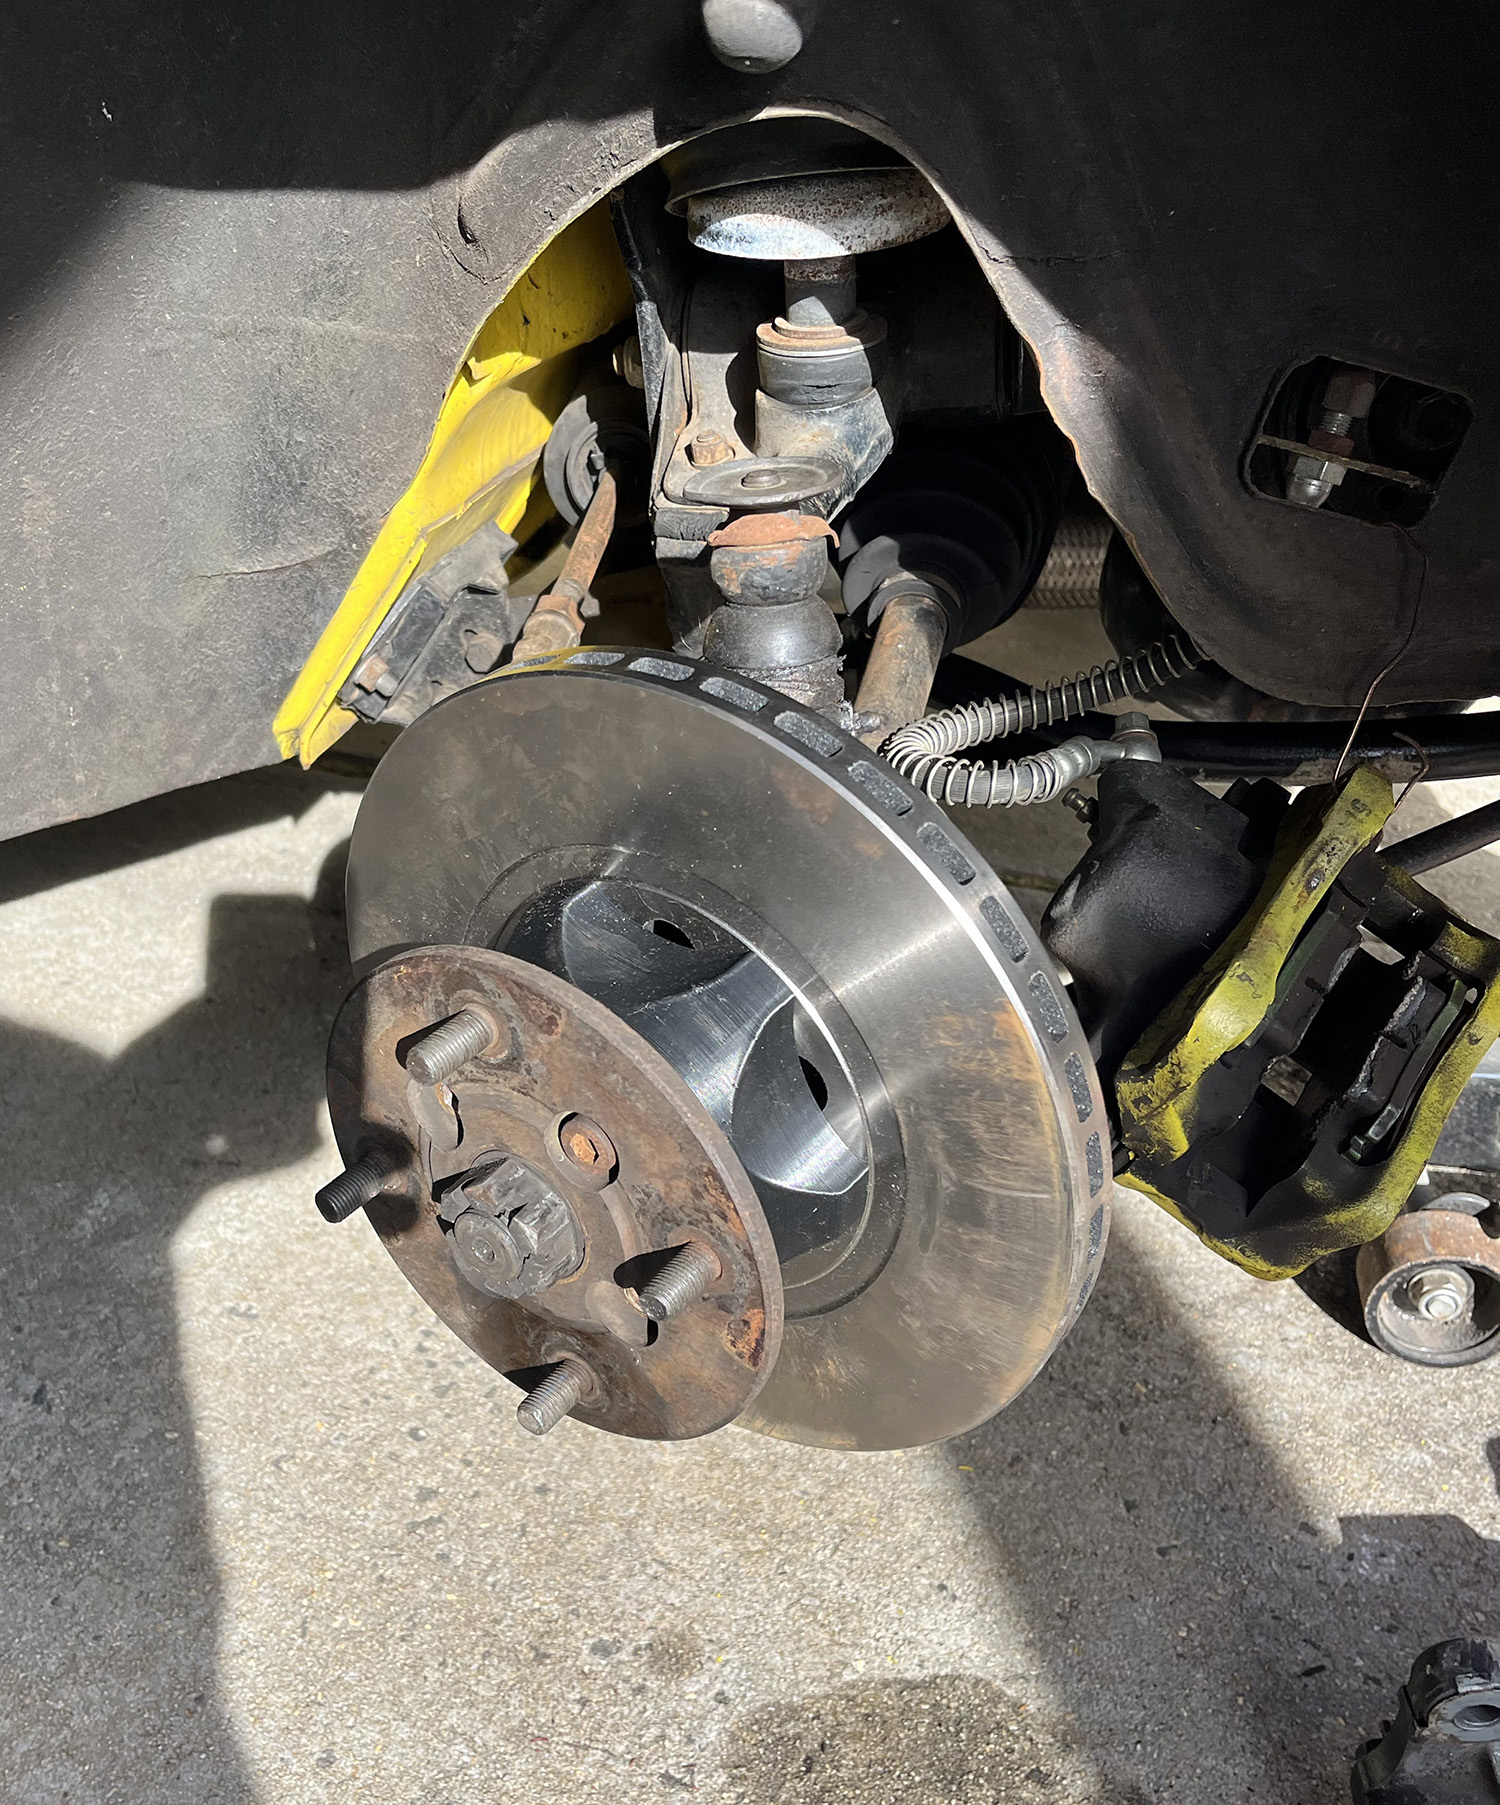
After much head scratching and poring over the DBA catalog, I settled on Ford Econovan brake discs as a possible option. They are 256mm diameter, 20mm wide and have a big enough hole in the middle to fit over the CV, and are basically flat like the motorsport style discs, just much cheaper. So with a suitable mounting bell made they looked like they just might work.

Econovan Disc
Image

With those in my hand I fired up the CAD software and tried to see what sort of shaped I'd need. After many iterations I finally arrived at something I liked, I then 3d printed a model and took it out to the shed to verify my work.

Disc with Mockup bell
Image

Image

Econovan discs vs Metro Turbo
Image


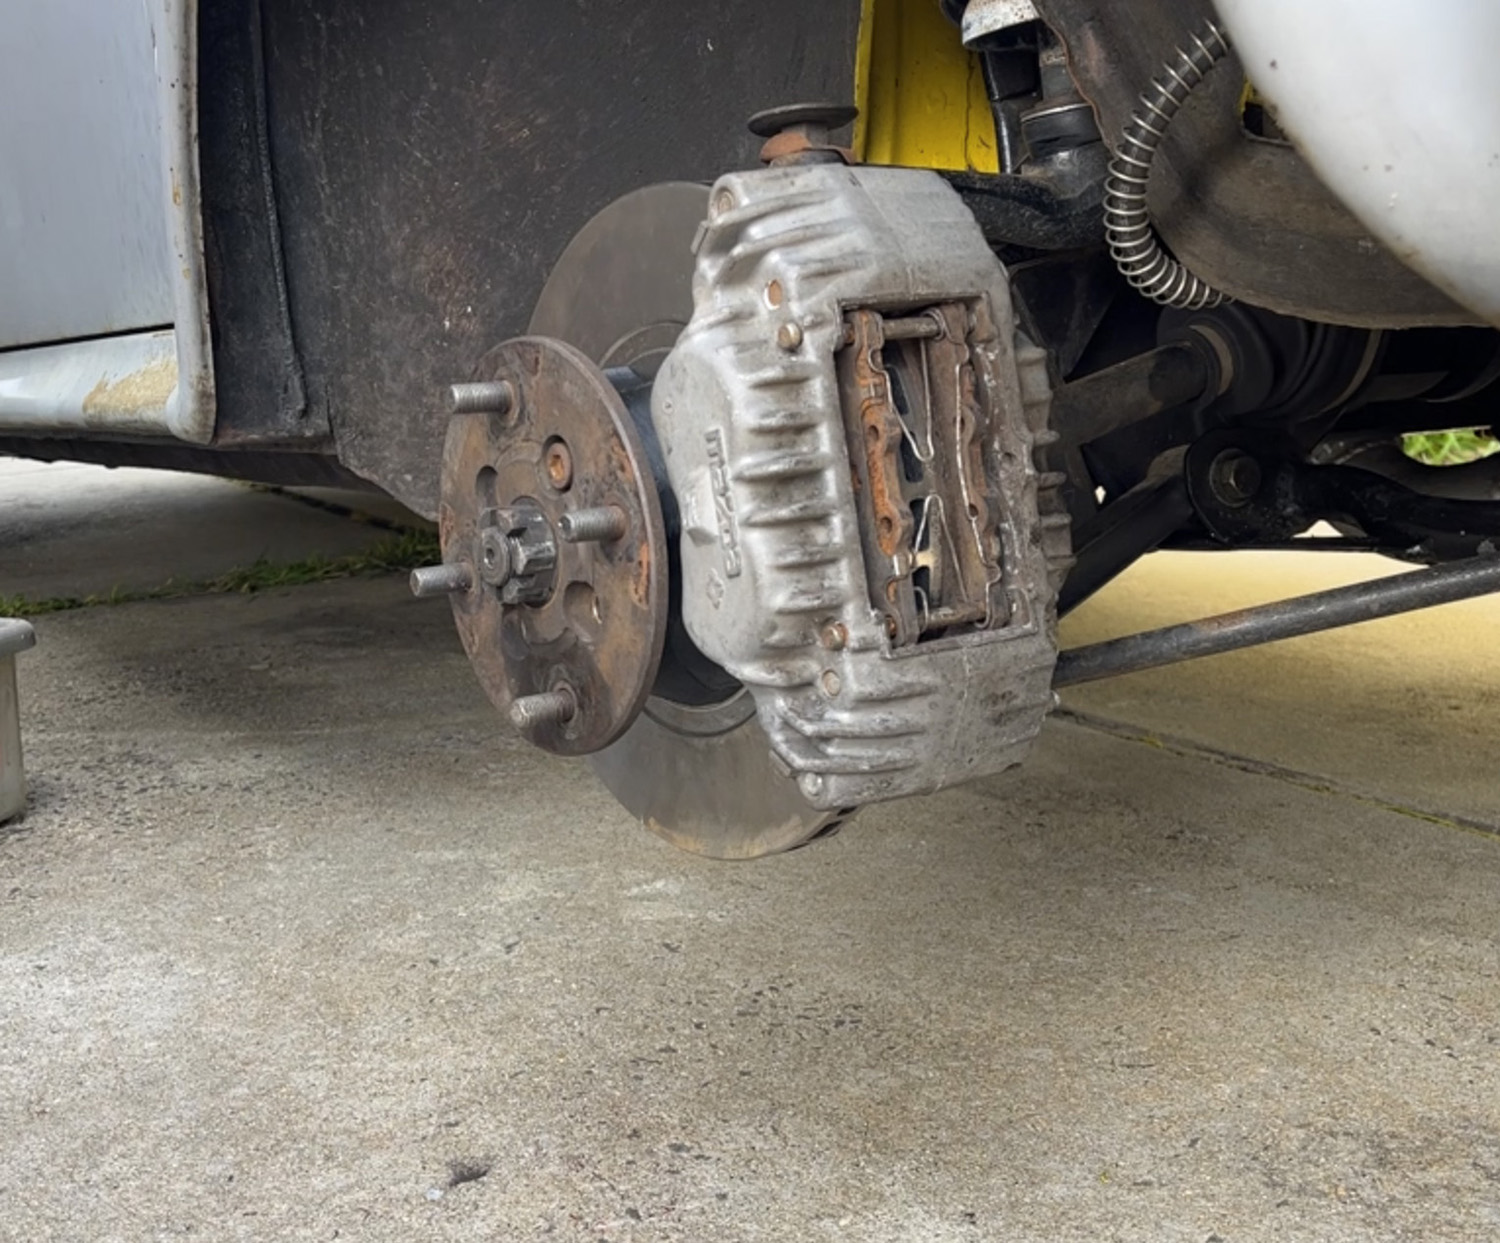
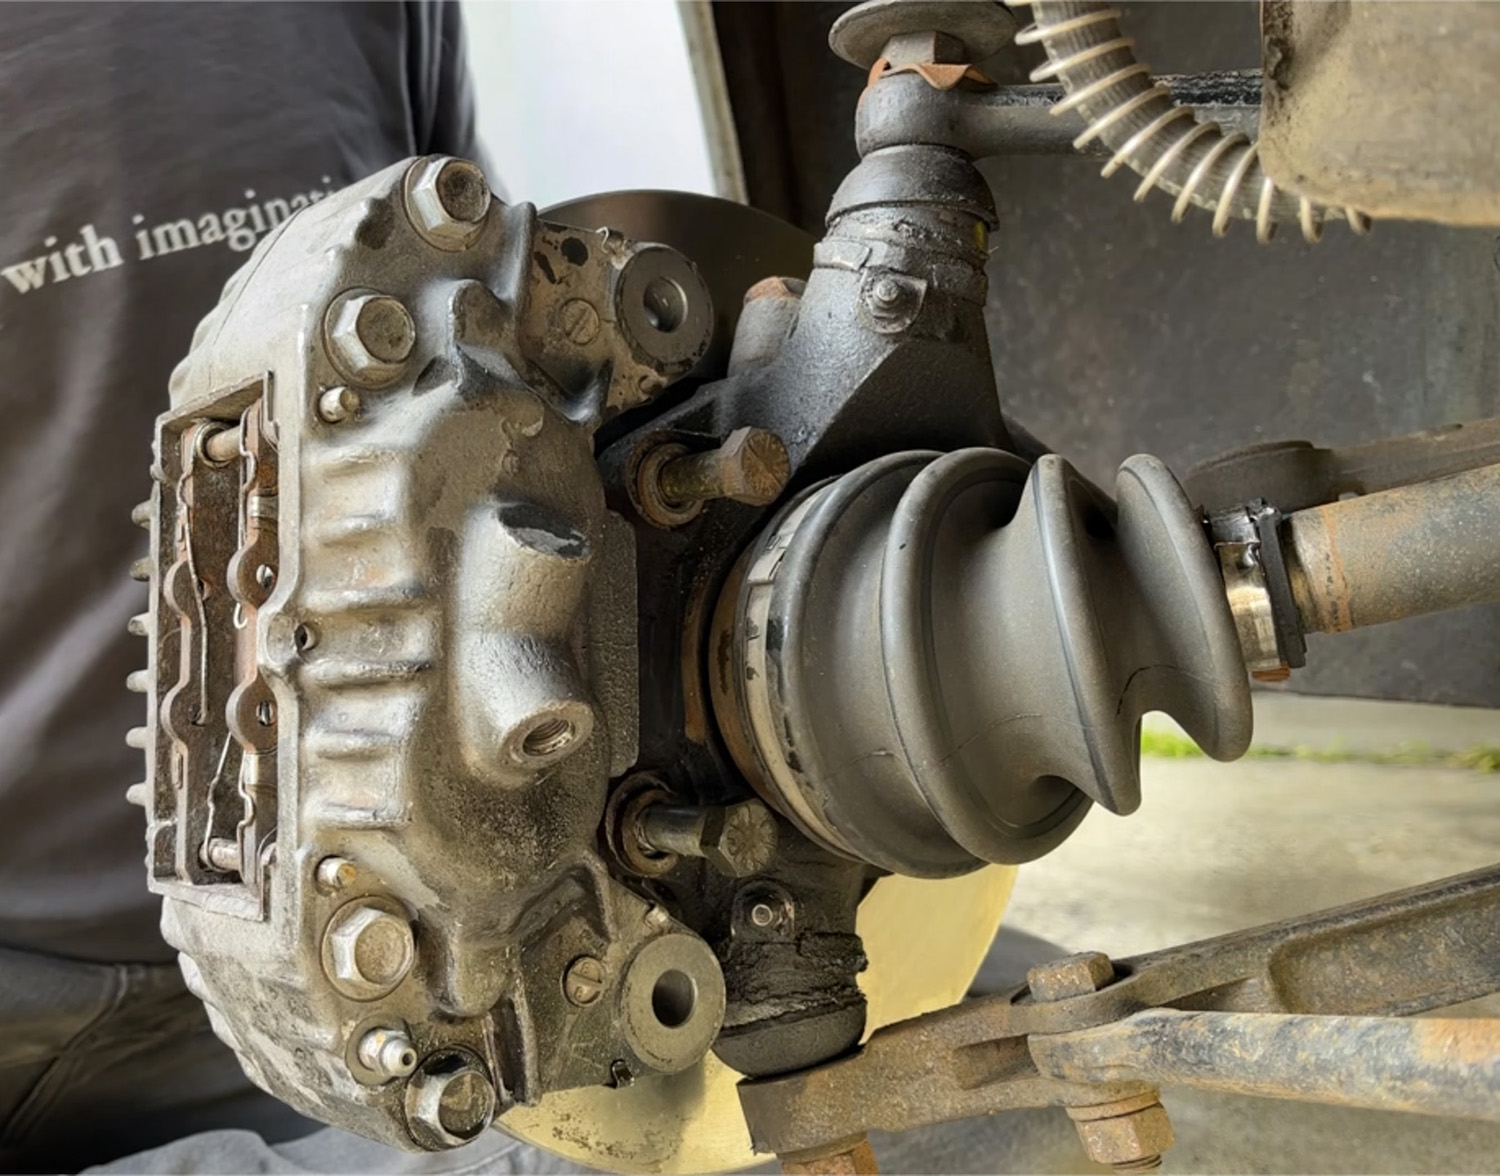
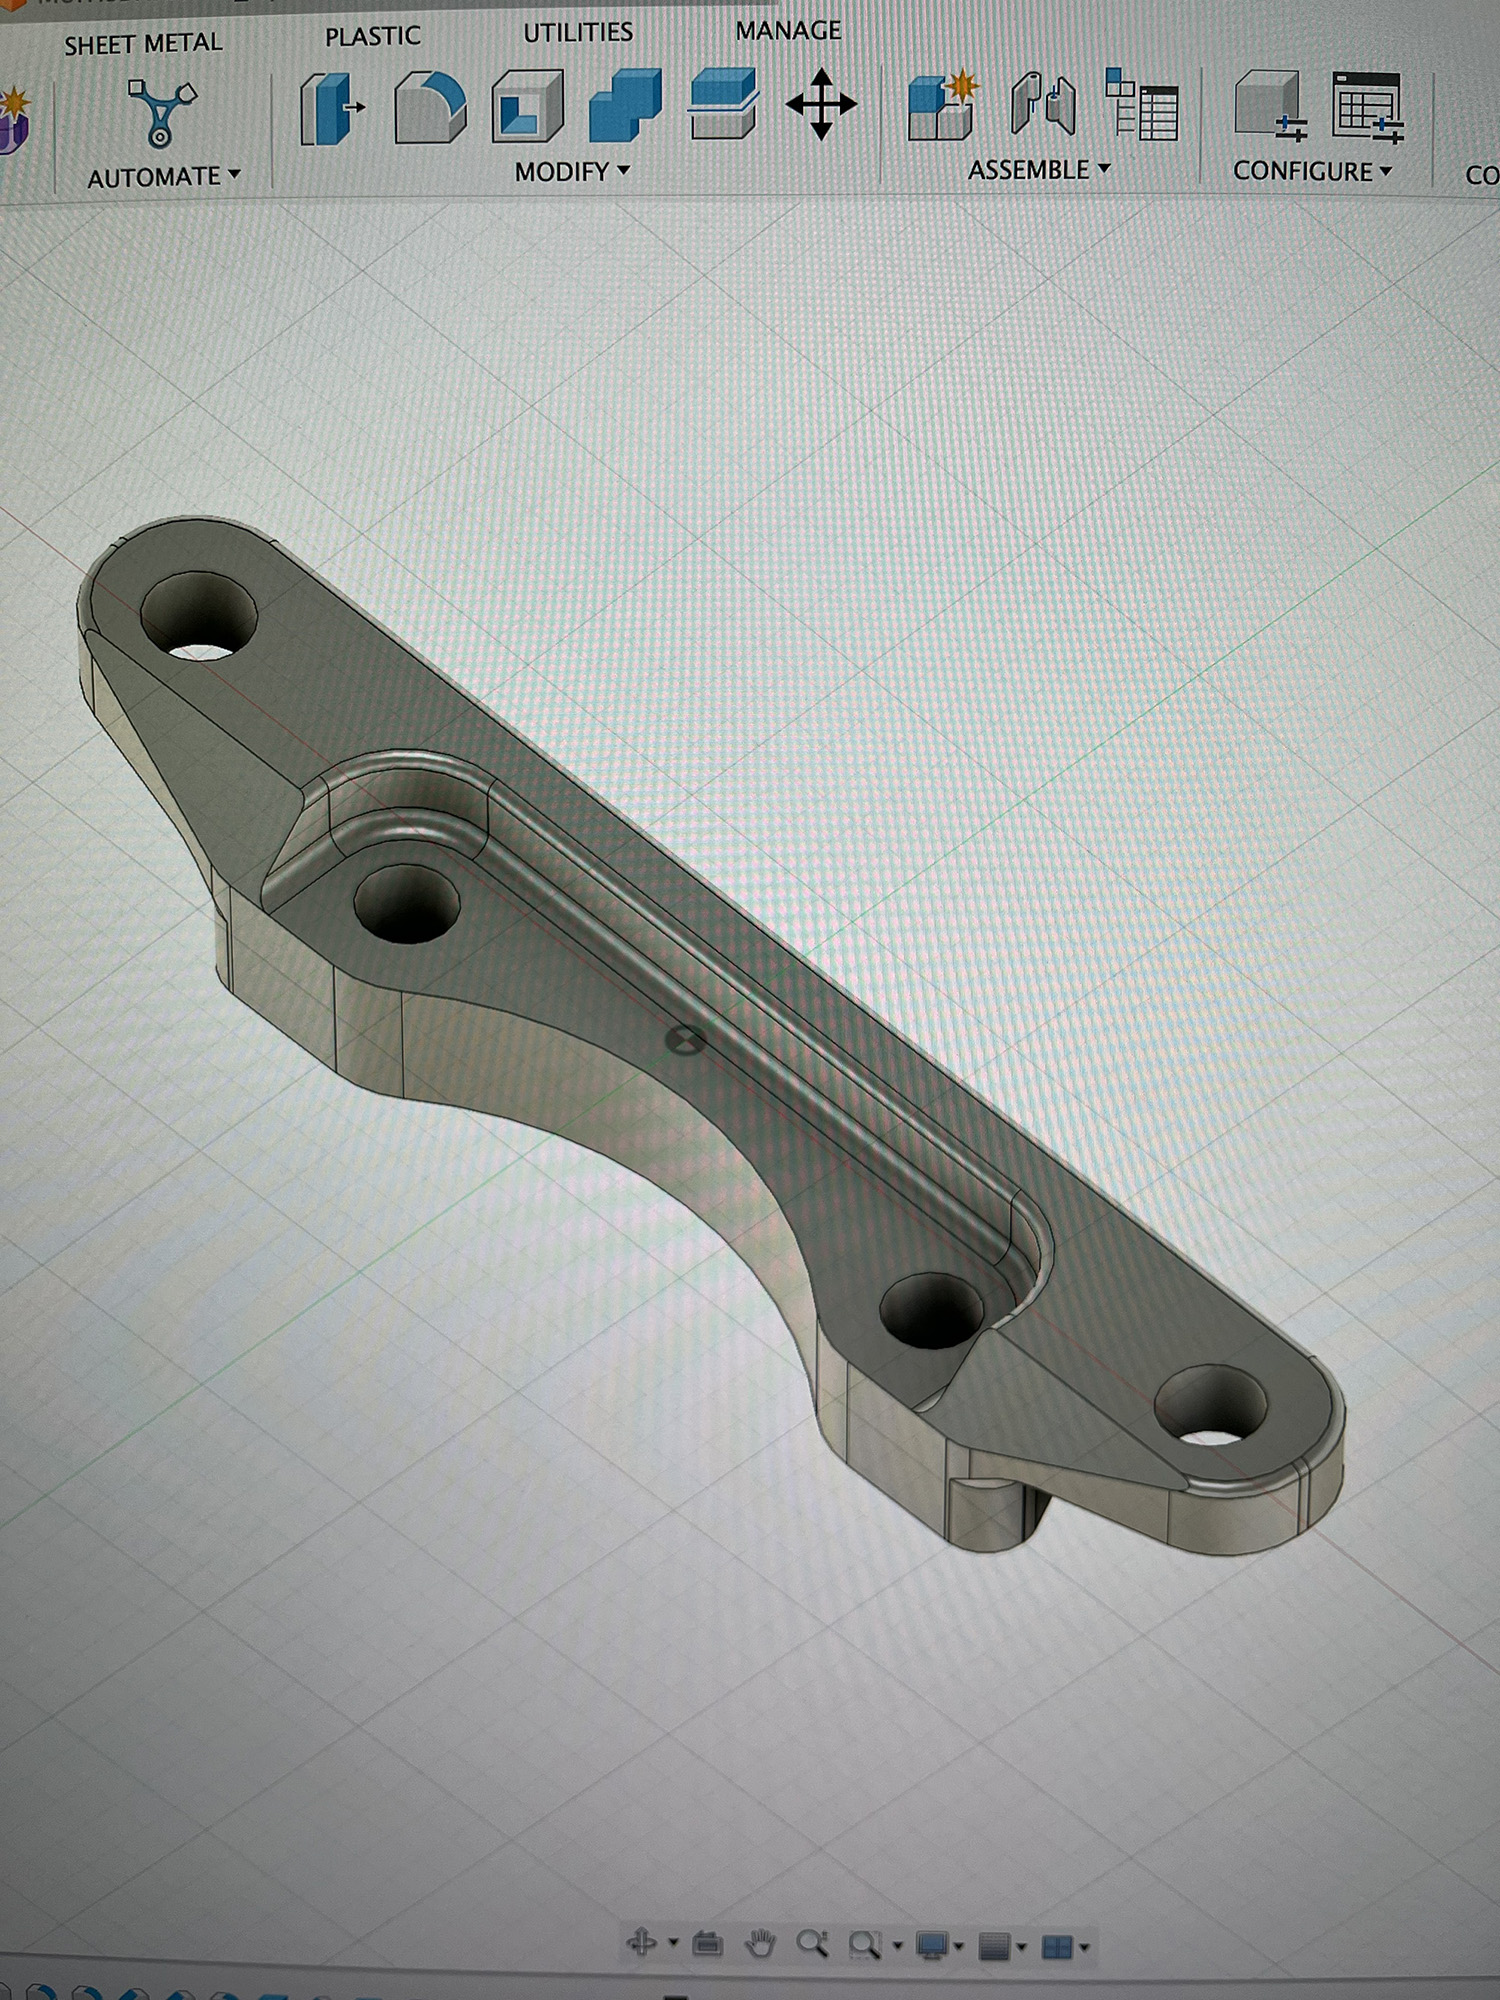
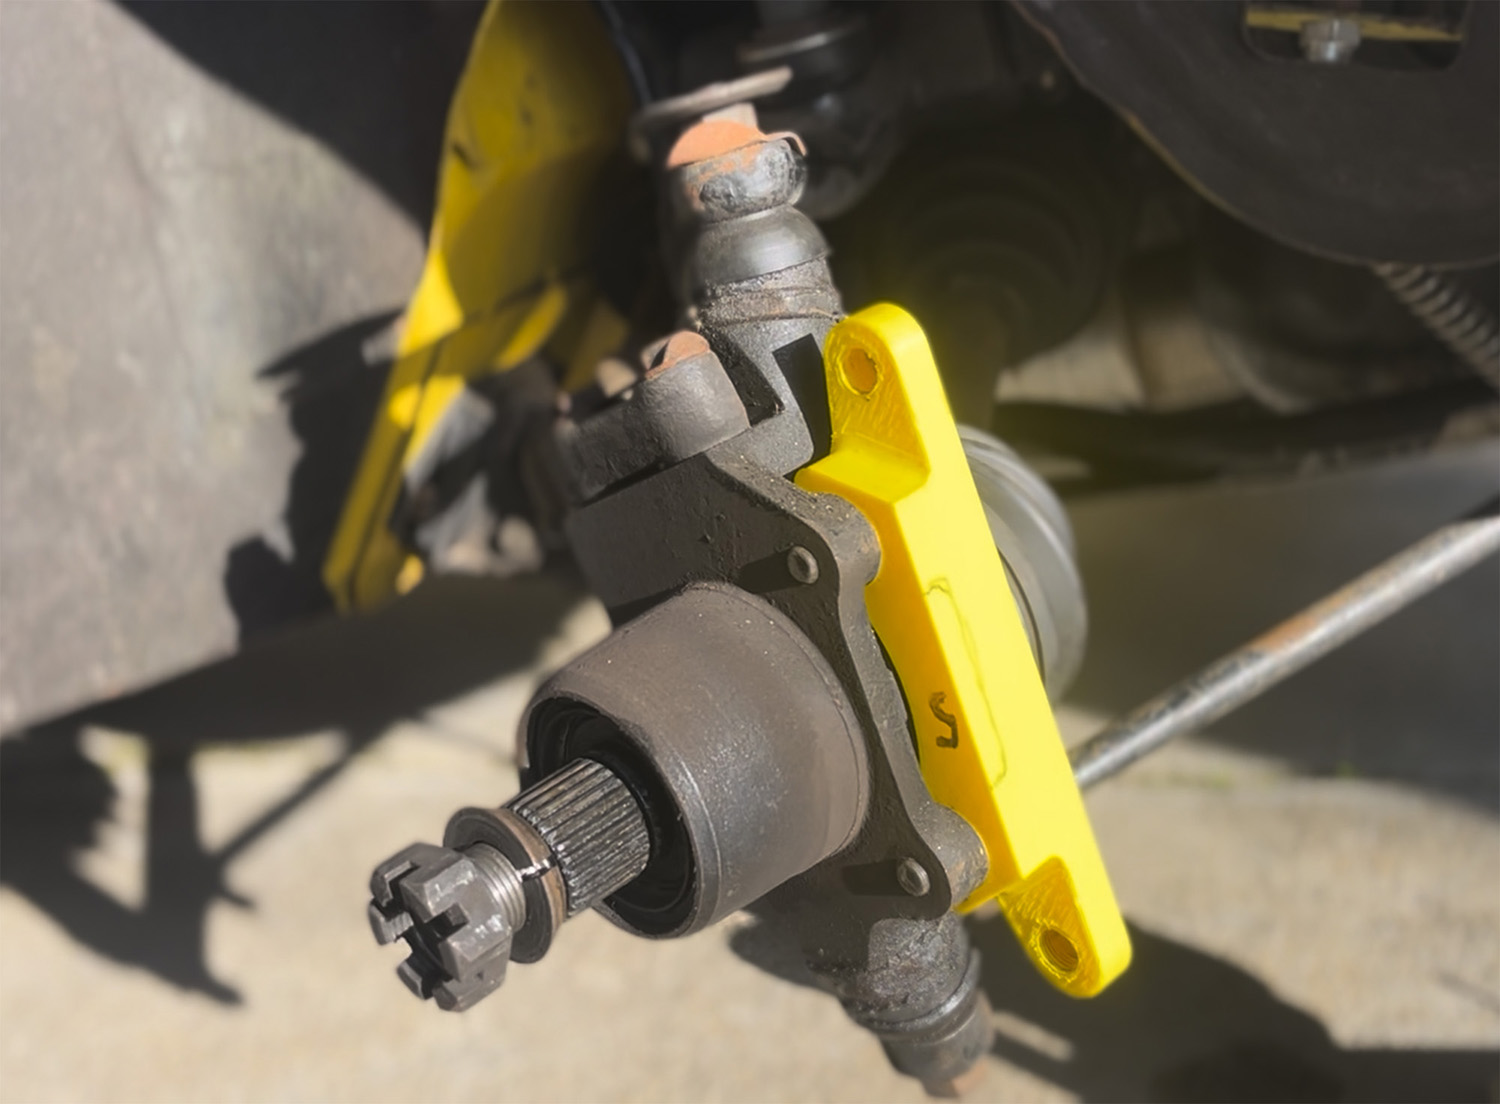
While initially I had hoped to reuse the Clio calipers by simply moving them outboard, it meant that the mounting holes clashed with the hub and just got problematic. However some rx7 4 pots came up cheap on market place so I figured I'd give them a shot. Their much wider bolt spacing made it physically possible to fit with an adapter.

3D printed caliper mount mockup number 5.
Image

RX7 caliper on the larger disc
Image

Image

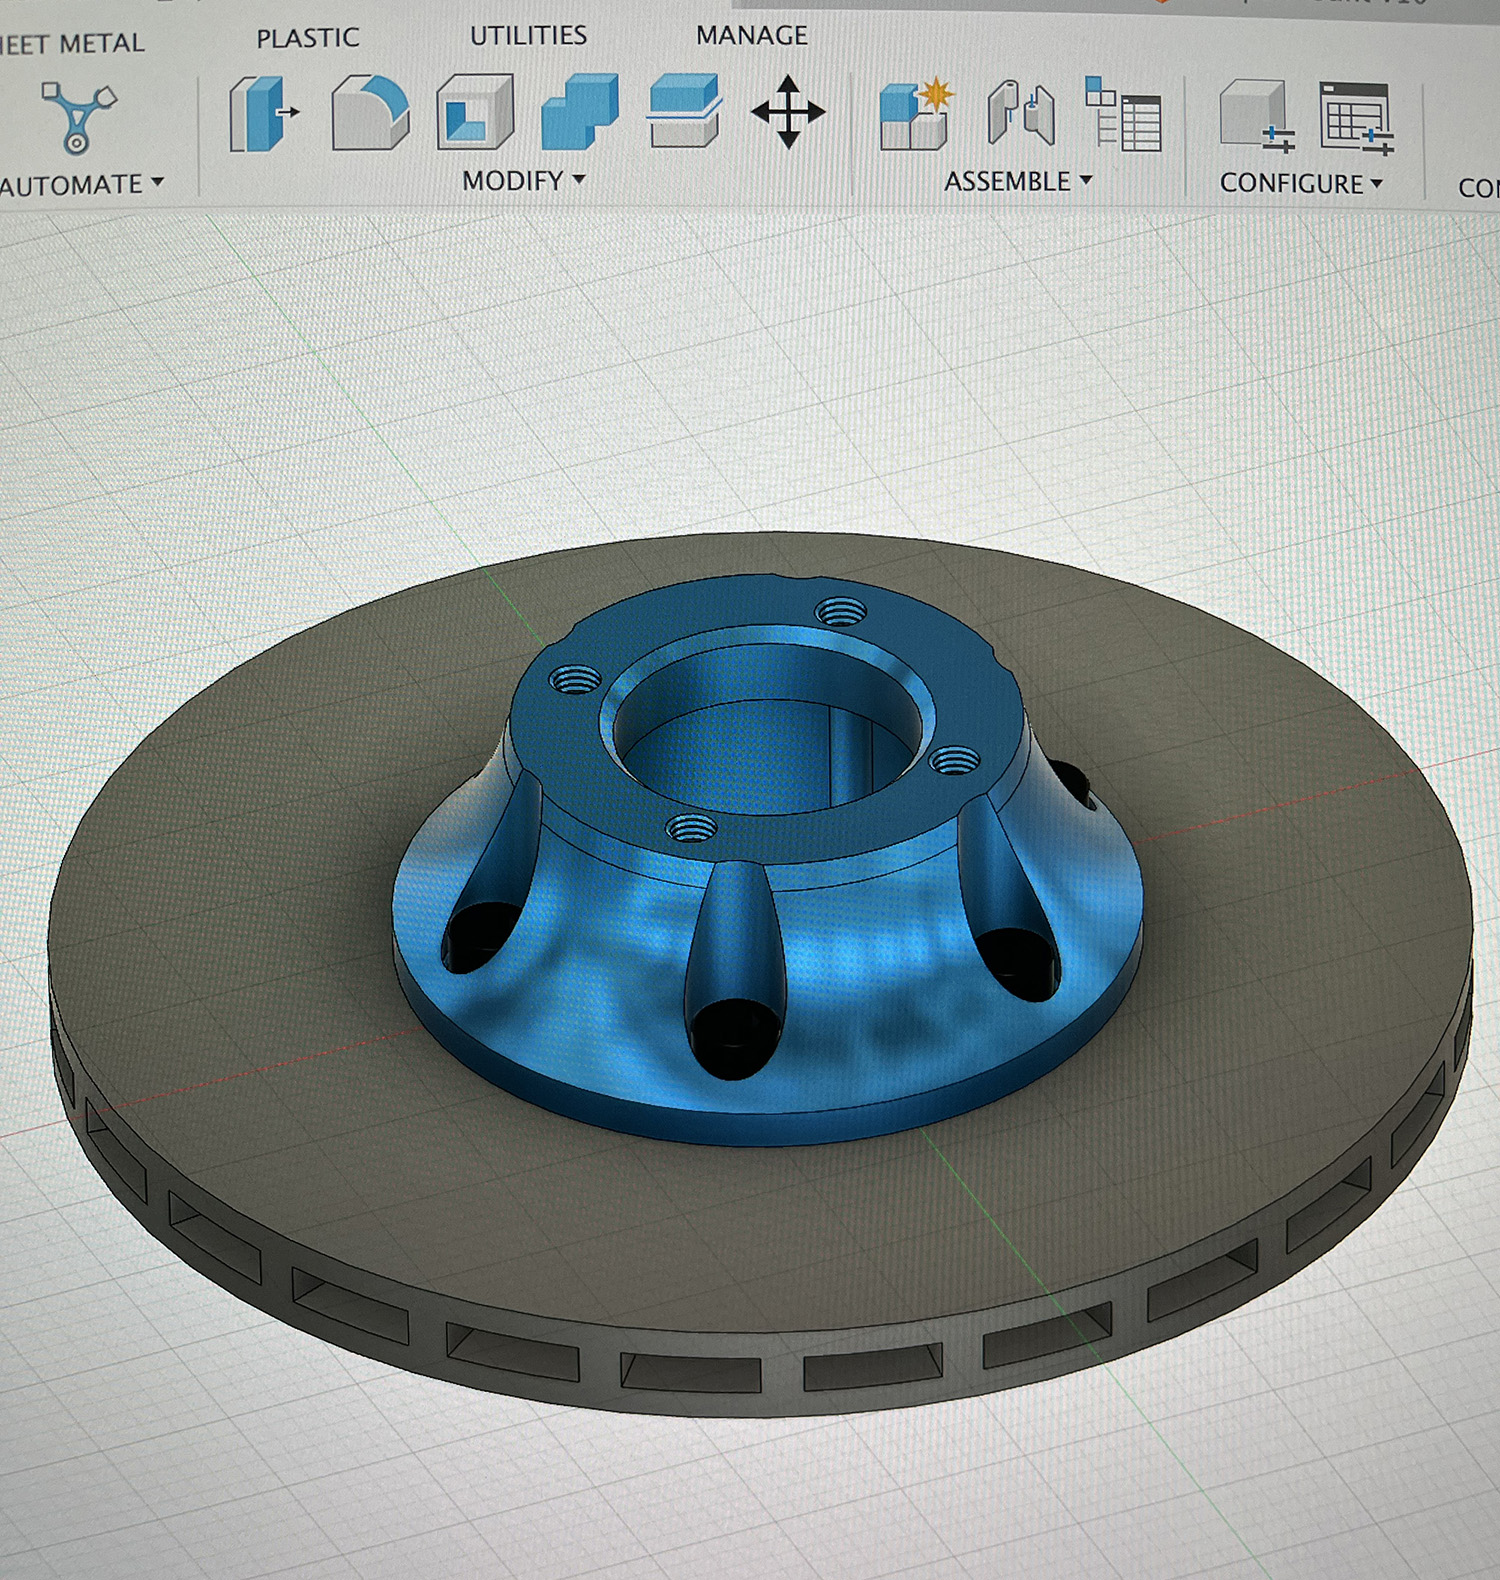
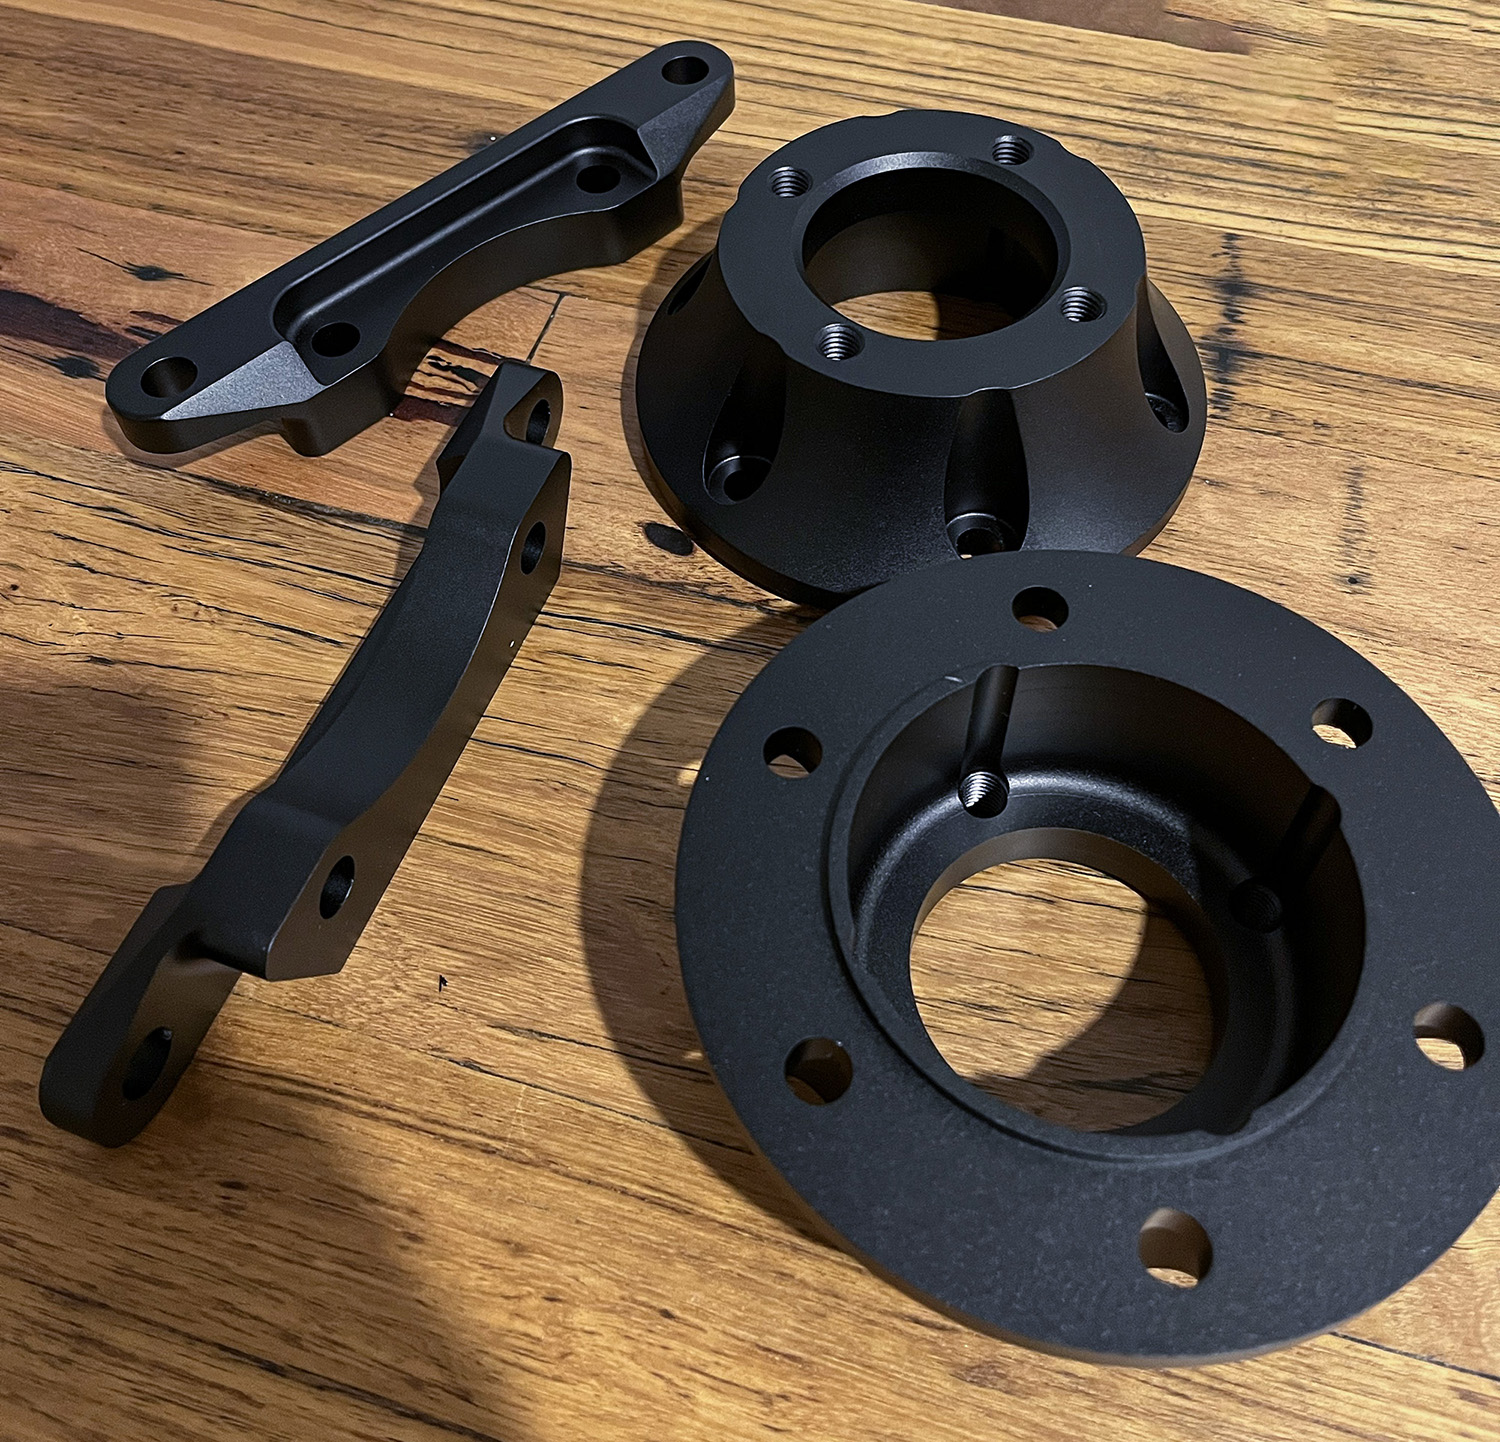
Mockups showed that the brake bell geometry was spot on, but I made a new design to use bolts and nuts instead of threaded holes at the disc mount. And I went thru 5 iterations for the caliper bracket to position it where I needed it while still allowing access to the grease nipples.

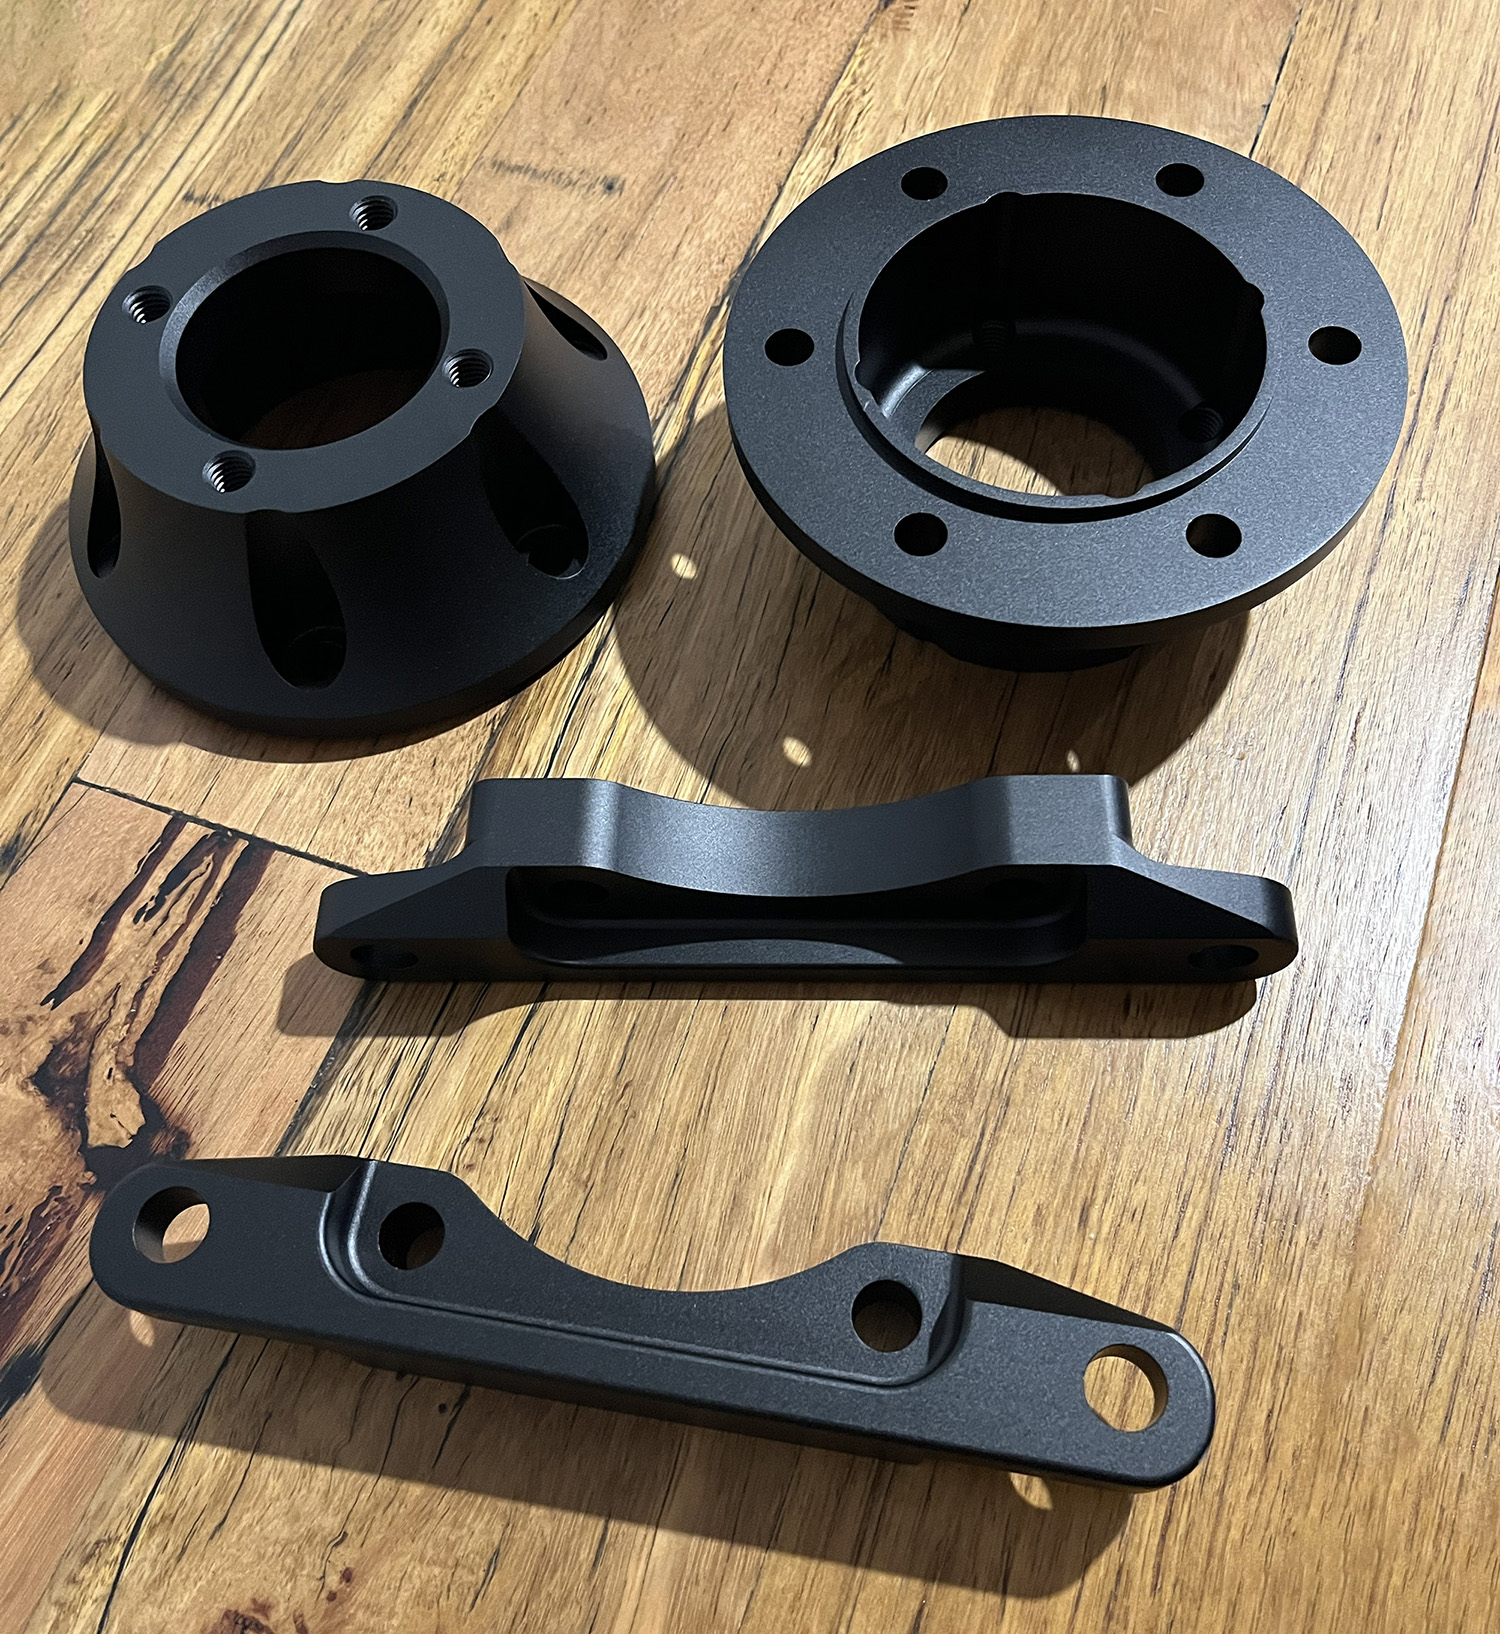
With the design sorted I uploaded the files to JLCPCB and sent them some money.

Final Brake Bell Design
Image

RX7 Brake Caliper Mount
Image

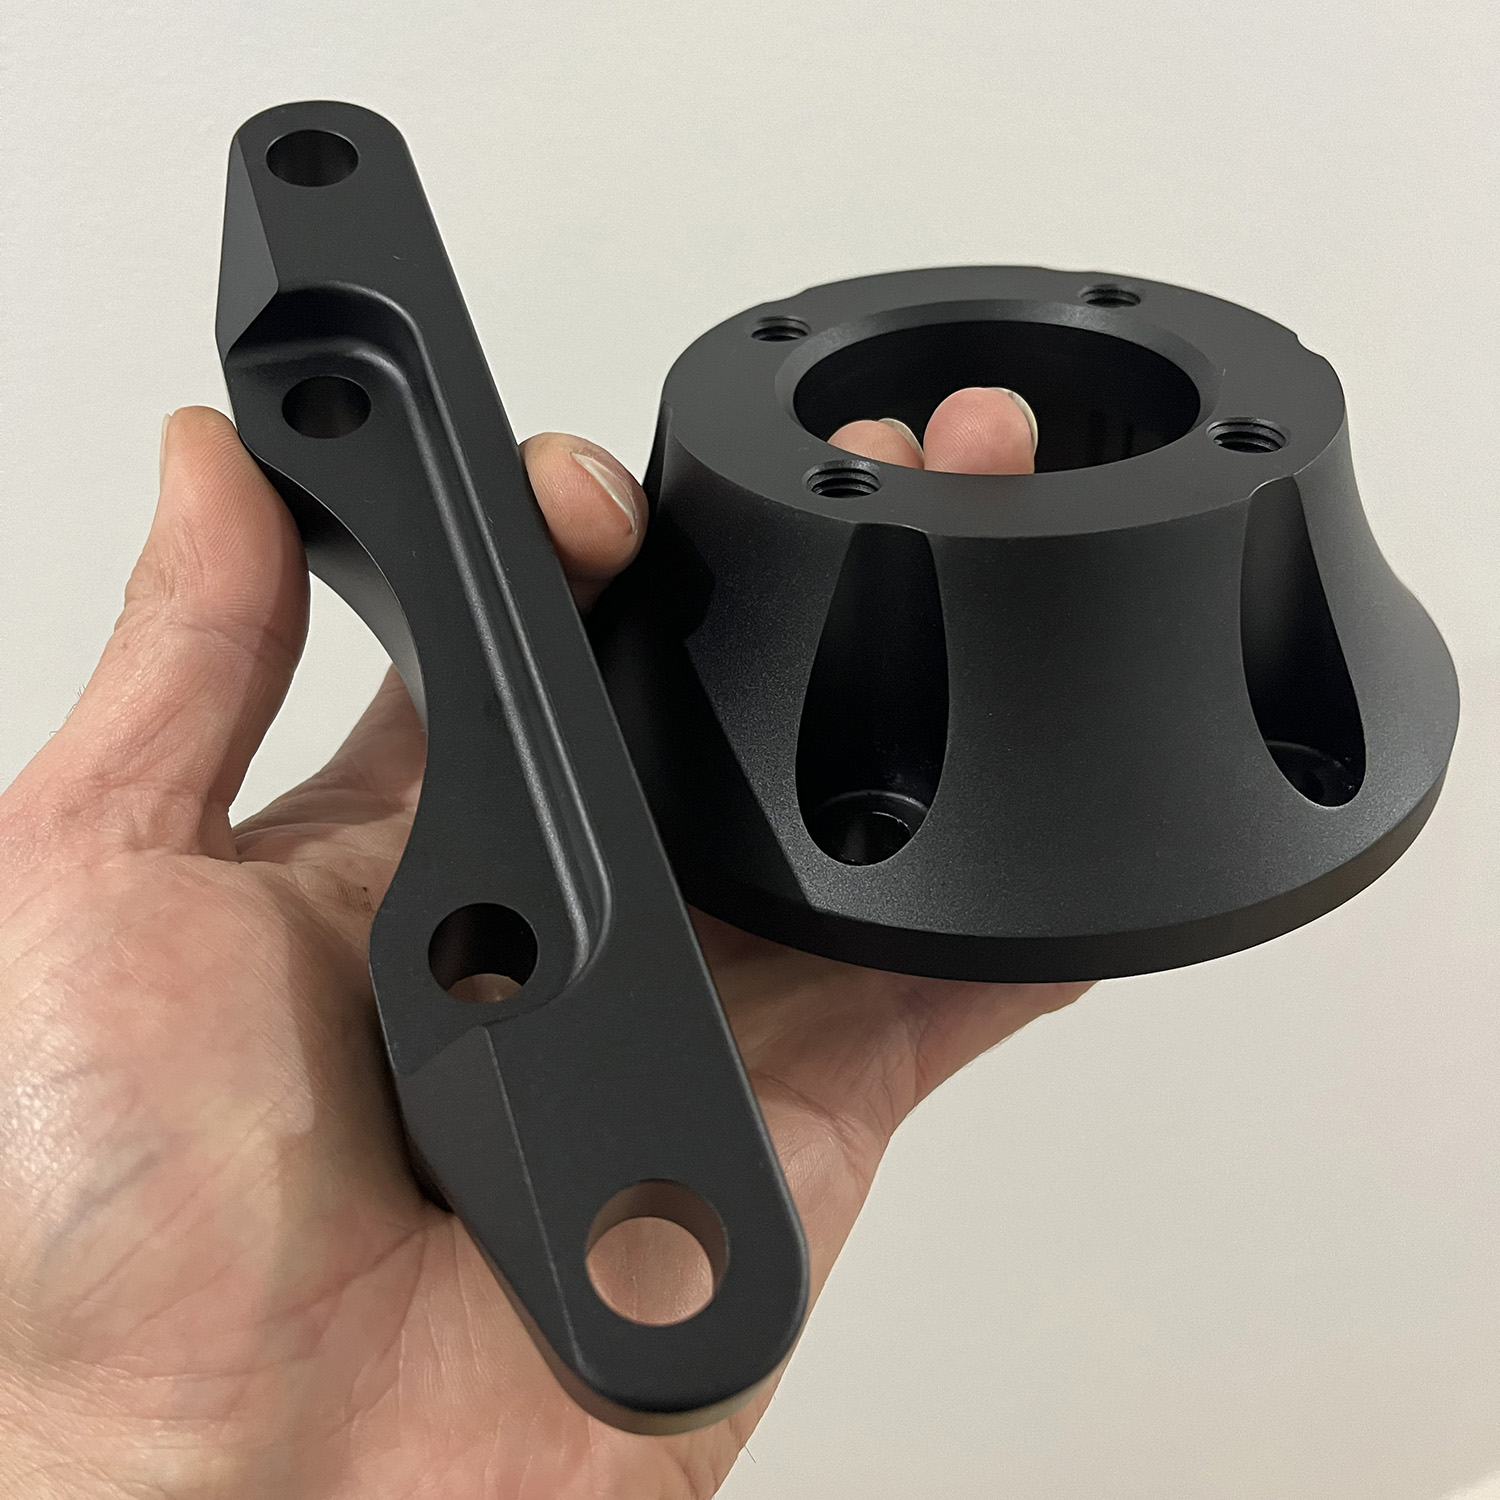
And so all this leads me to the shiny bits that arrived in the post today. They turned out awesome, now I just need to get some new bolts for all this and we can mount them up.
Image

Image

Image

Image

_________________
Madmorrie

https://www.youtube.com/watch?v=oczLolENFMQ


Last edited by madmorrie on Wed Oct 09, 2024 10:18 am, edited 1 time in total.

Top
 Profile  
 
PostPosted: Fri Sep 27, 2024 9:14 pm 
Offline
1275cc
1275cc
User avatar

Joined: Wed Mar 30, 2005 8:54 pm
Posts: 2010
Location: Greenhill, SA
This is bloody spectacular! Well done.

_________________
Cheap, Fast, Reliable. Choose two.


Top
 Profile  
 
PostPosted: Wed Oct 09, 2024 10:52 pm 
Offline
998cc
998cc
User avatar

Joined: Mon Jan 16, 2006 1:15 pm
Posts: 683
Location: Melbourne
So the bolts have arrived to fit the brakes, but I just dropped the seats off to be re-trimmed so while I might get time to fit them up soon, they won't be able to be tested for a while.

I have been messing around with lots of little things on the car. One idea that I have toyed with for ages is a custom badge. If we are honest, the Morris badge is a little pedestrian. Given I have injected a lot more attitude into the car a lot I thought I might take a look at modernising the badge a little too. (Or if you prefer, since I have bastardised nearly every other part of the car...)

Image

And while I have de-badged the outside of the car, the inside could do with a little bit of jewellery.

I do love the original Morris 'M' horn push, but all the ones I have are damaged in some way. The nice SAAS wheel I have came with a nice machined alloy centre, but it's just a bit bland.

Anyway, since I was trained as a graphic designer I fired up illustrator and had a muck around.

The original Ox we know and love.
Image


My first attempt. A bit better, but I was thinking it needed more "Raging Bull" style?
Image

Hmm, more comical than I was hoping for. At this point I walked away from it for months.
Image

Came back with fresh eyes much later and found better reference.
Image

Which distilled into this.
Image

And finally this.
Image

And since my car will be yellow and black. I created this version.
Image

Happy with that I set about making it real. I extruded to logo in blender and 3D printed it at the size I needed. I've just used PETG filament which is what I use most of the time. Will see how it lasts in the summer.

Image

I had some clear epoxy left over from a table project I did a few years back. With some raiding of the arts and crafts box and quite a bit of experimentation I managed to create this.

Image

Image

Image

Pretty happy with how it came out. Time will tell if it lasts or not.

_________________
Madmorrie

https://www.youtube.com/watch?v=oczLolENFMQ


Top
 Profile  
 
PostPosted: Fri Oct 11, 2024 7:37 am 
Offline
848cc
848cc
User avatar

Joined: Sat Oct 26, 2019 12:54 pm
Posts: 230
Location: Sydney
Very cool. Love how you have a finger print on every aspect of this build. Truely custom and better than factory.

_________________
1966 Mini Deluxe - “Gabby” 34 years under restoration and counting...
1970 MGBGT
1959 MGA


Top
 Profile  
 
PostPosted: Sun Oct 13, 2024 5:27 am 
Offline
848cc
848cc

Joined: Sat Feb 16, 2008 6:01 am
Posts: 50
Location: Santiago, Chile
amazing!!!!

_________________
Image


Top
 Profile  
 
Display posts from previous:  Sort by  
Post new topic Reply to topic  [ 355 posts ]  Go to page Previous  1 ... 20, 21, 22, 23, 24

All times are UTC + 10 hours


Who is online

Users browsing this forum: No registered users and 4 guests


You cannot post new topics in this forum
You cannot reply to topics in this forum
You cannot edit your posts in this forum
You cannot delete your posts in this forum
You cannot post attachments in this forum

Jump to:  

© 2016 Ausmini. All garage work involves equal measures of enthusiasm, ingenuity and a fair degree of irresponsibility.