Ausmini
It is currently Wed Jul 16, 2025 9:02 am

All times are UTC + 10 hours


Post new topic Reply to topic  [ 8519 posts ]  Go to page Previous  1 ... 496, 497, 498, 499, 500, 501, 502 ... 568  Next
Author Message
PostPosted: Wed Dec 17, 2014 9:25 pm 
Offline
religious status
religious status
User avatar

Joined: Fri Mar 19, 2004 6:19 pm
Posts: 39754
Location: near Baulkham Hills, NSW
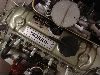
Put a 1310 back together, primed the oil pump, cranked it over with plugs out, got pressure (only 400KPa). Cranked it again, got NO pressure. Pump is blowing bubbles out the banjo bolt hole. :(
Looks like the oil pump gasket must have blown.
I think I'll make a new one from a Kelloggs cornflakes packet, it will be stronger than the brown paper bag strength ones being sold now.

[edit] Update-
Gasket not blown, but the 2 ports are VERY close to the gasket edge and an unused bolt hole. Also, this brown paper gasket is only .009" thick, and too small in diameter.
I cut a new one from 0.8mm gasket material and used Loctite 515 instead of Permatex #3. Will try for pressure in the morning.

[edit] update 2-
My homemade gasket didn't fix it, but a new pump did. Has 500Kpa (~70psi) cranking now.
The old pump wasn't scored at all and had only done ~1,000km, so I dunno.
Note- many aftermarket oil pumps now do not have enough chamfer on the corner, to clear the radius present (sometimes) in the block.
But, this may not have been the problem. The gasket was marked as sealing OK. But I have put a decent chamfer on the new pump, to be sure, to be sure.... 8)

_________________
DrMini- 1970 wasaMatic 1360, Mk1S crank, 86.6HP (ATW) =~125 @ crank, 45 Dellorto (38 chokes), RE282 sprint cam, 1.5 rockers, 11.0:1 C/R. :mrgreen:


Last edited by drmini in aust on Sat Dec 20, 2014 6:28 pm, edited 4 times in total.

Top
 Profile  
 
PostPosted: Wed Dec 17, 2014 10:30 pm 
Offline
998cc
998cc

Joined: Mon Mar 10, 2014 11:38 am
Posts: 1143
Location: Tassie
Bugger. Good thing you have the smarts to check its got pressure before putting fire in the belly!

_________________
1963 Morris 850 Smoke Grey
1963 Morris 850 Shadow Blue
1965 Morris Mini Smooth Van
1966 Morris Mini Van
1969 Morris Mini Deluxe Resto
5/72 Clubman Gt


Top
 Profile  
 
PostPosted: Sat Dec 20, 2014 5:19 pm 
Offline
998cc
998cc
User avatar

Joined: Tue Sep 10, 2013 3:21 pm
Posts: 979
Location: St. George Area, New South Wales
Woo new shoes, wheels balanced all round, aligned, all sorted for a drive, just need to put the steering wheel back to the middle, need a really big 33mmISH socket apparently.
Fancy new wheel alignment machine, at a place in Chulora. only tock a few picks but they will go up soon.

_________________
Nick
Image
http://www.ausmini.com/forums/viewtopic.php?f=3&t=86675


Top
 Profile  
 
PostPosted: Sat Dec 20, 2014 7:55 pm 
Offline
848cc
848cc
User avatar

Joined: Tue May 27, 2014 12:57 pm
Posts: 265
Location: Dundalk, Ireland
Hobson wrote:
need a really big 33mmISH socket apparently.


1" 5/16. See if you can get a lend of one from a local garage.

_________________
Image


Top
 Profile  
 
PostPosted: Sat Dec 20, 2014 7:56 pm 
Offline
998cc
998cc
User avatar

Joined: Tue Sep 10, 2013 3:21 pm
Posts: 979
Location: St. George Area, New South Wales
=D thanks. Yeah I am looking around.

_________________
Nick
Image
http://www.ausmini.com/forums/viewtopic.php?f=3&t=86675


Top
 Profile  
 
PostPosted: Sat Dec 20, 2014 7:57 pm 
Offline
1098cc
1098cc

Joined: Wed Jun 26, 2013 10:05 pm
Posts: 1500
Location: perth WA
Supercheap have them 34mm

_________________
The best part of fixing your mini is the test drive

Minis..

1976 van daily drive
1975 van
1968 deluxe in the shed
1967 deluxe high strung 1310
1959 austin healey sprite


Top
 Profile  
 
PostPosted: Tue Dec 23, 2014 10:24 am 
Offline
848cc
848cc
User avatar

Joined: Tue May 27, 2014 12:57 pm
Posts: 265
Location: Dundalk, Ireland
Tracing the navy wire with white tracer, goes into a green wire, twisted wire join wrapped in tape, which then goes into a blue and red wire 4 inches further down, again another twist and wrap join.

Oh this is gonna be fun!

_________________
Image


Top
 Profile  
 
PostPosted: Tue Dec 23, 2014 1:33 pm 
Offline
998cc
998cc
User avatar

Joined: Wed Oct 23, 2013 10:53 am
Posts: 552
Location: Wollongong NSW
timmy201 wrote:
I've finally got the passengers seat fixed up. It's been a good 6 months since the rubber diaphragm split and at least 12 months since I bought the new foam to restuff the base... It's actually quite comfy now, a bit firmer than the rubber base but hopefully longer lasting!

Image


Was first to ride in this new fancy seat. Was indeed quite comfy.

_________________
I wish I had some sort of witty quote in my signature


Top
 Profile  
 
PostPosted: Wed Dec 24, 2014 7:45 pm 
Offline
SooperDooperMiniCooper ExpertEngineering
User avatar

Joined: Fri Apr 29, 2005 9:46 am
Posts: 18887
Location: Under the bonnet son!
I don't use the rubber ones anymore... maybe they suited the lighter 1960s arses than the modern types..

_________________
SooperDooperMiniCooperExpertEngineering

All garage work involves equal measures of enthusiasm, ingenuity and a fair degree of irresponsibility.


Top
 Profile  
 
PostPosted: Wed Dec 24, 2014 7:54 pm 
Offline
1275cc
1275cc
User avatar

Joined: Sat Jun 20, 2009 11:24 am
Posts: 2276
Location: Wollongong
Mick wrote:
I don't use the rubber ones anymore... maybe they suited the lighter 1960s arses than the modern types..


Some of the new ones are poor quality rubber and split in no time. Good originals (Marked Made in Australia I think), say from a passenger seat are the go if you can find one.

_________________
Image
68 Morris Cooper S Mk1 (*ex 78 1275 LS 4th last built, 70 Morris 1500 OHC & 70 MiniMatic)


Top
 Profile  
 
PostPosted: Tue Dec 30, 2014 2:07 pm 
Offline
998cc
998cc
User avatar

Joined: Tue Sep 10, 2013 3:21 pm
Posts: 979
Location: St. George Area, New South Wales
Pulled the steering column off turned it 15 or so degrees to the left, and put it back on.

_________________
Nick
Image
http://www.ausmini.com/forums/viewtopic.php?f=3&t=86675


Top
 Profile  
 
PostPosted: Tue Dec 30, 2014 2:16 pm 
Offline
848cc
848cc

Joined: Sat Aug 16, 2014 9:22 pm
Posts: 109
Took my nugget to see kev aka DrMini for him to put his A/F meter on it as i thought it needed a tune... turns out its running good and im just ignorant hahah... thanks kev, much appreciated


Top
 Profile  
 
PostPosted: Tue Dec 30, 2014 5:52 pm 
Offline
1275cc
1275cc
User avatar

Joined: Sat Nov 19, 2005 1:37 pm
Posts: 2495
Location: Vegus, Brisvegus
Sandblasted two radiator shrouds, various brackets, a handbrake and the Perry extractors I have for sale.


Top
 Profile  
 
PostPosted: Tue Dec 30, 2014 8:05 pm 
Offline
1275cc
1275cc
User avatar

Joined: Sun Apr 29, 2012 1:19 pm
Posts: 4501
Location: Wollongong, NSW
Tried on some wheels during the week
Image

Image

Today I installed my stage one performance kit I got a few months ago.. Before
Image
After
Image

_________________
Image


Top
 Profile  
 
PostPosted: Wed Dec 31, 2014 8:52 am 
Offline
848cc
848cc
User avatar

Joined: Sat Sep 21, 2013 9:47 pm
Posts: 324
Location: Melbourne West
Wheels are good.

_________________
It's easy once you know how.


Top
 Profile  
 
Display posts from previous:  Sort by  
Post new topic Reply to topic  [ 8519 posts ]  Go to page Previous  1 ... 496, 497, 498, 499, 500, 501, 502 ... 568  Next

All times are UTC + 10 hours


Who is online

Users browsing this forum: No registered users and 101 guests


You cannot post new topics in this forum
You cannot reply to topics in this forum
You cannot edit your posts in this forum
You cannot delete your posts in this forum
You cannot post attachments in this forum

Jump to:  

© 2016 Ausmini. All garage work involves equal measures of enthusiasm, ingenuity and a fair degree of irresponsibility.