ausmini
https://ausmini.com/forums/

Archangel's Mini Build - El Gato (The Cat) - *FOR SALE*
https://ausmini.com/forums/viewtopic.php?f=23&t=22654
Page 35 of 125

Author:  Caponix [ Tue Apr 01, 2008 11:38 pm ]
Post subject: 

Kennomini wrote:
You've got the trailer, bring it anyway you'll definitely win something 8)


Archangel007 wrote:
Kenno,

Good idea.

I might win a trophy for 'Most Frustrated' or 'Longest Project'


should just bring it along if the dyno is there...just for some bragging rights :P 8)
Author:  Archangel007 [ Wed Apr 02, 2008 7:13 pm ]
Post subject: 

Dont worry I'll be there in some form or other!

Author:  Archangel007 [ Sun Apr 06, 2008 7:43 pm ]
Post subject: 

Okay, time for an update.

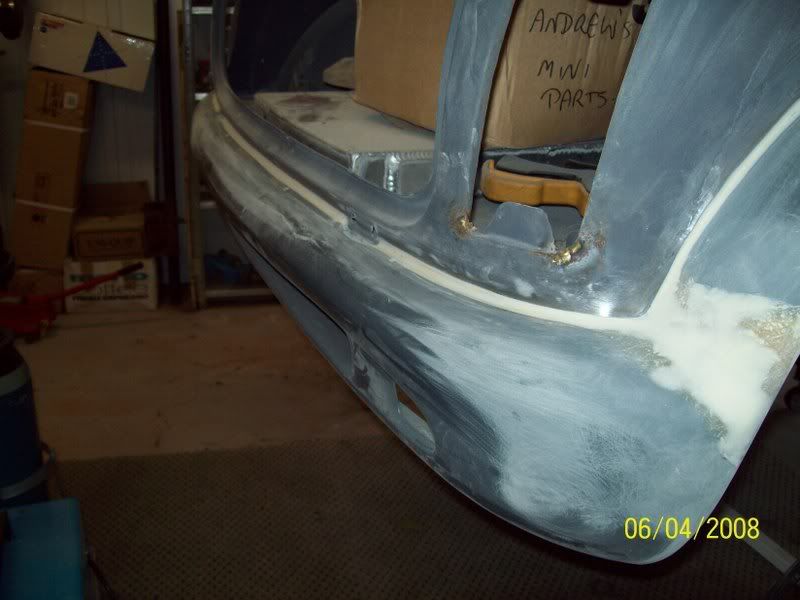
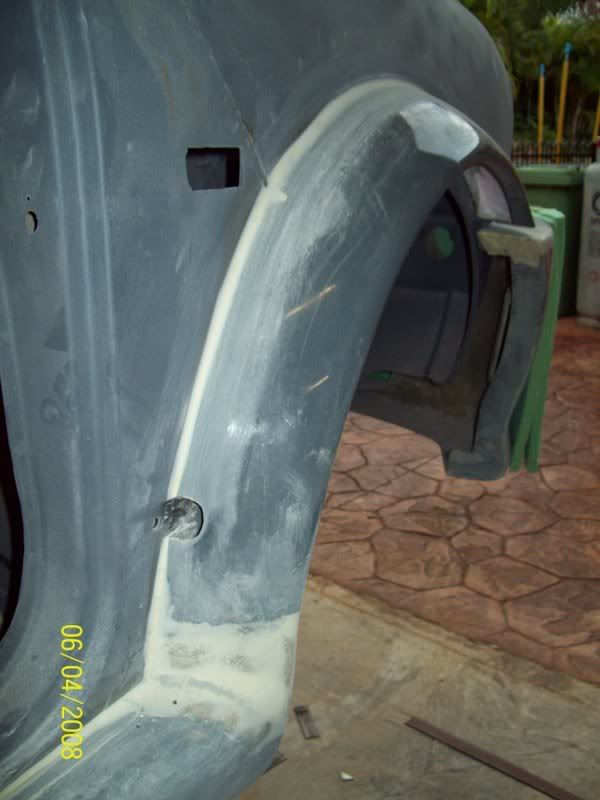
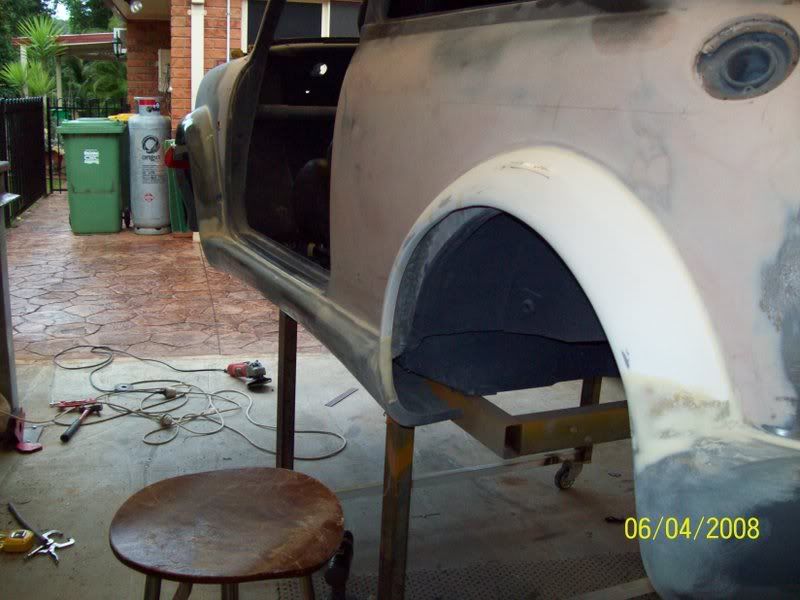
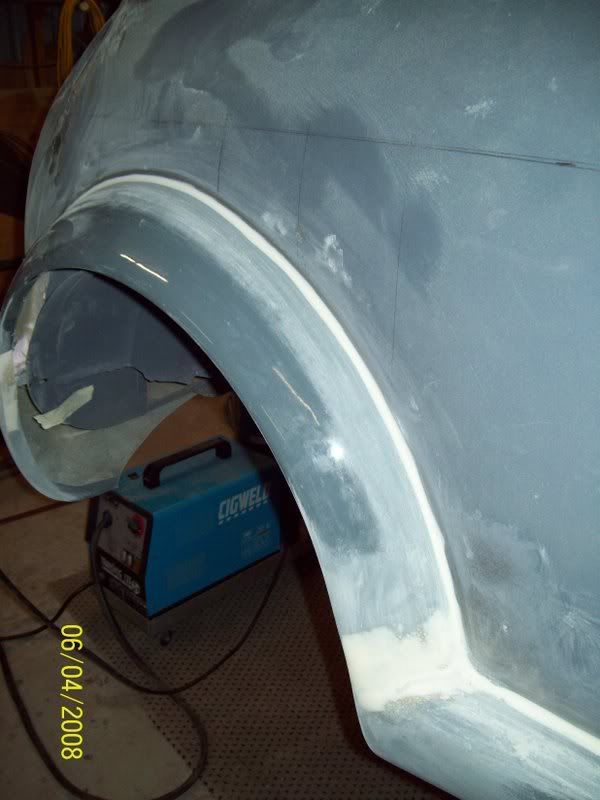
Spent most of the weekend bogging and sanding the bodykit to make the transition between it and the shell seamless. It is imperative that this transitional zone look as smooth and as uniform as possible. I started by masking off the bogging area, applying the microballoon/epoxy mix, and then pulling the tape off while still wet. Then when it was dry, the saniding.......lots of sanding!

Rear drivers side:
Image

Rear bumper:
Image

Driver side front:
Image

Passenger side:
Image

And that is about 95% complete now, just a few small areas to bog and sand.

So, I turned my attention to making some new seat mounts for the sports seats. Now I did have a set of alloy ones made up, but they werent exactly what I wanted. I needed to mount the amps for the doof doof under the seats because that was the only room left available on the car, and the alloy ones wouldnt let that happen without some major rework - which meant alloy welding!!

So, I bit the bullet and decided to start again from first principles. Taking into account everything that was needed of the mounts, the design that came out was very very simple - and to my surprise, as light as the alloy ones!

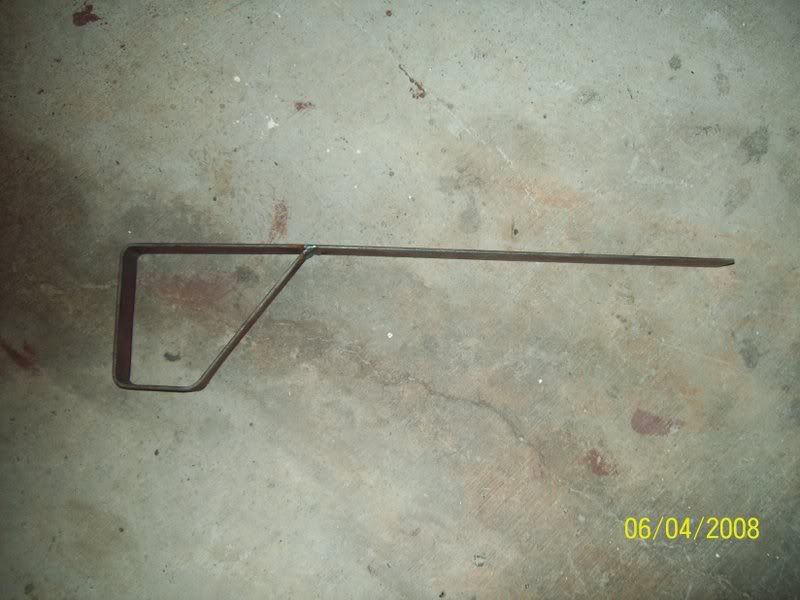
First job is to bend up two lengths of 30x3mm steel flat bar into this shape:
Image

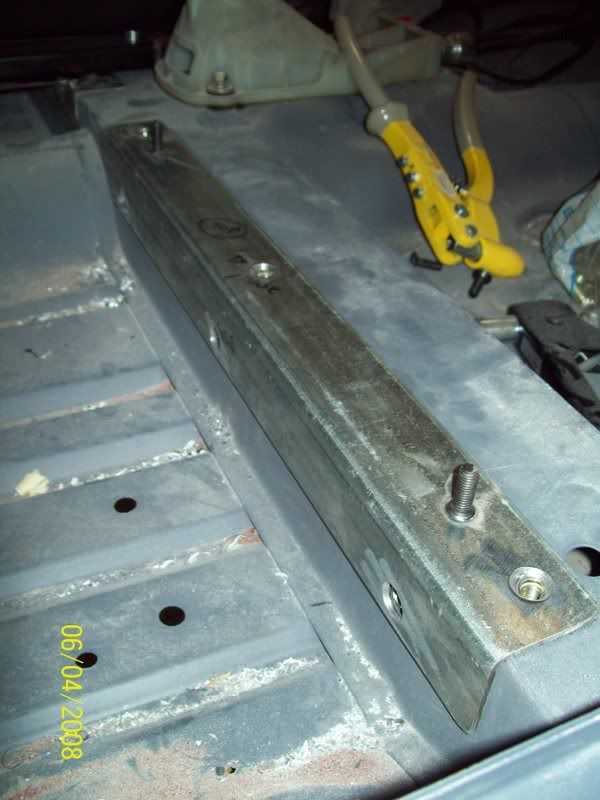
Once that was done, fabricate the front mount out of some 50x50x3mm angle - drill the mounting holes and countersink if you are using countersunk allen bolts like me. All fixings are 8mm:
Image

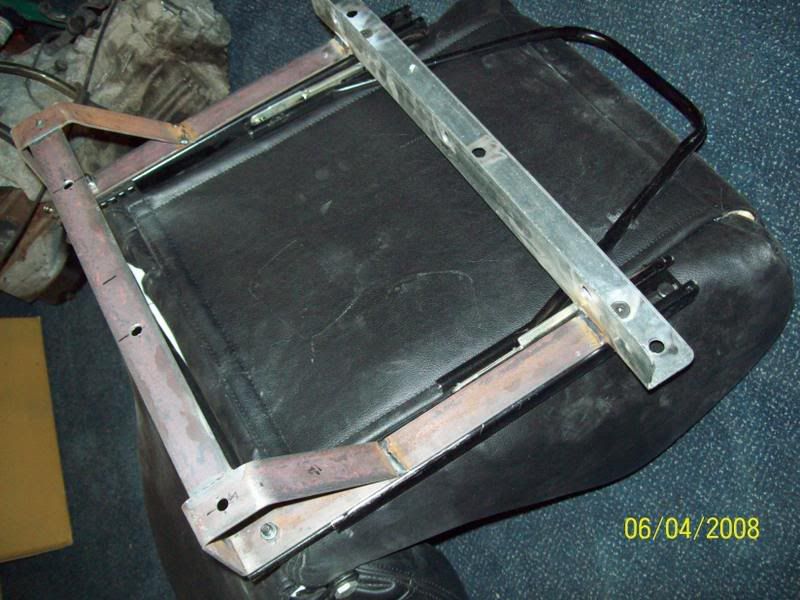
Then, weld together with another piece of flat bar across the back to act as a spreader and also to fix the whole mount through the floor with. This is what they looklike mounted to the underside of the seats:
Image

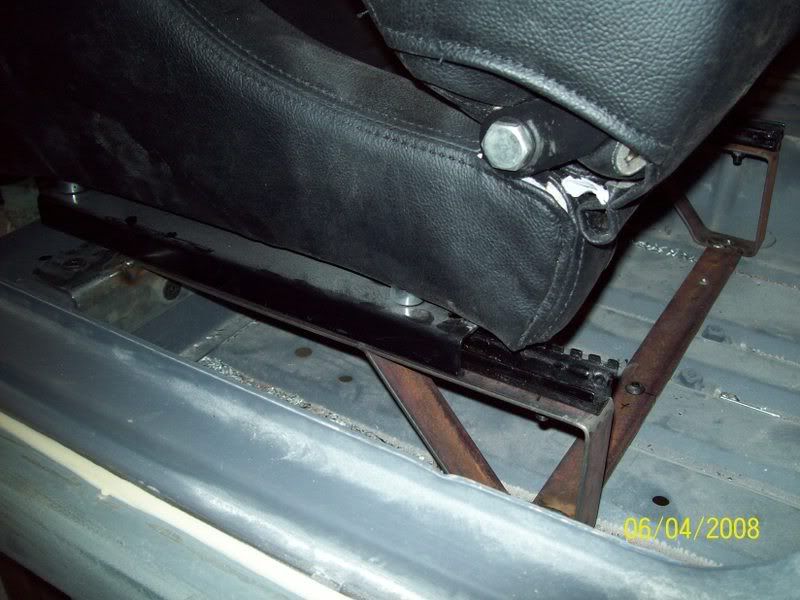
And with the seats in place in the car:
Image

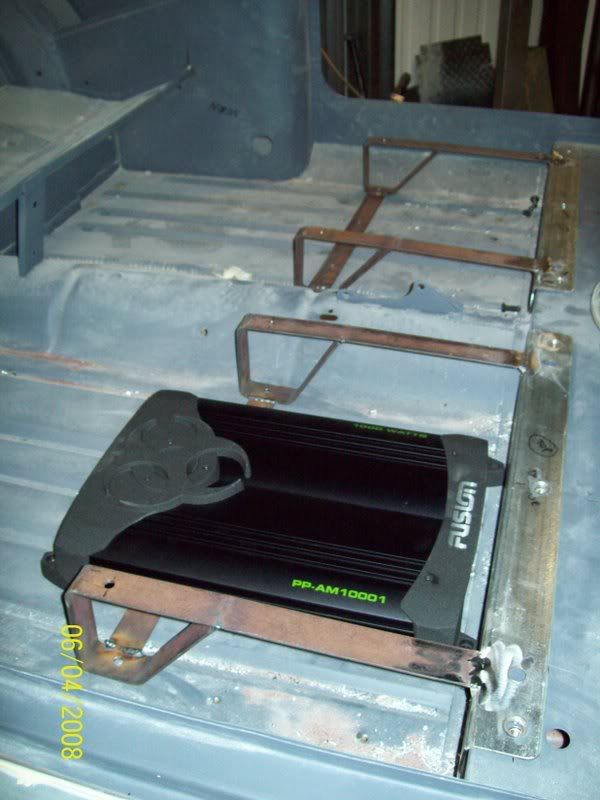
And this is what the look like by themselves, bolted in place. They leave heaps of room for the amps, with a lot of circulation space. The height is a lot better than the old alloy ones, enough height so I can even mount the amps on rubber isolators:
Image

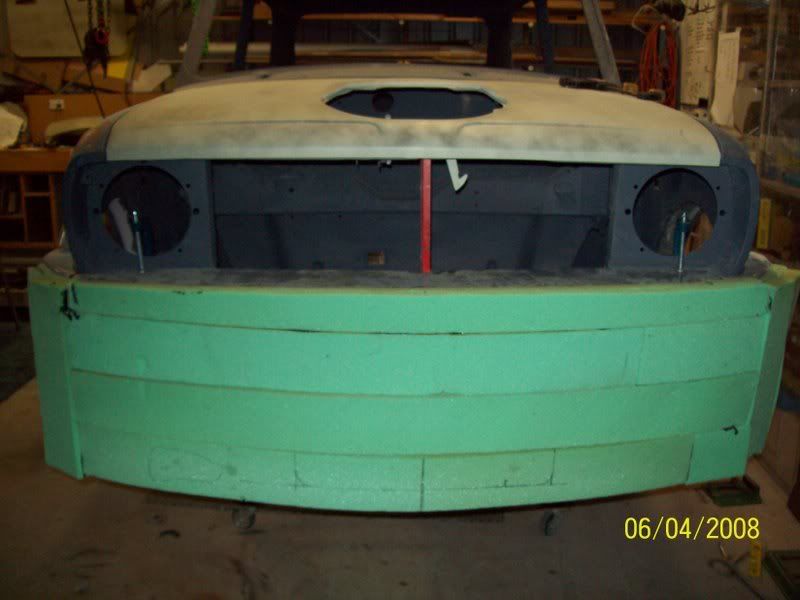
And, after that was finished, I turned my attention to the front spoiler. Two layers of foam (50mm) have now been permanently affixed to the front of the shitty Zeemax spoiler waiting to be carved into a masterpiece of contemporary aerodynamic and ruthlessly efficient aesthetic art!

Any guesses as to what it will look like in the end!:
Image

Author:  sgc [ Sun Apr 06, 2008 7:54 pm ]
Post subject: 

Dear God, El Gato is getting teeth! :shock:

Author:  Kennomini [ Sun Apr 06, 2008 8:49 pm ]
Post subject: 

I got no idea with that front spoiler but I can't wait to find out. The kit is looking good.

Author:  minimetoy [ Sun Apr 06, 2008 10:04 pm ]
Post subject: 

Is that a snow plough???? :lol:

Author:  Archangel007 [ Mon Apr 07, 2008 7:10 am ]
Post subject: 

minimetoy wrote:
Is that a snow plough???? :lol:


Reminds me of that jingle from the Simpsons - "Mr Plough" :D

Kenno - thanks, should start carving it tonight and have the major bits done by the weekend.

Simon - yes teeth, a grin, and some new eyes! :wink:

Author:  1018cc [ Mon Apr 07, 2008 10:11 am ]
Post subject: 

It is coming along nicely Tricky. I can't wait to see what ends up happening with the front bar.

It will look so good once it is done.

Author:  willy [ Mon Apr 07, 2008 12:44 pm ]
Post subject: 

Whats the head - roof clearance like with the new seat frames?

Author:  Caponix [ Mon Apr 07, 2008 12:49 pm ]
Post subject: 

nice work mate...the kit looks great.....cant wait to see the cats front 8)
no doubt you'll make something great out of it tricky! :)

Author:  Archangel007 [ Mon Apr 07, 2008 3:10 pm ]
Post subject: 

willy wrote:
Whats the head - roof clearance like with the new seat frames?


Yeah, not bad - I have quite a few inches between me and the roof, but then again, I am only 5'8"

I would say anyone over 6'2" might find their head touching!

Author:  '77 clubby van [ Mon Apr 07, 2008 4:06 pm ]
Post subject: 

I like those seat mounts, Tricky. Very neat.

I hope you tried the head room with a helmet on! :twisted:

Author:  Archangel007 [ Mon Apr 07, 2008 5:02 pm ]
Post subject: 

'77 clubby van wrote:
I hope you tried the head room with a helmet on! :twisted:


Shite mate, didnt check that - and the bro has my RF900 so I can't check!! :shock:

Fingers crossed it should all be good! 8)

Author:  MikesIntoMinisAgain [ Mon Apr 07, 2008 8:00 pm ]
Post subject: 

Better check again Tricky, I have been looking at seat heights and I am going to have to get bum as close to floor as possible, try to avoid laying back too far, it wont help when you are trying to hold the wheel straight under big bootfuls of acceleration. Shoulder leverage is very important for overall control when driving hard.

Author:  Archangel007 [ Mon Apr 07, 2008 8:05 pm ]
Post subject: 

All too true Mike, especially without power steering.

The seats are pretty low though, probably as low as they can go.

The rails work well, with heaps of fore-aft adjustment.

Page 35 of 125 All times are UTC + 10 hours
Powered by phpBB® Forum Software © phpBB Group
http://www.phpbb.com/