Ausmini
It is currently Wed May 01, 2024 6:04 am

All times are UTC + 10 hours


Post new topic Reply to topic  [ 1864 posts ]  Go to page Previous  1 ... 30, 31, 32, 33, 34, 35, 36 ... 125  Next
Author Message
 Post subject:
PostPosted: Thu Mar 06, 2008 12:55 pm 
Offline
998cc
998cc
User avatar

Joined: Sun Jun 11, 2006 2:15 pm
Posts: 604
Location: caboolture qld
sound like a good plan tricky and it also sound like you have alot of work ahead of you.

cheers
dan

_________________
Cheers Dan

FIRST COMES THE MONEY, THEN COMES THE POWER, THEN COMES THE WOMEN.!!


Top
 Profile  
 
 Post subject:
PostPosted: Thu Mar 06, 2008 7:40 pm 
Offline
1275cc
1275cc
User avatar

Joined: Thu May 24, 2007 7:19 pm
Posts: 5370
Location: Yandina,Sunshine Coast,QLD
4 weeks :? why will it take that long :lol:
are you going to show us your modded front spoiler yet? :P

_________________
Respect mine and I'll respect yours.


Top
 Profile  
 
 Post subject:
PostPosted: Thu Mar 06, 2008 7:45 pm 
Offline
1275cc
1275cc
User avatar

Joined: Fri Jun 17, 2005 10:31 am
Posts: 3183
Location: Burpengary, Queensland - Home of Tricky Performance Engineering
A) Becuase I am slack

B) No! (not yet anyway!)

_________________
"Not Speeding Officer..........Qualifying"


Top
 Profile  
 
 Post subject:
PostPosted: Sun Mar 16, 2008 8:02 pm 
Offline
1275cc
1275cc
User avatar

Joined: Fri Jun 17, 2005 10:31 am
Posts: 3183
Location: Burpengary, Queensland - Home of Tricky Performance Engineering
Alright, time for a quick update.................

As I told you all last week, now that the trailer is finished, I have to get back into finishing The Cat in a big way, with much urgency!

So, the next step for the car along the evolutionary path is to finish the bodykit so it could go off to be painted. So, this was the job for this weekend. I had a chat to my mate Will who lives over the road about attaching fibreglass bits to steel bodywork (Will works in a fibregalss panel shop and builds cabs for Mack trucks, he knows his stuff), and he recommended using Sikaflex instead of bonding with epoxy and microballoons as I was going to do, the Sikaflex will bond with about the same strength, but go off slower and allow some movement for aligning etc.

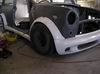
So, first job was to test fit the fibreglass Zeemax kit and see where it had to be trimmed, corrected etc. (BTW - if anyone wants an honest opinion of Zeemax, their products and customer service, just PM me!! :x ). The side skirts fitted with only a minimum amount of trimming, and the front flares were quite good. The rear bumper was in need of some corrective action however and the rear flares were absolutely woeful - so woeful in fact that I had an extra set of front ones made up because they actually fit the rear better than the original rears do!!).

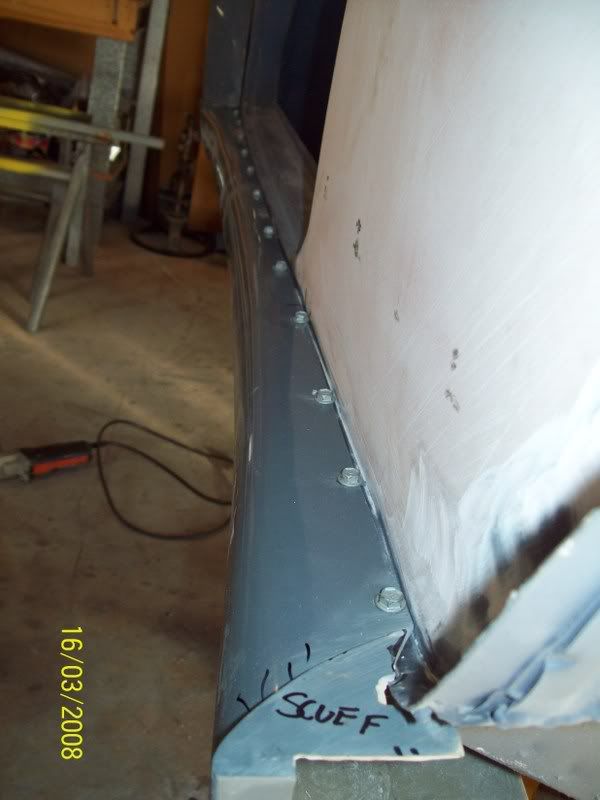
I started with the side skirts, and used some self drilling, self tapping hex drive screws to attach it to the body. Once its all attached, the screws will be removed and the holes filled. Here is the test fit:

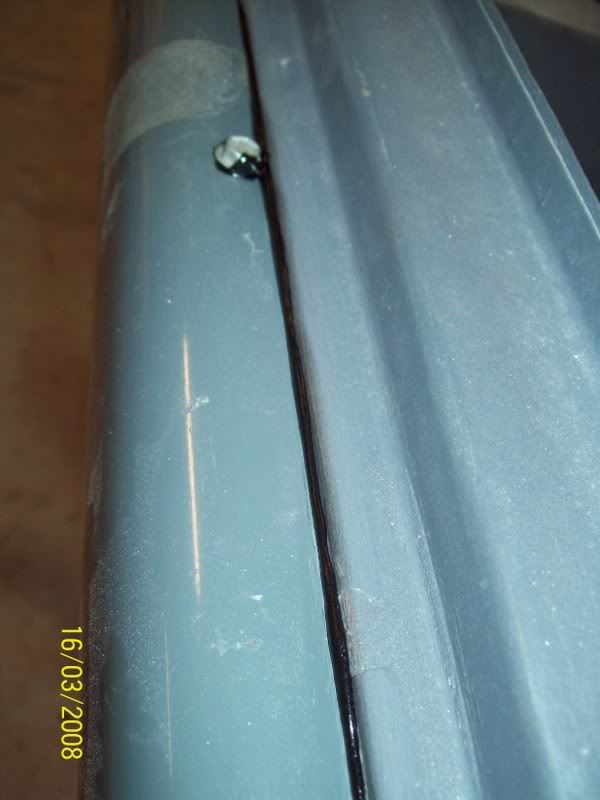
Screwed from the top through the sill flange:
Image

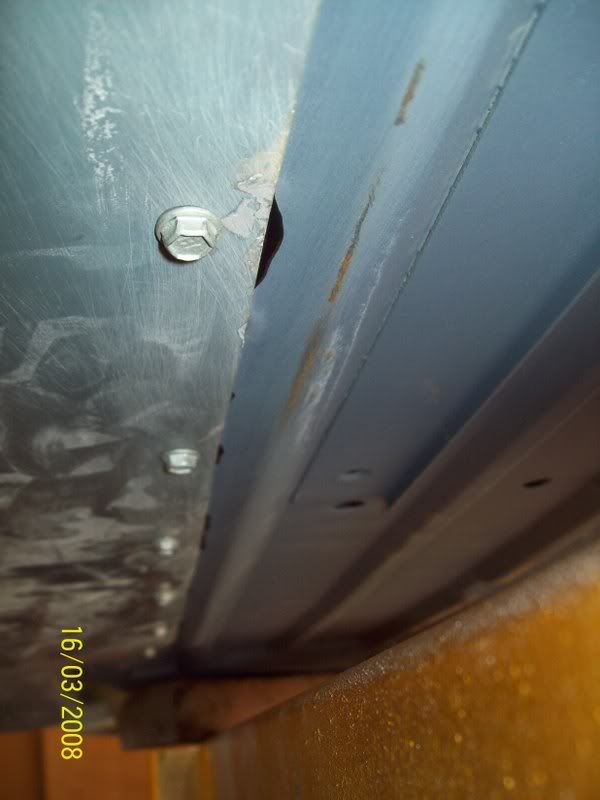
Screwed from underneath through the floor:
Image

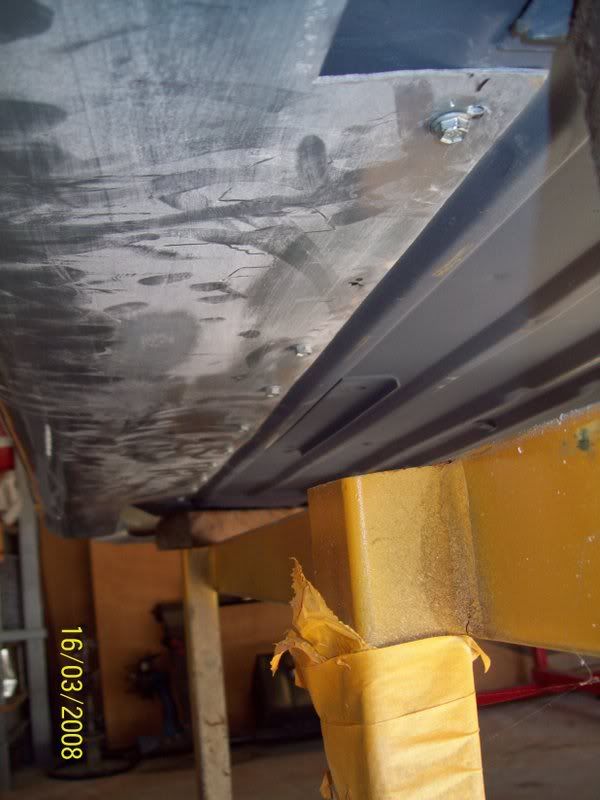
Once screwed, it was really rock solid, so this should give a good indication of how it should be when fully bonded to the car.

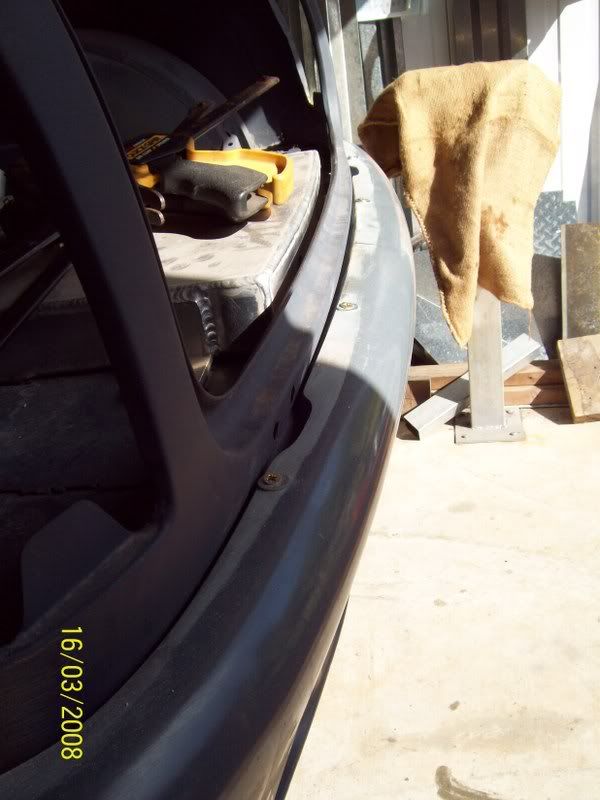
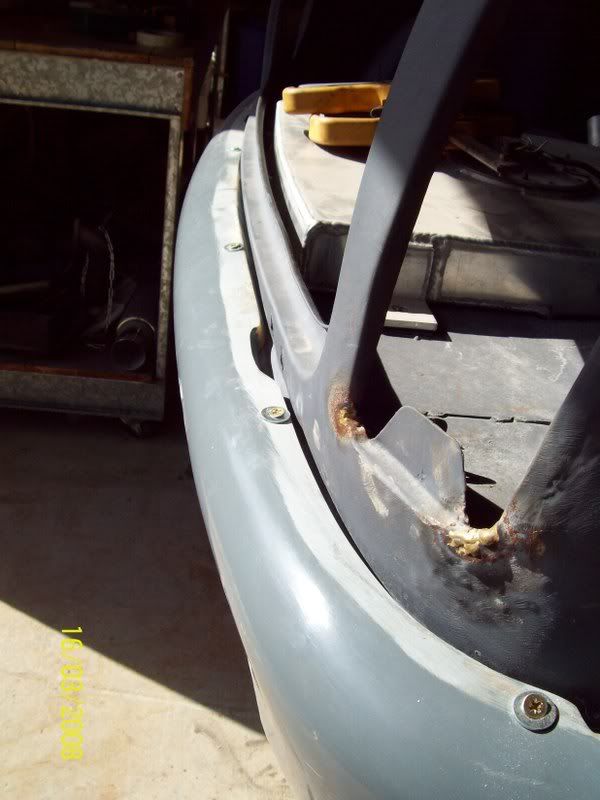
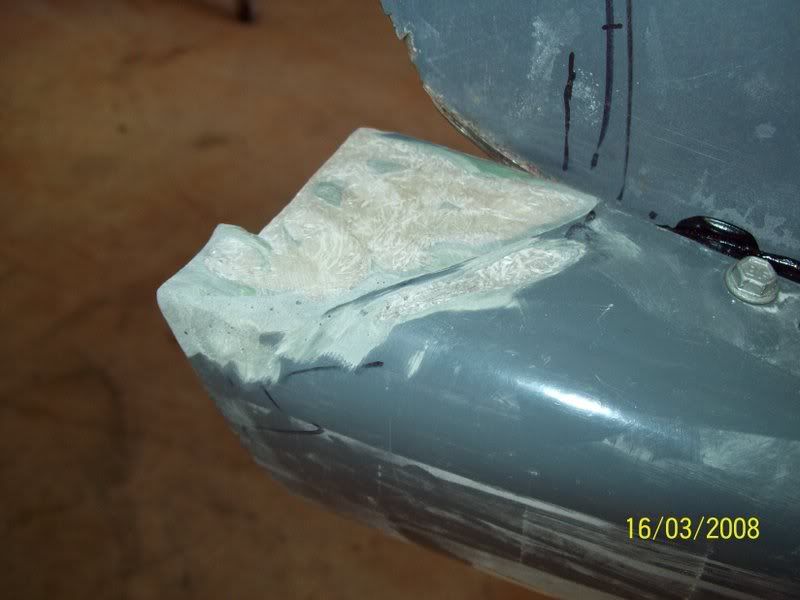
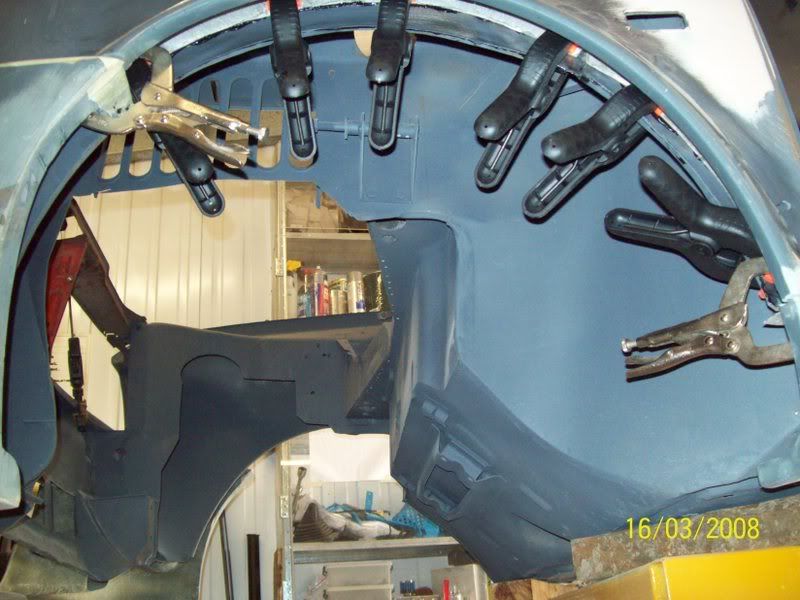
The next test fit was the rear bumper. Long screws were needed for this, as the bumper itself sits up a lot higher than the sill flange it will be screwed to. I put some 6mm washers under the heads to stop any chance of pull-through in case I inadvertantly overtightened one. Notice the gaps:
Image

Image

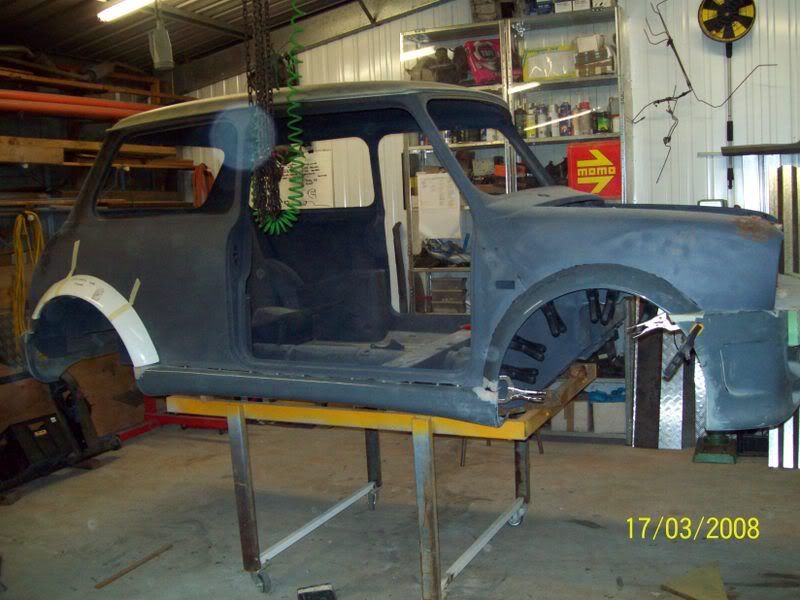
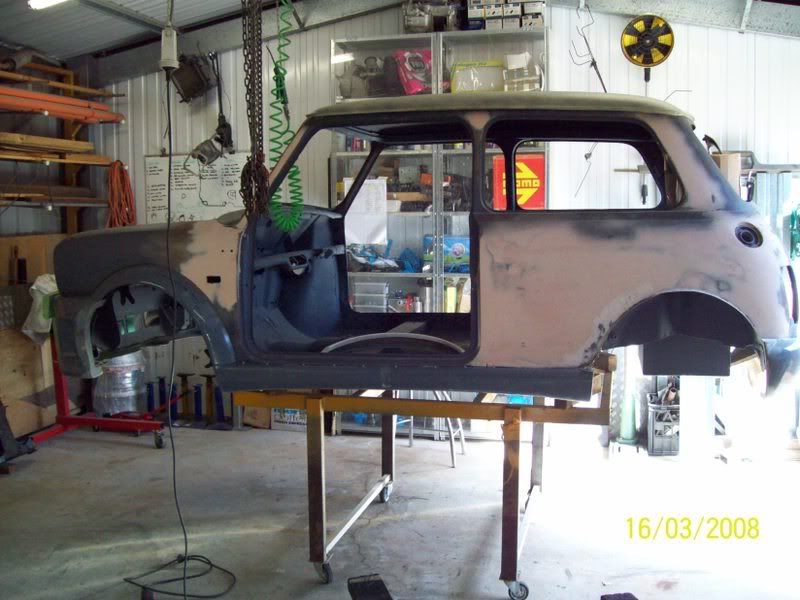
Time to stand back and have a look at the curves and lines as a whole. Hard to get the overall picture without the rear flares, but from the rear wheel well forward it looks ok:
Image

OK - time to bond. I decided to start with the side skirts and work my way up. Before I put the side skirts on for the last time, I ground back where the flares would meet the side skirts by at least one millimetre in depth. This will allow me to lay a couple of layers of chopped strand mat (CSM) or woven cloth over the junction so all the fibreglass panels are joined together. Likewise, where the Sikaflex is located, I scuffed up the fibreglass part and the body with 40 grit paper to allow for a good bond. All bog and filler were taken back from these areas so that the Sikaflex will be bonding onto bare metal.

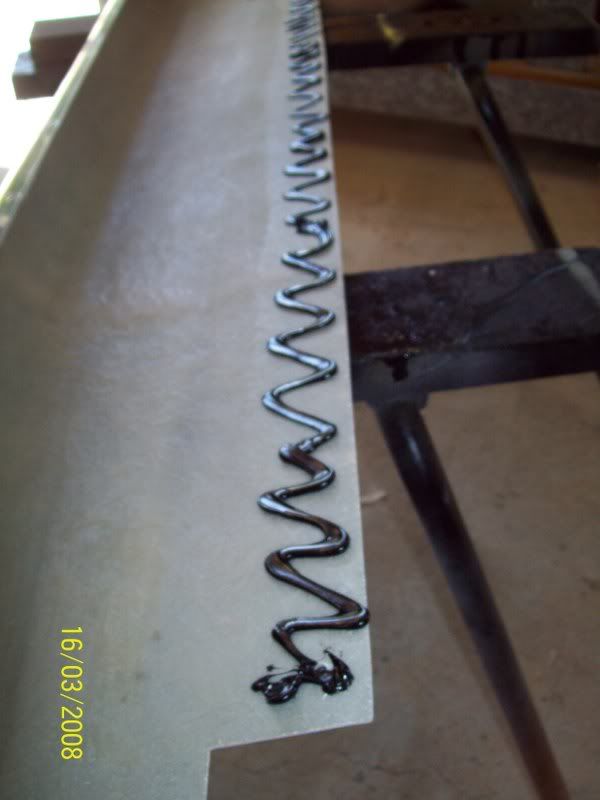
The side skirts will dictate (along with the front spoiler and rear bumper) exactly where the flares will sit in relation to the car. Time to Sikaflex (how come everytime I do something it involves a product that is a)sticky and b)black!!). Use heaps, its better to be looking at it than looking for it and you want as much adhesive area as possible!

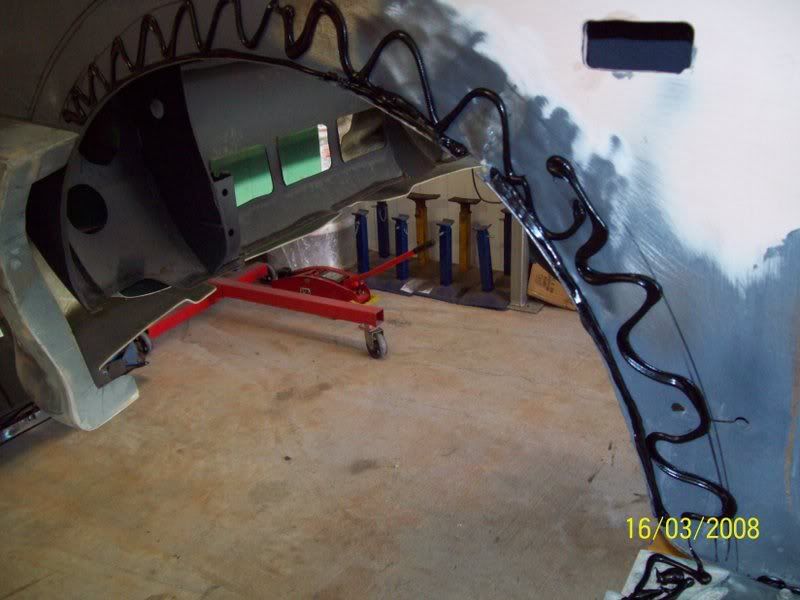
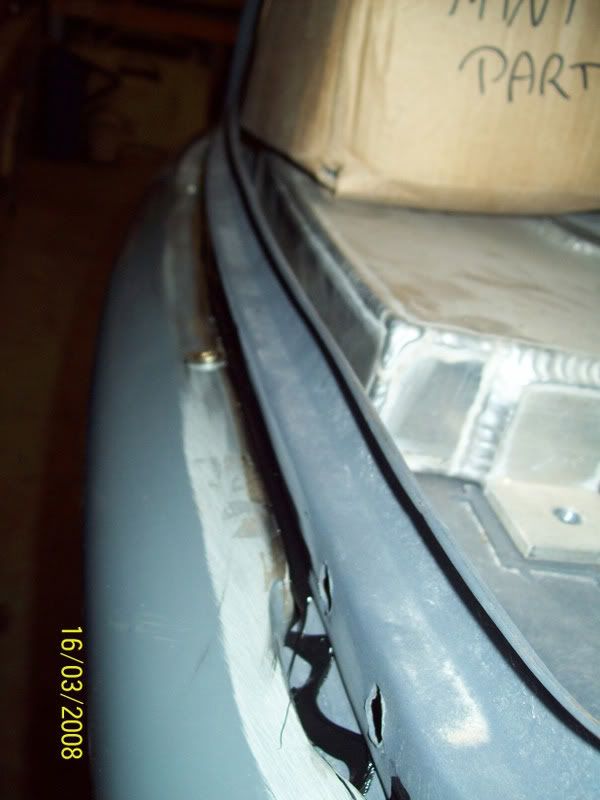
Along the sill flange:
Image

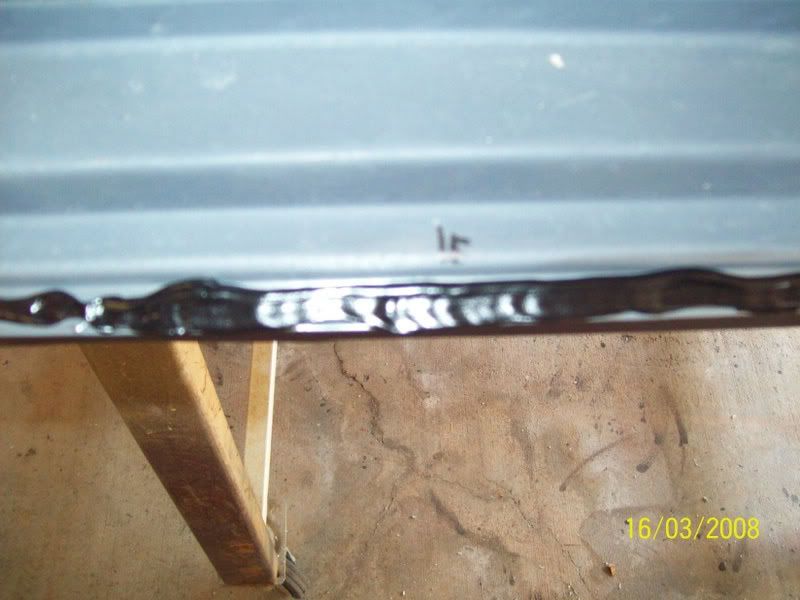
And on the side skirt where it attaches underneath the car:
Image

This is the front of the side skirt ground back with the wire wheel so the layers of CSM or cloth (or both) will be able to a) bond the the fibrglass part itself and not the undercoat or gelcoat, and b) so the joining strips wont bulge out higher than the surrounding parts.
Image

The side skirt was fitted up, and then the screws put back in to hold it all in place. Like I said earlier, they will be removed and the holes filled once it has all cured. This is the topside, notice the Sikaflex is bulging out, a good sign:
Image

And the underside (once again, it is being squeezed out - that's what you want):
Image

Ok,now for the front flare. With the positioning just right, I ground back the end of the flare just like the ends of the side skirt (only the side skirt end, as the front flare will not be bonded to the front spoiler, nor wiill the front spoiler be permanently be bonded to the car. It has to be removable to be able to get to the FMIC, indicators, fog lights and FMIC water spray jets and lines).

Here is the end ground back:
Image

And Sikaflex applied to the car:
Image

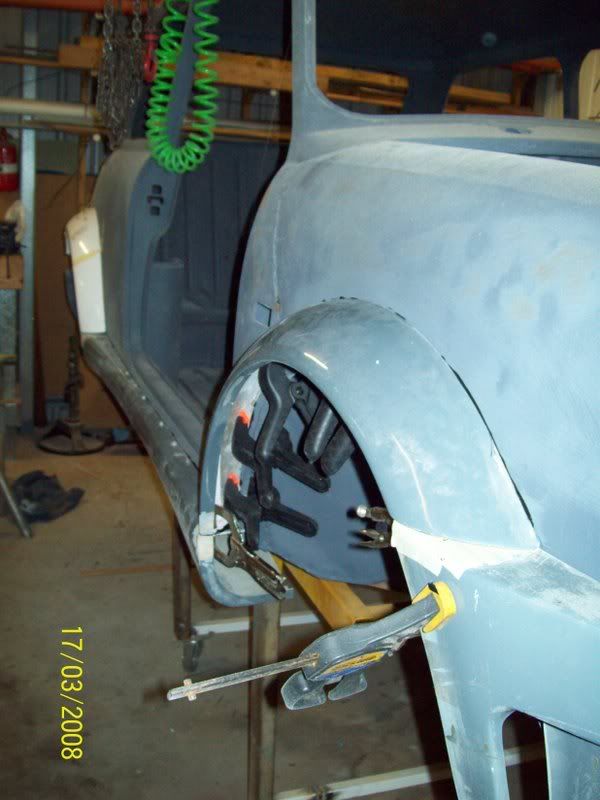
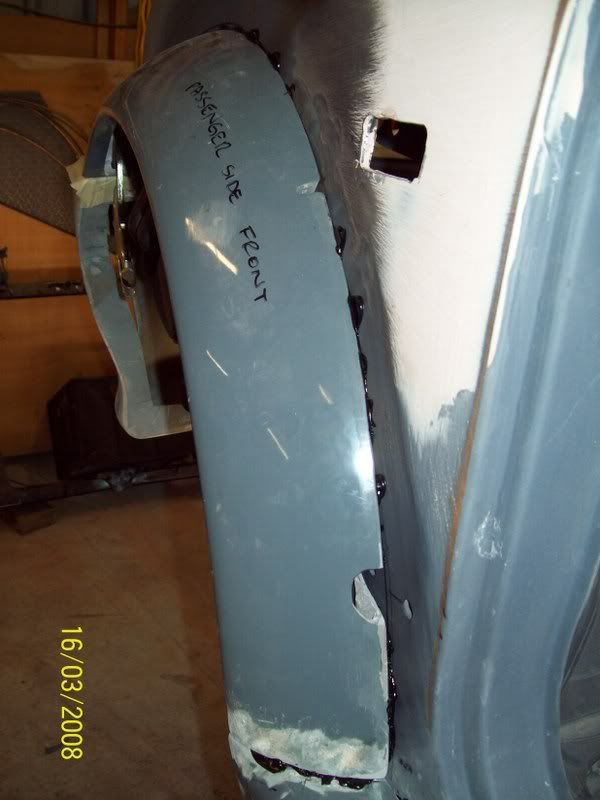
The flare was offered up and firstly clamped against the side skirt and the front spoiler, then clamped to the car. This will allow the lines to flow all together:
Image

Once again, use more than you think you need. You can trim it off later. Notice the masking tape at the front spoiler/flare junction. This is just a precaution and will allow easy seperation just in case some overspill gets in there. Also notice that I have cut out an aperture in the flare for the lower door hinge before it was fitted, and taht all the bog has been ground away from the bonding area:
Image

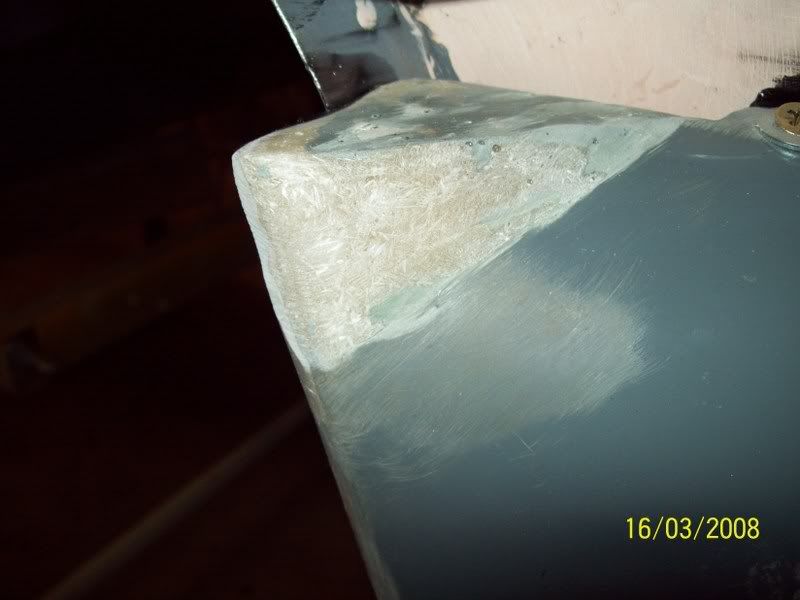
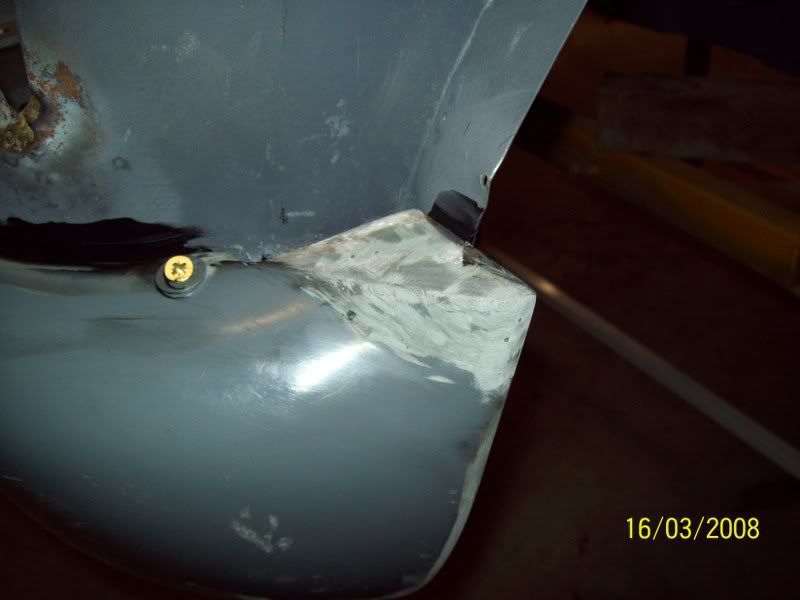
Okay, time to turn our attention to the rear bumper. Once again the bonding area was scuffed up with 40 grit on both surfaces, and then the area was blown clean with the compressed air. The ends where the fibreglass bodykit joined each other were ground back once again to allow for fibreglass overlay to seal the joint. The Sikaflex was applied to the mating surface:
Image

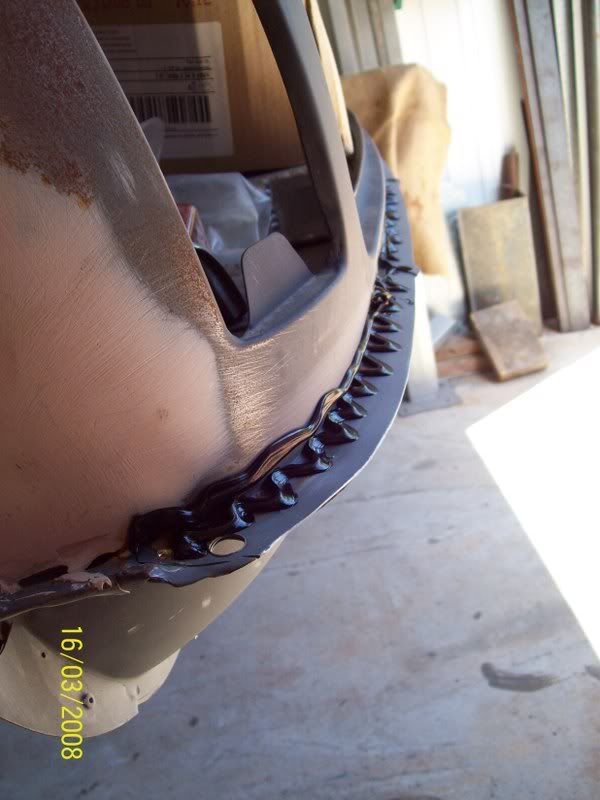
The sucker was then offered up to the body, and screwed down. Once again, the screws will be removed once its all cured, and the holes filled:
Image

Ends ground back to allow for the joining glass:
Image

Image

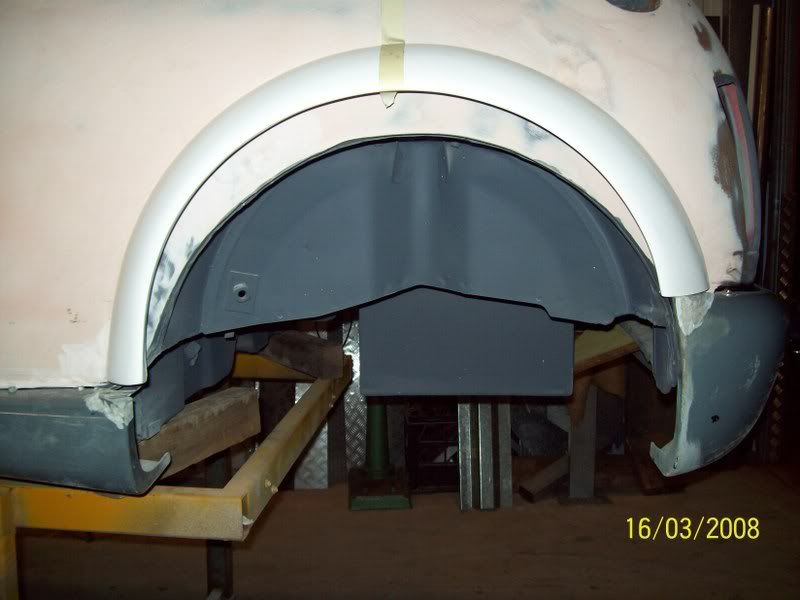
To show you how far out the original Zeemax rear flare was, here it is dummy-fit up to the car. Notice the two-plus inches of guard protruding out the bottom, and the shitty fit:
Image

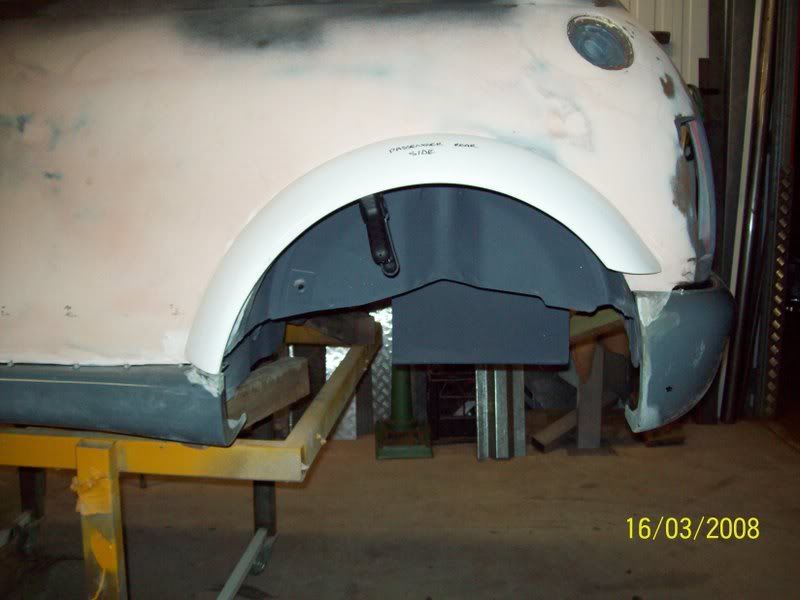
Now here is a front flare dummy fit into the same position - a lot better alternative with a bit of a filler piece:
Image

That's all for now - but tomorrow night we will be doing the other side, and then Wednesday we might just have enough time to apply the joining cloth. Wont get a chance to touch it over Easter, so need to get things happening this week!

Cheer,
Tricky

_________________
"Not Speeding Officer..........Qualifying"


Top
 Profile  
 
 Post subject:
PostPosted: Sun Mar 16, 2008 8:10 pm 
Offline
Give Ash some flowers Nick .
User avatar

Joined: Wed Aug 09, 2006 1:22 pm
Posts: 10149
Location: Toowoomba Region, QLD
Starting to come together!

You should be able to sand sikaflex smooth and paint over it, if need be.

I love this thread so much! Don't let spraycanmansam take over too much of your spare time! :P

Keep the updates coming Tricky :)

_________________
"In two years time your car will be like a lady's clothes, out of date, my car will still be in fashion when I am dead" - Sir Alec speaking to Pininfarina


Top
 Profile  
 
 Post subject:
PostPosted: Sun Mar 16, 2008 8:55 pm 
Offline
Forum Graffiti
User avatar

Joined: Sat Jun 16, 2007 10:31 pm
Posts: 1640
Looks great mate! Shame Zeemax's fit is a little shoddy, looks like you've got it sorted though 8)


Top
 Profile  
 
 Post subject:
PostPosted: Sun Mar 16, 2008 9:33 pm 
Offline
1275cc
1275cc
User avatar

Joined: Thu May 24, 2007 7:19 pm
Posts: 5370
Location: Yandina,Sunshine Coast,QLD
Leave the screws in AKA "Torana 5000" :lol:
Looking good but if you think you had it rough with Zeemax just count your self lucky you didnt go with Autofashion like me :oops: :x :evil:
(and mods I don't think you need to edit this as Autofashion don't exist any more)
Hay Tricky I think you accidentally left out some pics as you didnt show us the front spoiler :P :wink:

_________________
Respect mine and I'll respect yours.


Top
 Profile  
 
 Post subject:
PostPosted: Sun Mar 16, 2008 10:06 pm 
Offline
1275cc
1275cc
User avatar

Joined: Fri Jun 17, 2005 10:31 am
Posts: 3183
Location: Burpengary, Queensland - Home of Tricky Performance Engineering
Ha ha Ken, yeah, would be something different eh?

But if the screws in the side skirts stay in, the doors wont close I think!!

Yeah Ken, I think both Autofashion and Zeemax are both shite (the views expressed here by the author are his views alone, and not necessarily the views expressed or endorsed by Ausmini.com, its owner, mods or members). I will think twice before buying another bodykit, or better yet, make my own!

The front spoiler will be done in due course - be patient! I probably wont reveal it until its completely finished, a mould made, and a new moulding taken off that. I think it will be so different to the original, that I wont have any copyright issues, so may be able to rpoduce and market my own! :shock:

_________________
"Not Speeding Officer..........Qualifying"


Top
 Profile  
 
 Post subject:
PostPosted: Mon Mar 17, 2008 9:11 pm 
Offline
1275cc
1275cc
User avatar

Joined: Fri Jun 17, 2005 10:31 am
Posts: 3183
Location: Burpengary, Queensland - Home of Tricky Performance Engineering
Okay, tonight we bonded on the drivers side, side skirt and front flare.

Methodology same as before, so ne need to go through it again..................

Image

Image

We're getting there!!!

Cheers,
Tricky

_________________
"Not Speeding Officer..........Qualifying"


Top
 Profile  
 
 Post subject:
PostPosted: Mon Mar 17, 2008 9:15 pm 
Offline
998cc
998cc
User avatar

Joined: Thu Sep 07, 2006 8:37 pm
Posts: 501
Location: Nthside Brisbane
good work tricky, coming along nicely!

what ever happened with the panel beater? get any compensation?

_________________
Image
1968 Morris Mini Deluxe......sold :(
1992 Toyota Starlet GT EP82


Top
 Profile  
 
 Post subject:
PostPosted: Mon Mar 17, 2008 9:16 pm 
Offline
Forum Graffiti
User avatar

Joined: Sat Jun 16, 2007 10:31 pm
Posts: 1640
You got more work done than I did today.. it was pouring down and I don't have a shed ( yet ) not good spraying weather either :evil:


Top
 Profile  
 
 Post subject:
PostPosted: Mon Mar 17, 2008 9:46 pm 
Offline
1275cc
1275cc
User avatar

Joined: Fri Jun 17, 2005 10:31 am
Posts: 3183
Location: Burpengary, Queensland - Home of Tricky Performance Engineering
Hey Rude,

How ya doin', long time no hear!

He is still on board and will be doing the bodywork and spray painting. Its easier than trying to get my money back!

Sam,

Yes man, you need a shed!

_________________
"Not Speeding Officer..........Qualifying"


Top
 Profile  
 
 Post subject: bodywork
PostPosted: Thu Mar 20, 2008 6:57 am 
Offline
998cc
998cc
User avatar

Joined: Mon Jan 16, 2006 1:15 pm
Posts: 678
Location: Melbourne
Looking good Tricky!

That is gonna be one tough looking little motor.

Madmorrie


Top
 Profile  
 
 Post subject:
PostPosted: Thu Mar 20, 2008 12:13 pm 
Offline
I'm Ernie , Where's Bert ?
User avatar

Joined: Wed Jul 13, 2005 7:45 pm
Posts: 1708
lookin good mate
making some progress.
so you reckon you'll have this beast ready for mini muster?? :D

_________________
00' Forester GT
Image


Top
 Profile  
 
 Post subject:
PostPosted: Fri Mar 21, 2008 11:02 am 
Offline
1098cc
1098cc
User avatar

Joined: Thu Sep 30, 2004 3:12 pm
Posts: 1461
Location: Brisbane
Tricky i had the same sort of fitment issues with my zeemax kit. Instead of making new front and rear flairs i cut the guards to suit. So now the front guards are a little more open and the rears have been tubbeb. I will still need to modify either the front bar of the front flairs because of the extended front

_________________
If you want more inches, stroke it
Life's a garden.... Dig It!
http://www.ausmini.com/forums/viewtopic.php?t=20746


Top
 Profile  
 
Display posts from previous:  Sort by  
Post new topic Reply to topic  [ 1864 posts ]  Go to page Previous  1 ... 30, 31, 32, 33, 34, 35, 36 ... 125  Next

All times are UTC + 10 hours


Who is online

Users browsing this forum: No registered users and 6 guests


You cannot post new topics in this forum
You cannot reply to topics in this forum
You cannot edit your posts in this forum
You cannot delete your posts in this forum
You cannot post attachments in this forum

Jump to:  

© 2016 Ausmini. All garage work involves equal measures of enthusiasm, ingenuity and a fair degree of irresponsibility.